Purchasing Requests
The Purchase option allows you to track items you may wish to purchase, instead of borrowing via interlibrary loan. This feature allows you to input relevant data about the item you're purchasing, and tracks usage in OCLC Usage Statistics.
Move requests to Purchasing Requests:
- Patron initiated requests can appear in the Borrowing Requests > New for Review queue or, if the request matched an automation from the Automated Request Manager, the Purchasing Requests > Review for Purchase queue.
- Click New for Review.
- On the New for Review screen, click the request ID or Title to display the request.
- Optional. Click the Purchase tab to review prices and links to vendor sites such as Get It Now if you subscribe to the service.
- Click the Change Fulfillment Type button at the top of the request and select Purchase Request.
- Complete any desired fields.
- Click Save.
- A confirmation message appears and the request appears under Purchasing Requests > On Order.
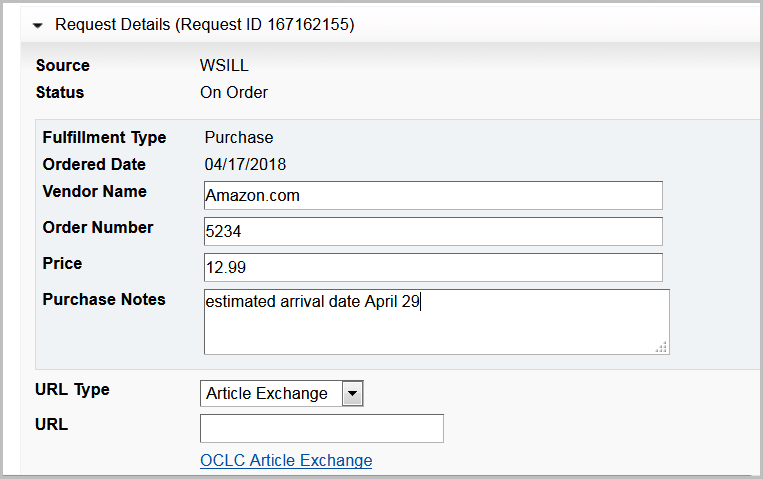
The Purchase Request information displays at the top of the request details.
Note: If your institution uses WorldShare Acquisitions, you can also submit purchasing requests to the Purchasing Requests > On Order in WorldShare Acquisitions directly. Please see WorldShare Acquisitions Integration for more information.
Complete Purchasing Requests
- When the item is received, manually Mark the request as received in the Tipasa interface.
- Loan requests If you have the Loan available for pickup notification configured, the user will be notified that the item is ready for pickup. Please see Notification Types for more information.
- My Account will update the request to Received by library.
- The request will close.
- Copy/Electronic requests - Add a URL Type and URL to the request prior to marking the item as received.
- My Account will update to Available to view and will link to the requested item.
- The request will close.
- Loan requests If you have the Loan available for pickup notification configured, the user will be notified that the item is ready for pickup. Please see Notification Types for more information.
- If the purchase request is not received:
- The Fulfillment Type of the request can be changed to an ILL request and submitted as a borrowing request.
- Cancel the request as is appropriate.
Note: Requests that are On Order will be aged to Received? status after 21 system days. Please see Request Aging for more information.
Purchase Request status
The following table shows how the request status appears to staff in the Tipasa interface and to the patron in My Account.
| Staff view in Tipasa | Patron view in My Account | Description |
|---|---|---|
| Review for Purchase | Submitted | The request is in the Review for Purchase queue awaiting staff member evaluation. |
| On Order | Item requested for purchase | The requested item is on Order. |
| Received/Closed | Received by library | The request is updated to Received. Any configured notifications are sent to the patron. |
| Received/Closed | Available to view | A link to the requested item has been added to the Item URL field in Tipasa and the request is updated to Received. |
Staff Notes
Usage Reports
The below WorldShare Interlibrary Loan reports include all types of purchase requests, including requests sent to WorldShare Acquisitions:
- Borrower Activity Overview Report
- WorldShare ILL Purchase Request Report
Please see WorldShare Interlibrary Loan reports for more information.