Loan an item
See also:
- Loan an item (using Windows Login)
- Query results for details regarding the constant request information, standard buttons, and request history.
Loan to your own patron or another library
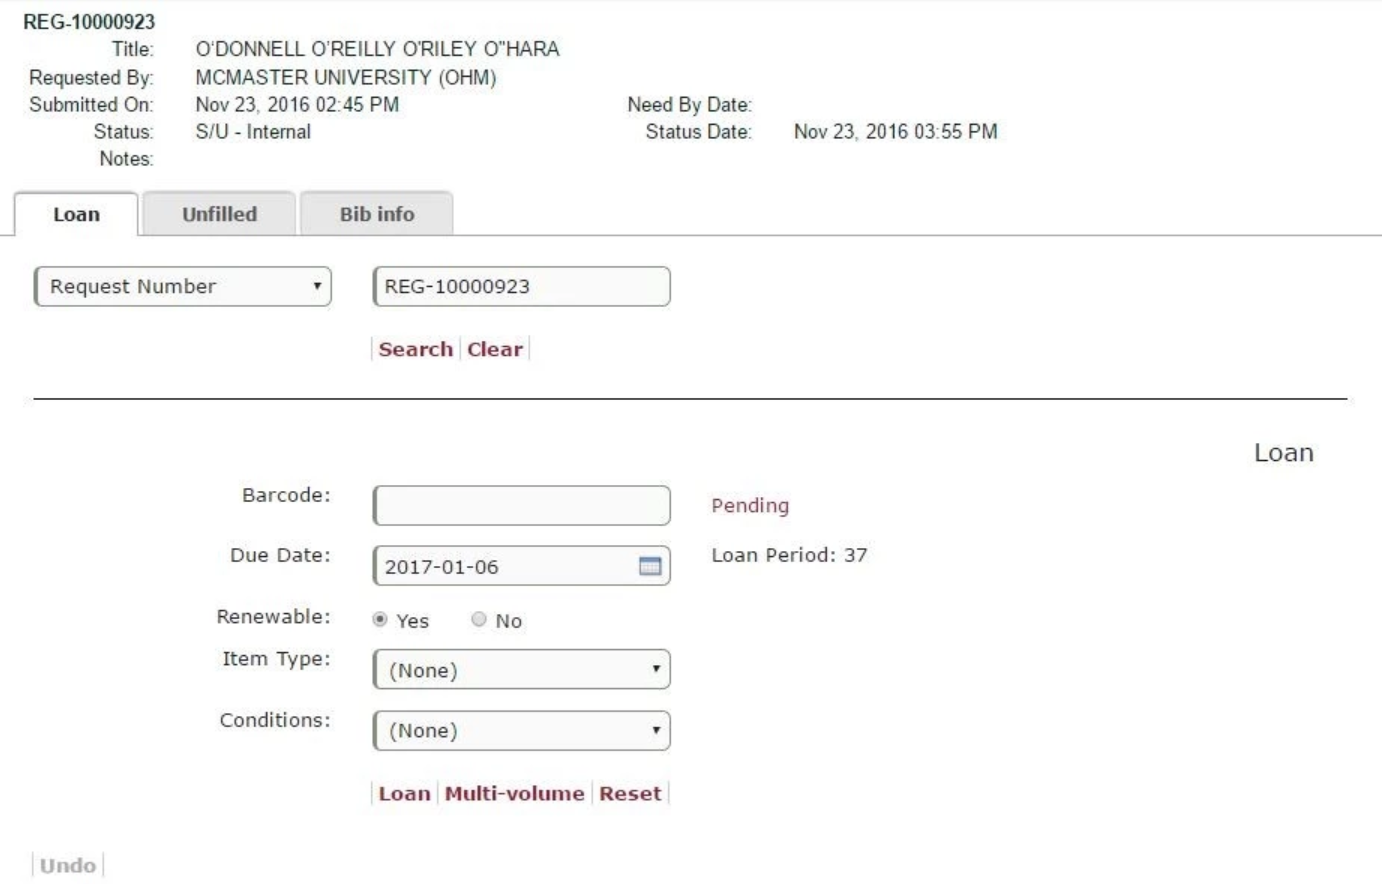
To update a request as a loan (either to your own patron or to another library):
- Retrieve the request to be updated. The Loan tab displays.

- Enter/update all the fields as described below and click Loan or Enter.
- The request is updated in Relais as a Loan (LON) and a series of updates is done.
- In the default RequestFlow, the request is moved to the delivery process (Local Print) for cover pages to print.
- Depending on your configuration, a pickup notice may be sent if the Delivery Method equals Pickup and if there is an email address for the requested.
- An audit record is added to the request.
- For an ISO transaction:
- If the request is from another library, a Shipped message is generated.
- If the request is from your patron, a Received message is generated.
- A loan tracking record is created in Relais.
- If the request is from another library this record tracks the loan to the library.
- If the request is from a patron, this record tracks the loan to the patron.
- In the default RequestFlow, the request is moved to the delivery process (Local Print) for cover pages to print.
If you are updating a single request, the input box for the Exact Query is highlighted so that the next request can be entered, e.g., via a barcode reader, making it easy to process a batch of requests.
Multiple items
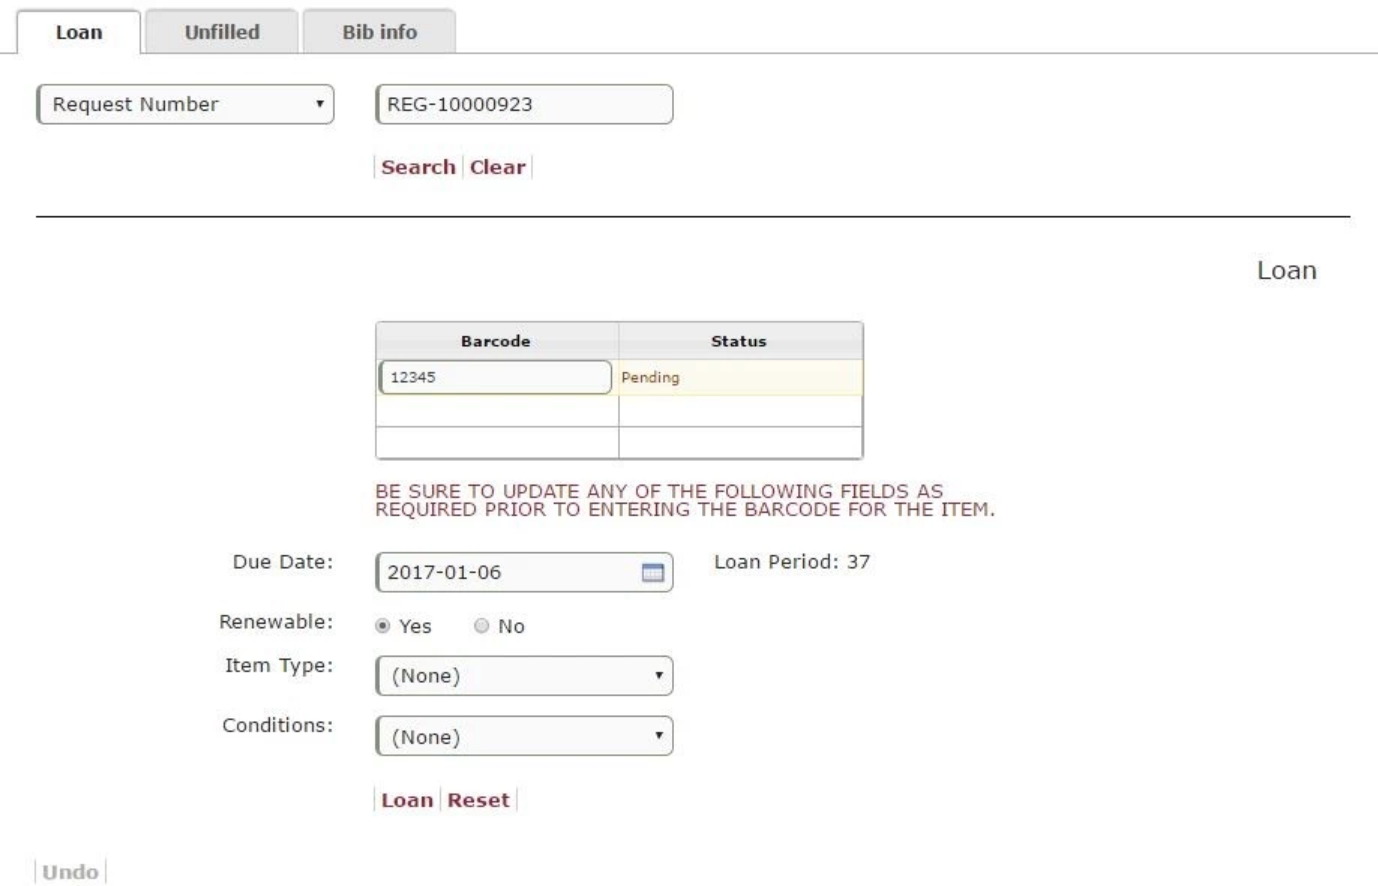
If there are multiple items to be loaned for one request, click Multi-volume before or after the first item is loaned.
Wand in or enter each barcode separately, click Enter to update the item as a Loan (LON), and move to the next row in the grid to enter the next barcode.

Caution: If an item has a specific due date or conditions that are different from the other items, be sure to modify those values prior to entering the barcode.
- A separate loan tracking record is created for each physical item loaned.
- A single cover page is printed for the request.
Autofill the barcode
If you are using NCIP or eSIP and you use the Relais request number as the barcode, then you can configure the autofill option.
When this option is turned on, the request displaying the barcode field is populated automatically with the request number.
Note: If multiple items have been shipped for a request and the auto-fill option does not work, you will need to enter each barcode for each item.
Auto removal of diacritics
If you are using NCIP or eSIP and your NCIP/eSIP server cannot create a temporary bib record because the title or author in the AcceptItem message includes diacritics, you can turn on the auto removal option to strip the diacritics. When this option is turned, Relais removes diacritics prior to generating the AcceptItem message.
For example:
| Original title/author | After diacritics removed |
|---|---|
| L'Étoile du Sud | L'Etoile du Sud |
| Jean François Paschal Grousset | Jean Francois Paschal Grousset |
| Örtlich betäubt | Ortlich betaubt |
| Günter Wilhelm Grass | Gunter Wilhelm Grass |
| Núria Añó | Nuria Ano |
| Núvols baixos (Low Clouds) | Nuvols baixos (Low Clouds) |
Note: Diacritics are removed only from UTF-8 strings containing Latin alphabets. UTF-8 strings containing non-Latin alphabets, such as Chinese or Arabic, are not altered.
Undo function
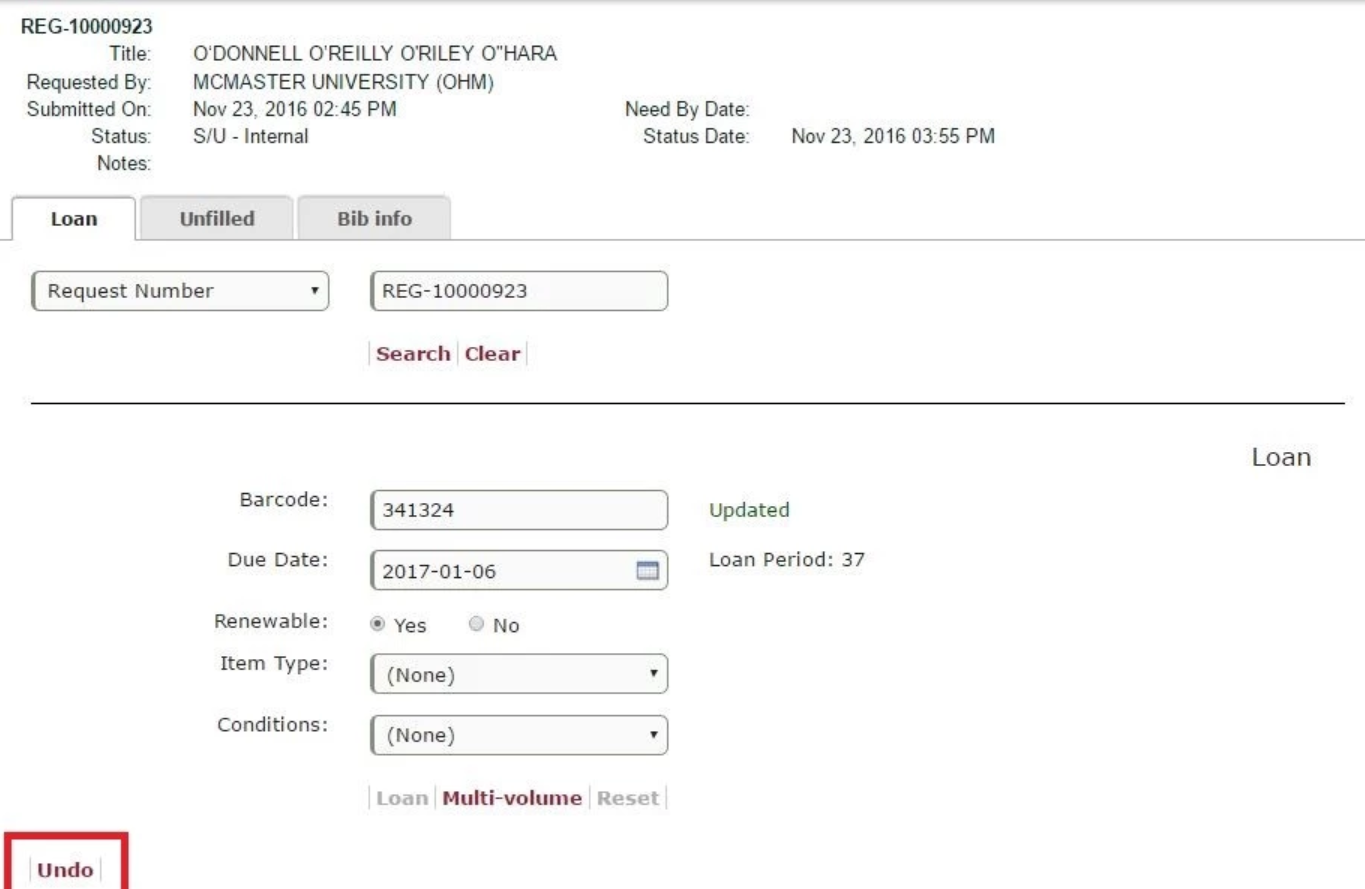
It is possible to undo the update and enter the correct information if you have updated a request in error.
- Click Undo

- When the confirmation message displays, click Yes.
- This reverses the update in Relais allowing you to enter a different barcode, open a new request, etc.
If using NCIP or eSIP and the loan is:
- to another library, then
- A CheckinItem message is sent to check the item back in in the local library system
- to your patron, then
- A manual update to the local library system is needed to reverse the actions triggered by the AcceptItem message
For a multi-volume loan, click on each barcode separately and click Undo.
Wrong Item
The loan tracking, 'Return – Wrong Item Shipped' process is managed through the Reopen and Undo functions available from within the loan tab. These functions enable staff members to process a request that has already been processed as a loan.
The “Undo” function will:
- Check in the existing item within the staff members' ILS, if the NCIP checkIn item message is enabled.
- Remove the previously created loan tracking record from the Relais system.
- Reinsert the request being Undone into the active request workflow enabling the request to be processed once again.
Reset
If you have entered a barcode and changed other information in error, but you have not updated the loan yet, you can click Reset to display the request as it was when opened initially.
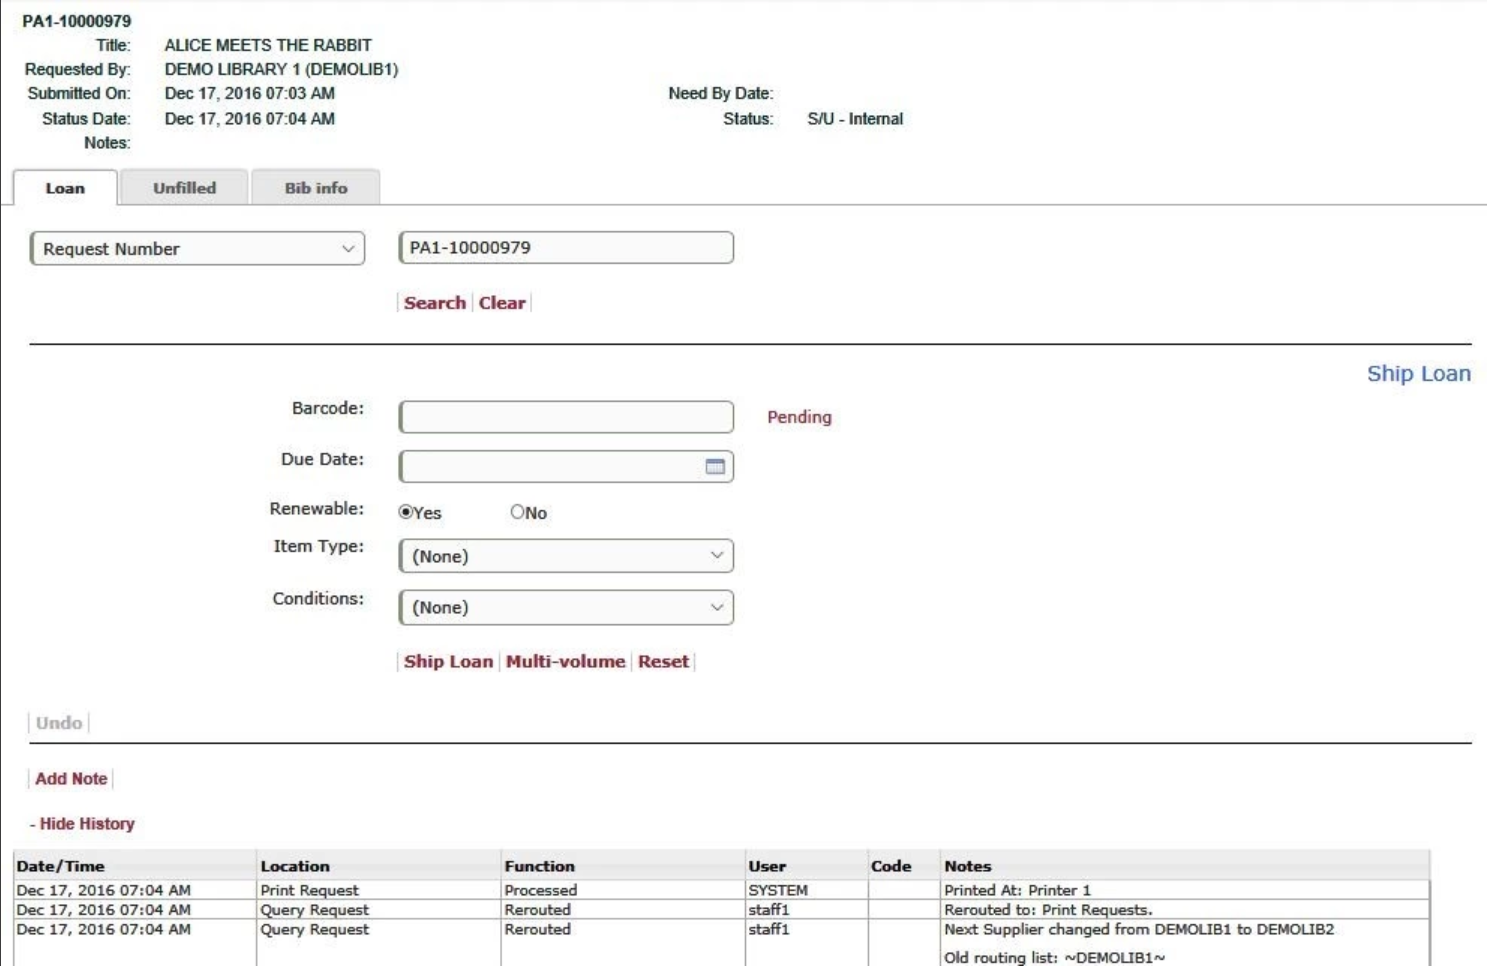
Shared system - Loan to another library
If you are part of a shared system and the request is from another library in your system, the Ship Loan tab displays

- Enter/update all the fields as described above for the Loan tab and click Loan or Enter.
- The request is updated in Relais as a Ship Loan (SHP) and a series of updates is done.
- An audit record is added to the request.
- A loan tracking record is created in Relais.
Configure the Loan and Ship Loan tab
Any of the elements on the Loan (LON) tab can be configured. This includes changing the name of the tab, changing the text of each label and button, and selecting which elements to hide or display. All configurations can be done based on staff group.
Specific configurations are noted below.
Due date
- The due date can be hidden on the Loan (LON) tab if you are using NCIP or eSIP and the due date is set by your local library system. Default = display
Renewable flag
- The default value for the Renewable flag can be set to Yes/No. Default = Yes
- The Renewable flag can be hidden or displayed. Default = display
Item Type
- The Item Type drop-down can be hidden or displayed. Default = hidden
- The values in this drop-down can be modified. While the default values are based on the entries from Table Maintenance → Miscellaneous → Supplied Item Type, the values that display in the tab can be further configured if required.
Conditions
- The Conditions drop-down can be hidden or displayed. Default = display
- The values in this drop-down can be modified. While the default values are based on the entries from Table Maintenance → Code Tables → ISO Supply Conditions the values that display in the tab can be further configured if required.
Autofill
- The barcode can be auto-filled with the request number if using NCIP or eSIP. Default = do not autofill
