Next-Generation Notifications overview
Next-generation notifications help you communicate with patrons effectively and efficiently while being customizable to your library's unique branding. They allow you to include logos, web links, and custom messages in your notifications to customers. Additionally, you can control which data elements to include in a template and determine the notifications' frequency and timing.
Legacy notifications will not be turned off until mid-2027. For more information on making the switch to Next-Generation Notifications and resources to help with this transition, visit Getting ready for Next-Generation Notifications.
Caution: When a library enables a Next-Generation Notification, its corresponding legacy notification(s) will be disabled. For Group Aware libraries, OCLC recommends coordinating a single rollout window for Next-Generation Notifications across the consortium to avoid patrons experiencing mixed notification experiences when borrowing from multiple libraries.Flegacy
Create Next-Generation Notifications overview
To create Next-Generation Notifications, follow the steps below.
1. Complete the General Settings
Refer to General Settings for more information.
- Navigate to the WMS Circulation module of the OCLC Service Configuration and select Next Generation Notifications.
- Open the General Settings section.
- Complete the following sections:
| Setting | Description |
|---|---|
| Enable notification types |
Once your notifications have been created and added to the appropriate policy, enable the notification for use. This will disable any corresponding legacy notifications if they were previously configured. Caution: Do not toggle the Enable notifications section to On for the notifications until you have completed all the required fields in the templates. |
| Manage custom messages |
Add custom messages to your Next-Generation Notification templates.
|
| Manage field labels |
Customize the field labels to be used in your Next-Generation Notification templates. Each label includes the Default label and a Custom label. If your institution is a part of a group, each language available in your group will have a column for a custom label. Notes:
|
| Manage logo images |
Add logo images that can then be selected in your Next-Generation Notification templates. Once added, institutions will be able to view previously configured logos in alphabetical order by Name. The previously configured logos will include a last modified date as well as the Name, URL, and Alternative text. |
| Manage reply to addresses |
Add a Reply-To address to be used in your Next-Generation Notifications.
|
| Manage web links |
Customize and configure web links to be used in your Next-Generation Notification templates. To add a My Account or custom web link to a template, enter ${ and type the Name of the desired web link into a text block. Select the web link based on the name configured. Refer to Create a template for more information. |
| Other settings |
Allows for the configuration of date and time formats for email and network print notifications as well as Printed slips/POS with Next-Generation Notifications. For more information, see Other settings. |
2. Create the Next-Generation Notification templates
Refer to Create a template for more information.
Navigate to the WMS Circulation module of the OCLC Service Configuration and select Next Generation Notifications.
- Select which template to add via type: Patron, Billing, Loans, Holds and schedules, or Point of sale (POS) printing.
- Required sections of loan templates include:
- Name
- Name templates clearly. Templates are listed together alphabetically on the indicated policy screen. A clear naming convention makes it easier to retrieve the appropriate notification when entering it on the desired policy screen.
- Subject
- Loan Details
- Optional. Add data fields.
- Optional sections include: Logo, Header, Footer, embedded custom messages, and web links.
- To add a My Account or custom web link to a template, enter ${ and type the Name of the desired web link into a text block. Select the web link based on the name configured. Refer to Create a template for more information.
- To add a custom message into a text block, enter ${ and type the Name of the custom message into a text block.
- Name
- Complete the General Information section of the template and click Save.
- Each additional section of the template requires you to click Edit and then Save after entering information prior to moving on to the next section.
- Fill out the required elements of the template, otherwise, the notification will not send.
- Once the templates are created, you can preview each template via the preview icon under the Actions column. From the preview screen, you can choose to email the notification to yourself.

- Use the Actions column to edit or delete templates.
Find previously created templates
Use the filter options to retrieve the desired templates more quickly.

Available Next-Generation Notification templates
3. Configure Notifications on the appropriate policy pages
Each Next-Generation Notification template can be assigned to a different policy. To enable the Notification, select Yes next to Configure notification to view the additional settings.
For information on creating or editing these policies, please see:
| Policy | Example |
|---|---|
| Patron Type Policy, Notifications |  |
| Loan Policy, Notifications |  |
| Long Overdue and Lost Policy, Notifications |  |
| Scheduling Policies, Notifications | 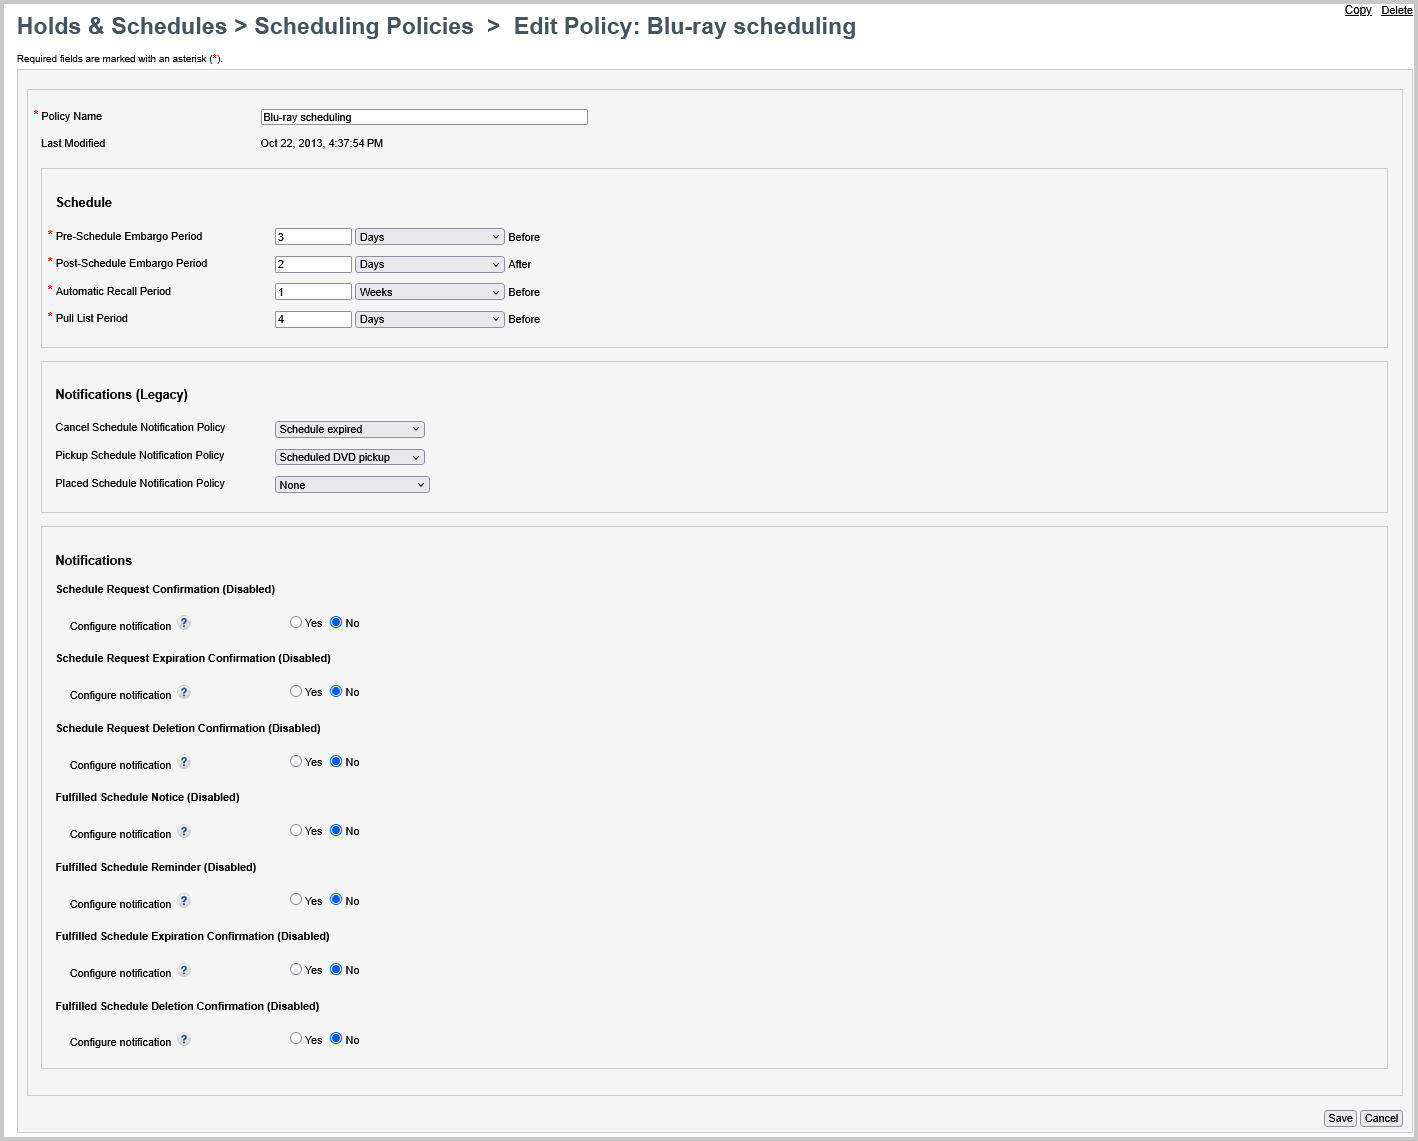 |
4. Enable the notifications
When ready to use the Next-Generation Notification templates that you set up and allow these notifications to be sent, you must enable them within the Enable notification types section.
- Next-Generation Notifications are sent out every 10 minutes.
Caution: Do not toggle the Enable notifications section to On for the below notifications until you have completed all the required fields in the templates.
- Incomplete templates will prevent new notifications from being sent.
- Once the Next-Generation Notifications are enabled, any corresponding legacy notifications will be disabled (if they were previously configured).
For more information, refer to Enable notification types.