Media
Discover how to use the media library to upload your own images, icons and themes or select from an offering of default themes.
Overview
The media library allows you to upload and manage the images you use throughout your CapiraMobile app. The folders and images that you add to the media library are accessed from the following locations within the dashboard:
- Branches - Select images to represent your individual branches.
- Account options - Select an image for your digital library card.
- Styles - Choose an image for the app header.
- Buttons - Select images for buttons on any screen.
Note: The media library will come pre-populated with any images that you included on your library's implementation form, as well as a selection of standard icon sets that are available to all CapiraMobile users.
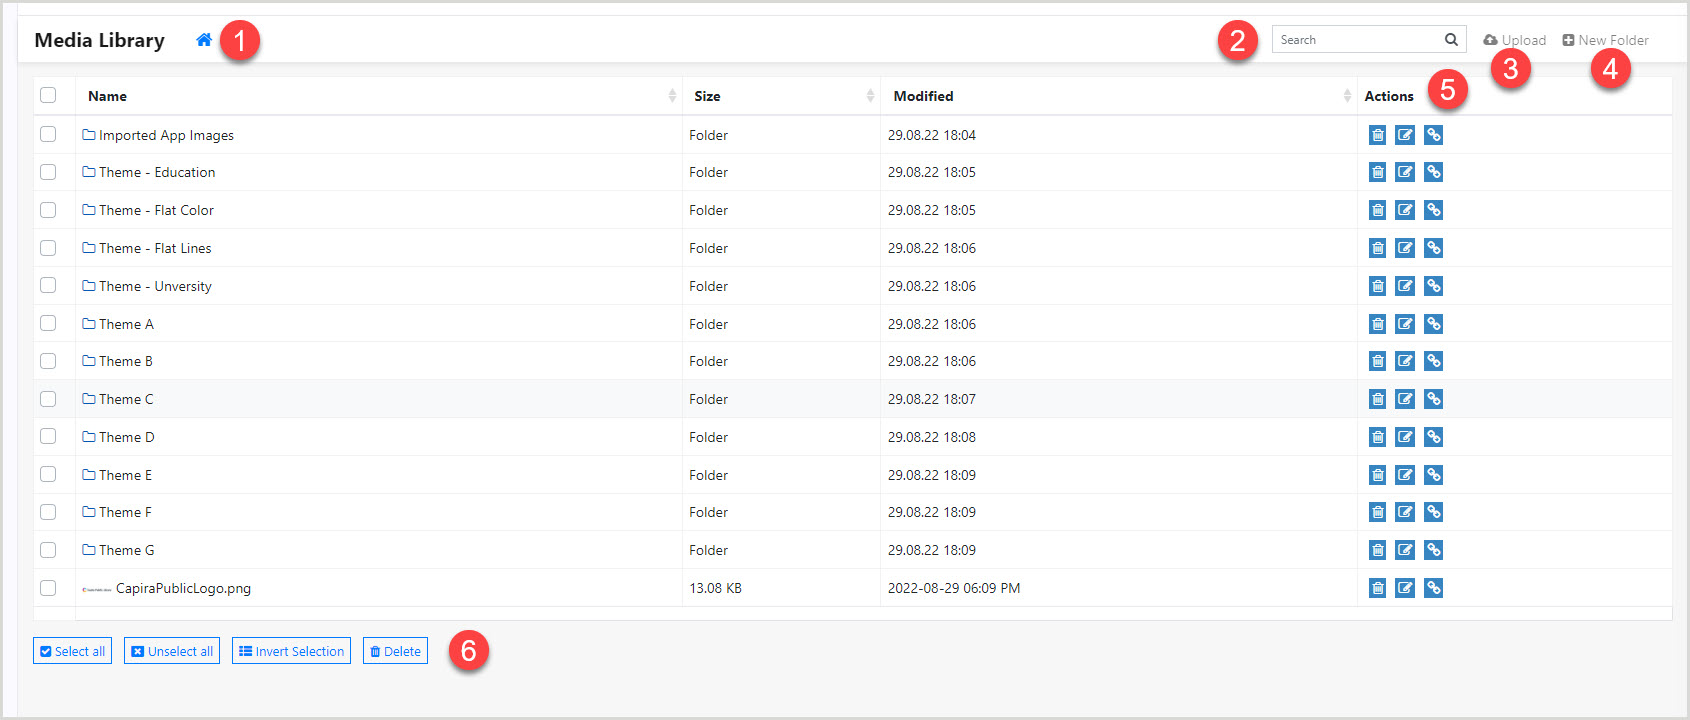
Manage the media library

- Home - Return to the top level of the media library.
- Search box - Search for folders and files.
- Upload - Upload new media.
- New Folder - Create a new folder.
- Actions - Complete one of the following actions for the corresponding folder or file:
- Delete - Remove the folder or file from the media library.
- Rename - Rename the folder or file.
- Direct link - Copy a direct link to the folder or file.
- Bulk actions - Complete bulk actions for folders and files.
Image requirements
- Preferred image file type: .png
- Header images: Minimum: 768x120 / Maximum: 2048x258
- Button/Screen icons: Minimum: 200x200 / Preferred: 500x500
- Branch images: Minimum: 200x200 / Preferred: 500x500
Note: For best results, only use square-shaped Branch images.
- Library card images: Suggested: 450x250 (16:9 aspect ratio)
