Print for Document Delivery Requests
Print book straps
Follow the below instructions to add book straps and stickers to the print queue and to print book straps/stickers for items you are lending.
To add book straps to the Print Queue for Document Delivery requests:
You must have Advanced Lending enabled to print book straps for Document Delivery requests. Book Straps for Document Delivery requests are added to the Print Queue when batch processing these requests to another queue.
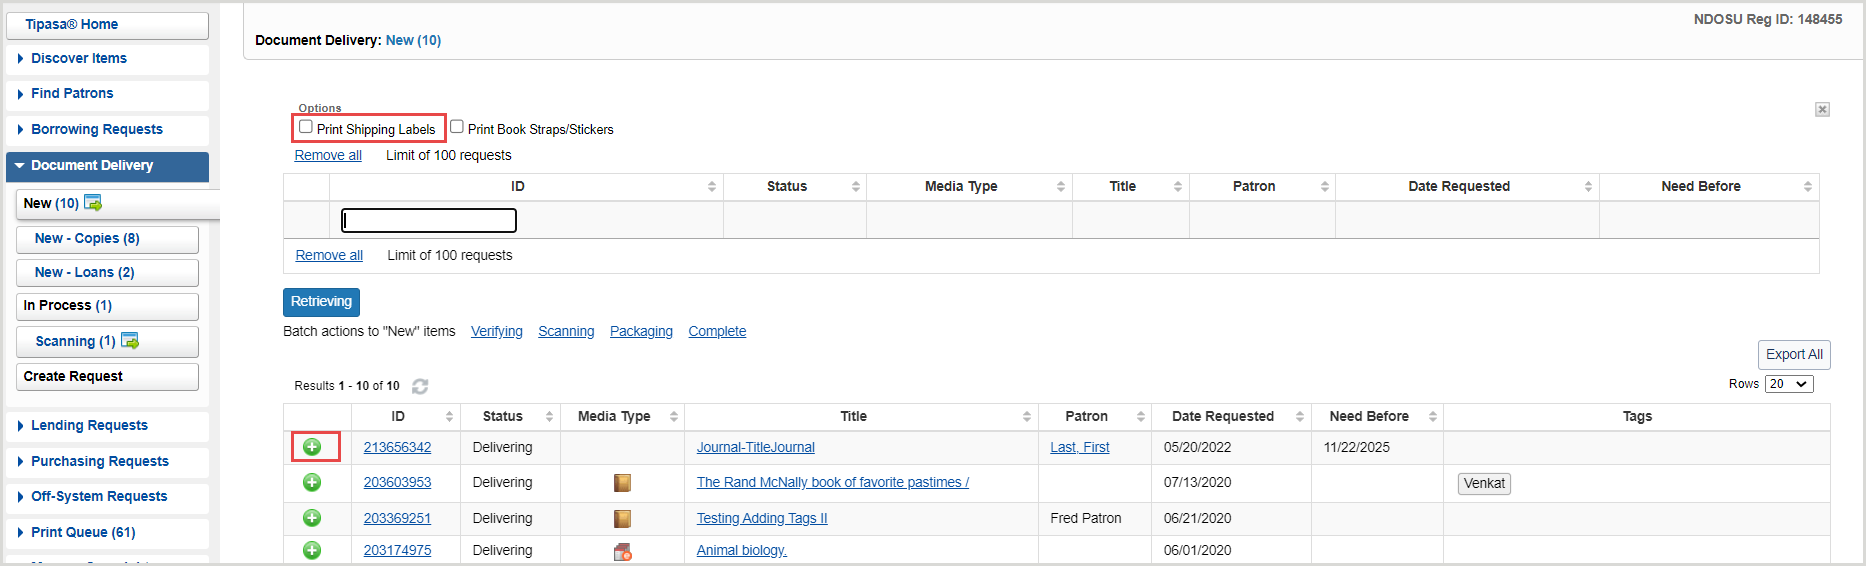
- On the left navigation, click Document Delivery.
- Select one of the following queues: New, Verifying, Retrieving, Scanning, Packaging or Complete.
- From the selected Document Delivery queue screen, use the Batch actions option to move specific requests into a different queue. Options include: New, Verifying, Retrieving, Scanning, Packaging, or Complete.

- A table appears allowing for the addition of requests to be processed.
- In the request ID field, scan or type the request ID, or click the plus sign (
 ) next to the requests in the table below.
 - Select Print Book Straps/Stickers to add the selected items to the Print Queue as they are processed to the new status.

- Based on the batch process you are performing, click New, Verifying, Retrieving, Scanning, Packaging, or Complete Items to apply the status to all of the items you entered in the table.
- The selected items will appear under the Print Queue for Borrowing.
Customize book straps
You can customize your book straps in OCLC Service Configuration. See Print Settings for more information.
To customize borrower and lender book straps:
- Sign in to Service Configuration.
- On the left navigation, click WorldShare ILL > Print Settings.
- On the Print Settings page, under Logo Image Settings, enter the URL of the logo you want to appear on your books straps.
- Under Book Strap Settings, select Use customized book straps under .
- Enter any notes you want to include on the book strap in the Notes field.
- Click Save.
Print shipping labels
Follow the instructions below to print shipping labels
You must have Advanced Lending enabled to print book straps for Document Delivery requests. Book Straps for Document Delivery requests are added to the Print Queue when batch processing these requests to another queue. Refer to see Batch processing for borrowers and Batch processing for lenders for more information.
- On the left navigation, click Document Delivery.
- Select one of the following queues: New, Verifying, Retrieving, Scanning, Packaging or Complete.
- From the selected Document Delivery queue screen, use the Batch actions option to move specific requests into a different queue. Options include: New, Verifying, Retrieving, Scanning, Packaging, or Complete.
- A table appears allowing for the addition of requests to be processed.
- In the request ID field, scan or type the request ID, or click the plus sign () in the table below to add a request.
- Click Print Shipping labels to add the selected items to the Print Queue.
- Based on the batch process you are performing, click New, Verifying, Retrieving, Scanning, Packaging, or Complete Items to apply the status to all of the items you entered in the table.
- The selected items will appear under the Print Queue for Shipping Labels.
To print shipping labels:
- On the left navigation, click Print Queue.
- Under Lending, click Shipping Labels.
- On the Lending Shipping Labels screen, select the check boxes next to the requests you want to print shipping labels for. Select the check box at the top of the table to select all items in the table.
- In the Format list, select 6 per page or 30 per page.
- A template is displayed underneath the table. To start at a different label position, select the number in the template, or enter the number in the Start at label position field.
- Optional, when 6 per page is selected. Select the check boxes under Include on labels to include the following on the labels:
- Request ID barcode
- LIBRARY MAIL DMM: 173.5.0
- RETURN SERVICE REQUESTED
- Click Print.
- On the Print Preview window, click the print icon or links to print the return labels.