Harvest Setup
Harvest set up
Supported COUNTER report types for Recurring and One-Time harvests include:
- COUNTER 3: JR1, JR1a, JR2, DB1, DB3
- COUNTER 4: JR1, JR1 GOA, JR1a, JR2, JR3, JR3mobile, JR4, JR5, DB1, DB2, PR1, BR1, BR2, BR3, BR4, BR5, CR1, CR2, CR3, MR1, MR2, TR1, TR1mobile, TR2, TR3, TR3mobile
- COUNTER 5: PR, PR_P1, IR_M1, IR Master, IR_A1, TR, TR_J1, TR_J2, TR_J3, TR_J4, TR_B1, TR_B2, TR_B3, DR, DR_D1, DR_D2
Recurring Harvest
Once a harvest is scheduled for a configured vendor, it can be accessed through the Harvest History screen. For details, see Use the Harvest History.
To schedule a recurring harvest:
- On the left navigation, click Usage Data.
- Click Harvest Setup.
- On the Harvest Setup screen, click the Recurring Harvest tab.
- From the Vendor Name list, select a vendor.
- The schedule and version available for the vendor are displayed.
- Select one or more Report Types to be harvested.
- Enter the Start Date of the harvest. The system harvests the data from the date you enter until it reaches the most recent month. From that point the system harvests based on the vendor's monthly schedule. You can type in the date or click the calendar icon to select the date.
- The default Start Date and End Date are set to the previous month
- Select the Status:
- Active: On (harvests occur according to the vendor's monthly schedule).
- Inactive: Off (no harvesting occurs).
- Click Save.
One-time Harvest
Use this tab to harvest COUNTER files that have been downloaded manually from a vendor's website or transfer reports from configured vendors.
To schedule a one-time harvest:
- On the left navigation, click Usage Data.
- Click Harvest Setup.
- On the Harvest Setup screen, click the One-time Harvest tab.
- From the Report Source list, select a Source. Follow the instructions below based on your selection.
Manual - Transfer report file from my computer
- Select the vendor that published the COUNTER report you are uploading from the Vendor Name list. This list scans the actively held collections in your knowledge base holdings and presents vendors in your collection.
- Select the Counter type from the drop-down.
- Select the Format of your file.
- XML: available for all COUNTER 4 reports.
- Comma-delimited (CSV)
- Tab-delimited (TSV)
- See Format CSV and TSV file imports for more information about using this format for a select number of COUNTER 4 reports.
- EXCEL (XLS and XLSX)
- To upload a file, select Choose File. Locate the file on your computer and click Open.
- Click Validate.
- The version and report type of the file you uploaded is displayed.
- Enter the date range of the report into the Start Date and End Date fields, respectively. You can type in the dates or click the calendar icons to select the date.
- Click Save.
SUSHI - Transfer report file from configured vendor
- From the Vendor Name list, select a vendor.
- The licensee, format, and version of the report are displayed.
- Select one or more Report Types to be harvested.
- In the Start Date field, enter the start date of the report. You can type in the date or click the calendar icon to select the date.
- In the End Date field, enter the end date of the report. You can type in the date or click the calendar icon to select the date.
Note: The default Start Date and End Date are set to the previous month
- Click Save.
Format CSV and TSV file imports
License Manager requires COUNTER-compliant formatting for COUNTER 4 and COUNTER 5 file uploads. CSV or TSV uploads are supported for the following list of journal, collection, and book reports:
- Journal Reports: JR1, JR1 GOA, JR1a, JR2, JR3, JR3mobile, JR4, JR5, TR_J1 (Excluding OA_Gold), TR_J2, TR_J3, and TR_J4
- Collection Reports: DB1, DB2, and PR1
- Book Reports: BR1, BR2, BR3, BR4, BR5, and TR_B1 (Excluding OA_Gold), TR_B2, and TR_B3
- Multimedia Reports: MR1 and MR2
- Title Reports: TR, TR1, TR1mobile, TR2, TR3, and TR3mobile
- Platform Reports: PR_P1
- Item Reports: IR, IR_M1, and IR_A1
Use the below information to correctly format your report before uploading or to correct a previously uploaded report that returned errors.
- See the COUNTER Code of Practice for the latest COUNTER standard requirements.
- Use the free file validation tool for your COUNTER reports. A free account is required.
Metric type requirements
Most COUNTER reports include multiple metric types in addition to a summarized period value for each month (i.e. "Reporting Period HTML" in the JR1 report). Because monthly breakdowns only include the "Reporting Period Total" metric type values, other metric types will be discarded for spreadsheet reports containing multiple months. If individual metric types are important to import into License Manager, this can be accomplished by downloading individual monthly reports from your publishing vendor.
Report-specific requirements:
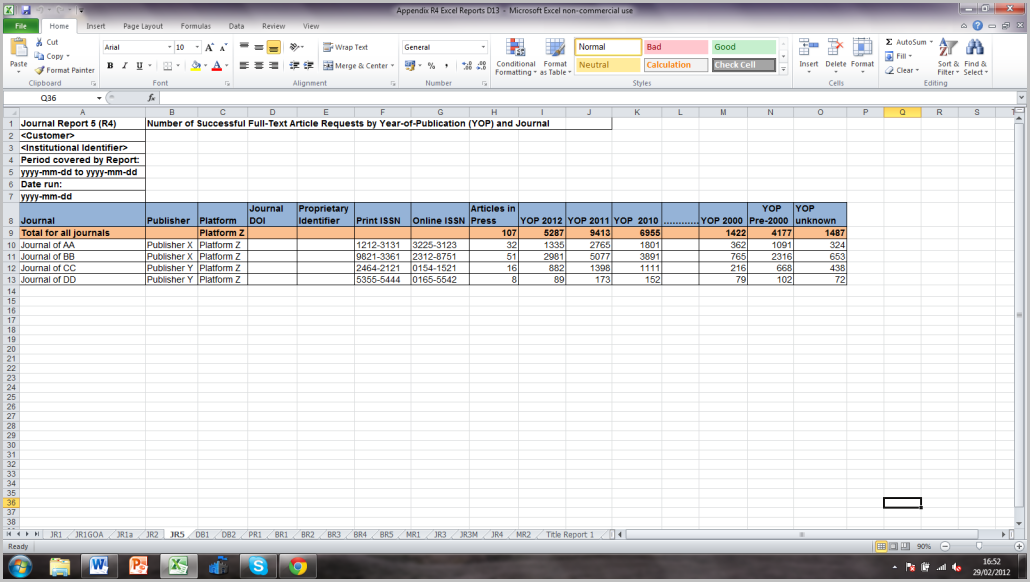
- JR5: Number of successful full-text article requests by year of publication.
- Because this report does not detail the data results by month of access, License Manager requires "Period covered by Report" values to be no greater than one month for JR5 reports. This allows License Manager to combine and summarize monthly reports across different time periods.
- In the image below, cell A5 can be no greater than one month:
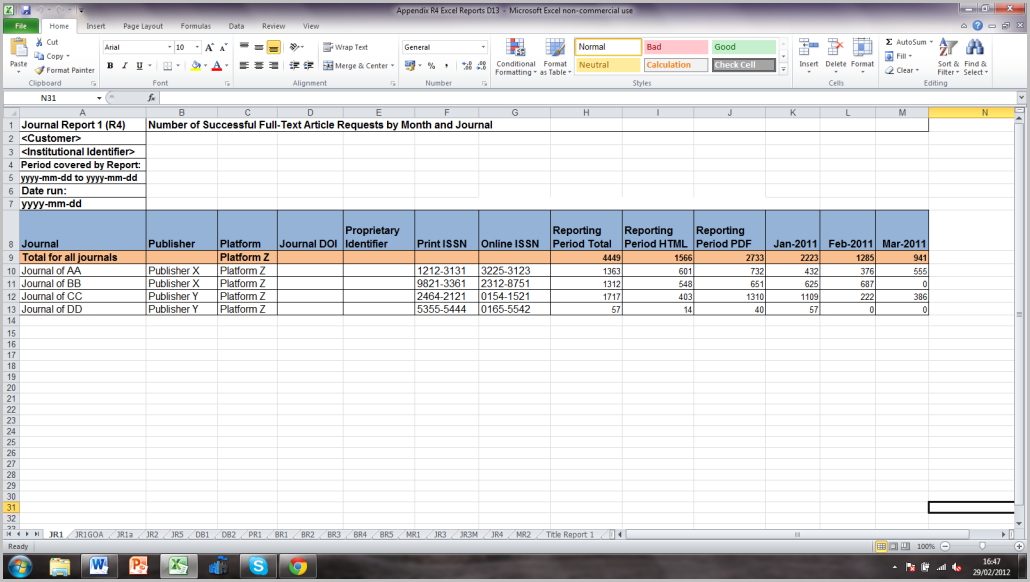
- TR1: Number of successful requests for journal full-text articles and book sections by month and title.
- Because this report includes a date header that differs from all other reports, License Manager has elected to require date headers in the same format as other reports (aside from the JR5).
- It may be required that you reformat your date headers from (as an example) "Total MMM-YY" to the standardized "MMM-YYYY". In other words, "Jan-2011" instead of "Total Jan-11".