Borrower history report
Learn how to create and print the Borrower history report in Amlib.
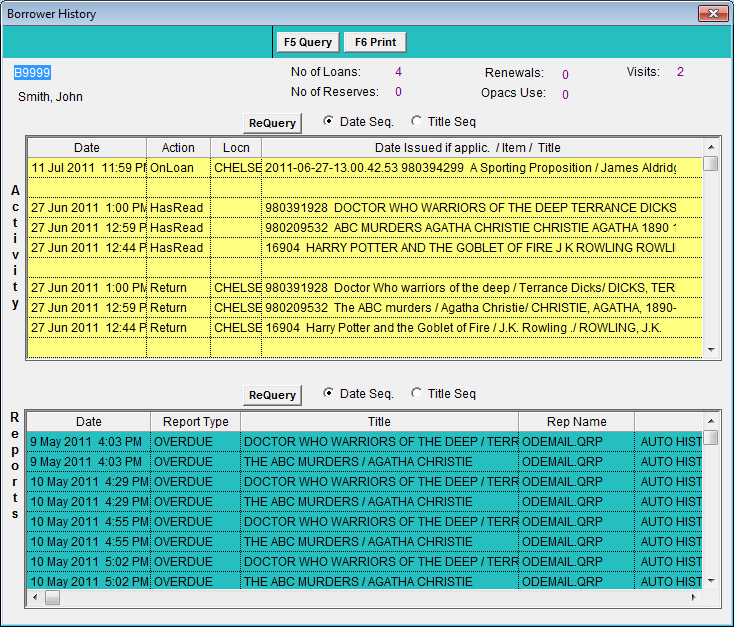
It is possible to produce a report based on the Borrower History.
The report lists the HasRead items in the Borrower History: Activity table (these entries are created after the item has been returned).
There are two main reports templates used for this:
- Borrower History - &BORHIST.QRP
- Borrower History by Class - &BORHISC.QRP
Supervisor Settings
The number of history records retained on a borrower record is set in the Supervisor module:
- Launch the Amlib client.
- Go to Main > Supervisor > Installation – the Installation screen will display.
- Click the Circulation tab.
- Scroll down to the Keep the last ### history records setting.
- Adjust the Value column to be equal to the number of history records you wish to retain – for example: 100
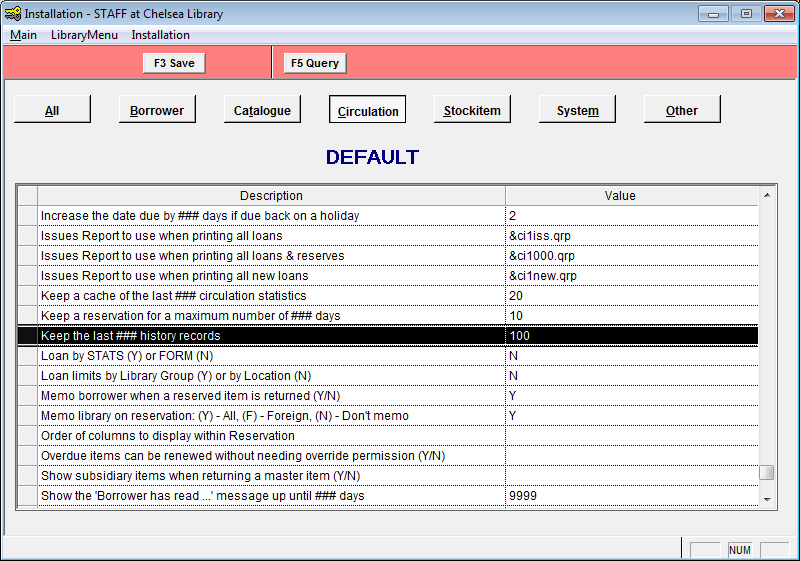
- Click the F3 Save button to save setting changes.
- From the main menu, select Installation > Choose Location, select the appropriate location in the list and click on the OK button.
- Select the Circulation tab – and scroll down to the Keep the last ### history records setting and check the value inserted.
- Either insert a value for this particular location or leave blank to use the Default setting.
- Click the F3 Save button when complete.
- Repeat steps 7 – 10 for all other circulating locations.
- Exit the Amlib client and restart for any changes to take effect.
Borrower Settings
This setting controls if a HasRead entry is made in the Borrower History:
- Launch the Amlib client.
- Go to Main > Borrowers > BorrowerTypes – the Borrower Types screen will display:
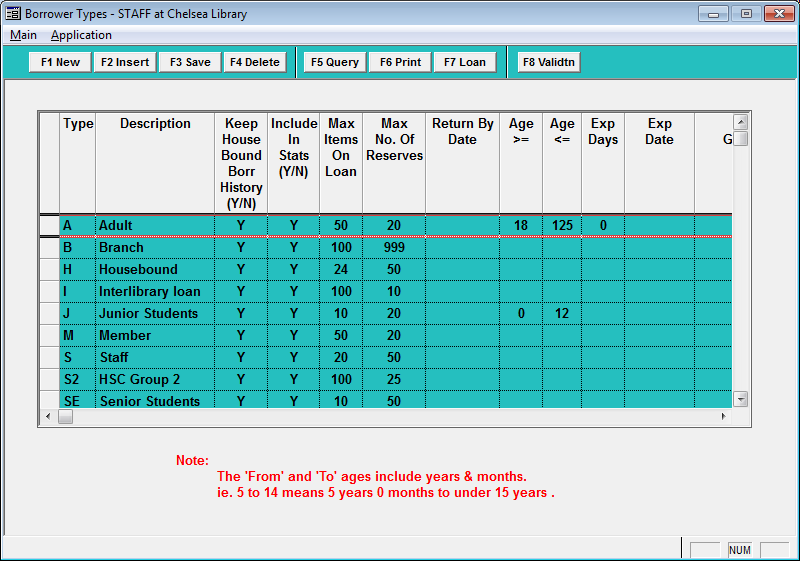
- Ensure the Keep House Bound Borr History (Y/N) is set to Y for all Borrower Types.
- Click the F3 Save button to save any changes to the settings.
Create Report
- Go to Main > Reports > RepBorrower – the Borrower Reports screen will display.
- Click the F1 New button – the Select Report Format screen will display.
- Highlight the Borrower History report template you would like to use – &BORHIST.QRP (Borrower History) or &BORHISC.QRP (Borrower History by Class). You should locate these templates via Template name rather than Description, as these are multi-function templates and sometimes the Description refers to this alternate functionality (for example: Delete History & List).
- Click the OK button.
- Type in a Description – for example: Borrower History by Class
- Ensure the Update Entity (Y/N) column is set to N
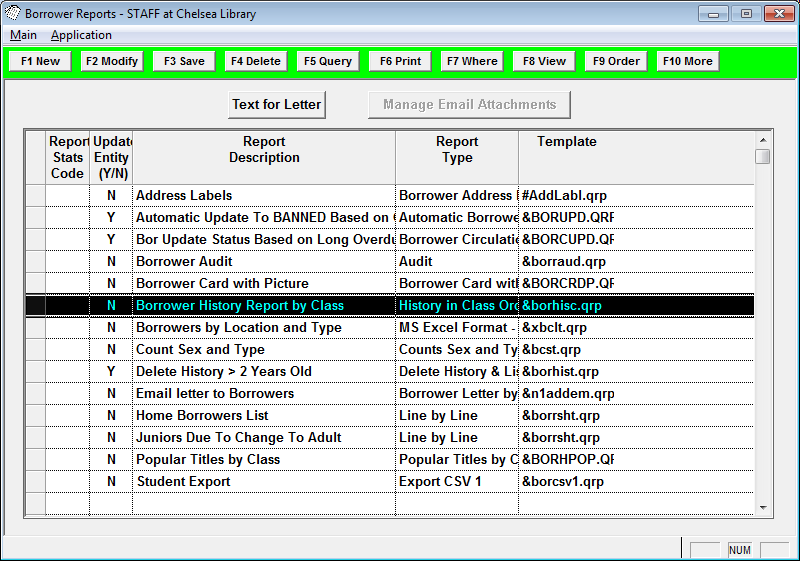
- Click the F3 Save button.
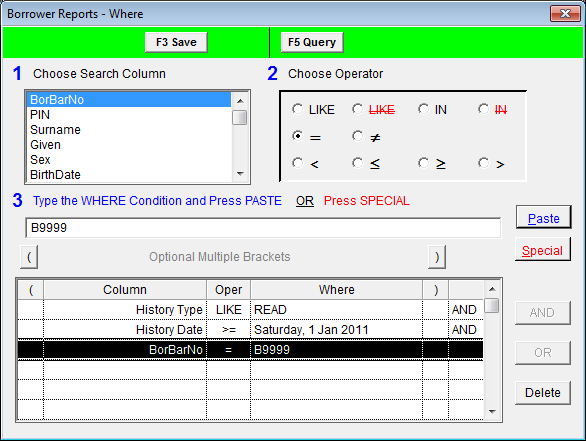
- Select the F7 Where button to set up the selection parameters – this will bring up the Borrower Reports – Where screen.
- Enter the following Where search:
- History Type LIKE READ OR History Type = READING
(Use the Paste button to insert the parameter into the list at the bottom of the screen) - Enter a start date: History Date >= enter a date in DD/MM/YYYY format – for example: 01/01/2010
- Enter a finish date: History Date <= enter a date in DD/MM/YYYY format – for example:
(a finish date is optional – if not inserted, the report will go up to the current date). - You may want to add other restrictors – for example: BorClass = OR BorGroup = OR BorBarNo =
- Click the F3 Save button when complete
- Borrower History Reports
- History Type LIKE READ OR History Type = READING
- Click the F9 Order button – this will bring up the Borrower Reports – Order By screen
- If you are using the &BORHISC.QRP template, then select BorClass from the Columns list and arrow it across into the Order By list
- Select and arrow BorBarcode (or BorSurname)
- Select and arrow Item Title
- Click the F3 Save button when complete

View Report
- Highlight the report and click the F8 View button – a prompt will display with the following message: This type of report may use a Saved File as a Source. Do you want select the file now?
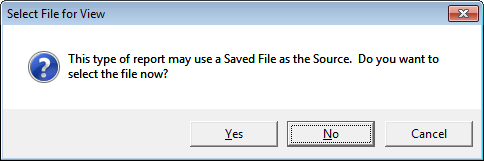
- If you would like the report to run using the entire database (rather than a Saved List) then click the No button.
- The report will then display:
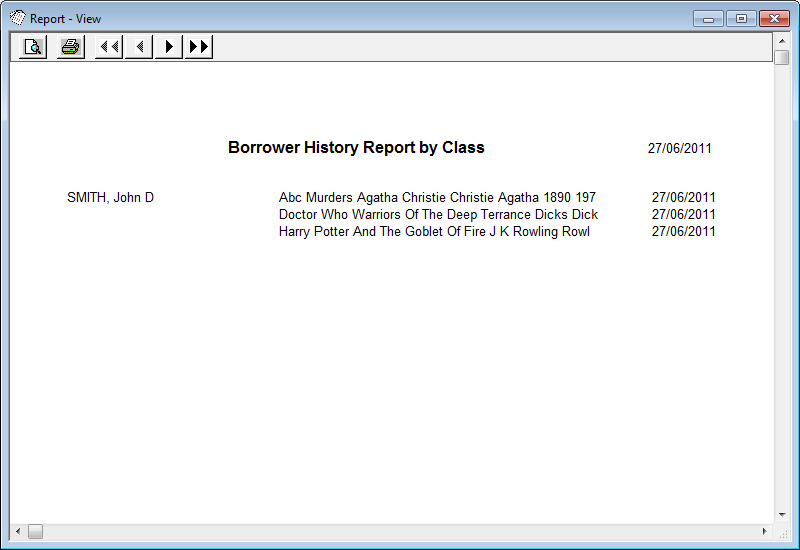
- Select the print button to print the report.