Borrower history report - including on loan
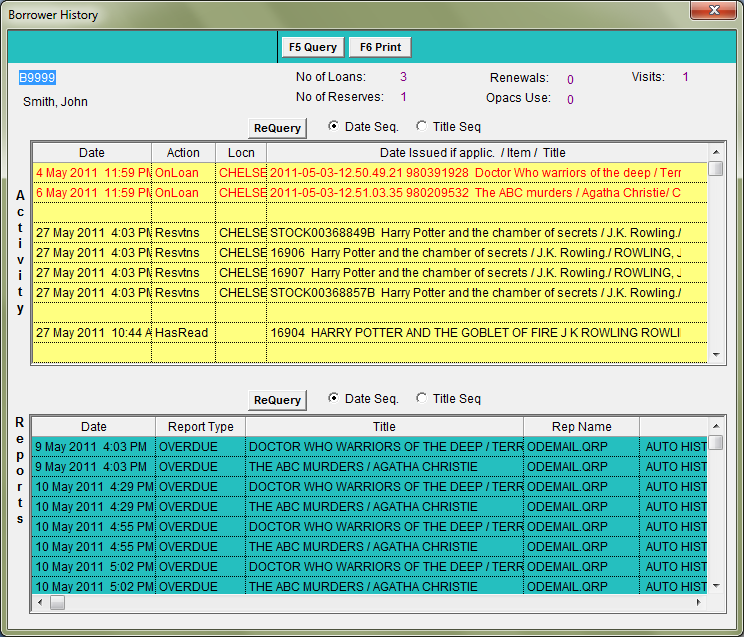
It is possible to produce a report based on the Borrower History list – however, this report does not usually include items that are currently on loan to the borrower (the Issue, OnLoan, Resvtns and Return items appearing in the Borrower History: Activity table are actually being mirrored from the Stockitem History: Activity table). Only the HasRead items in the Borrower History: Activity table can be reported on (and they are only created after the item has been returned).
However, it is still possible to report on the items on loan by running a preliminary circulation report beforehand that will place an entry in the Borrower History: Reports table, which can then be included in the Borrower History report results.
There are two main reports templates used for this:
- Borrower History - &BORHIST.QRP
- Borrower History by Class - &BORHISC.QRP
Supervisor settings
The minimum number of history records retained on a borrower record is set in the Supervisor module:
- Launch the Amlib client.
- Go to Main > Supervisor > Installation – the Installation screen will display.
- Click the Circulation tab.
- Scroll down to the Keep the last ### history records setting.
- Adjust the Value column to be equal to the number of history records you wish to retain – for example: 100
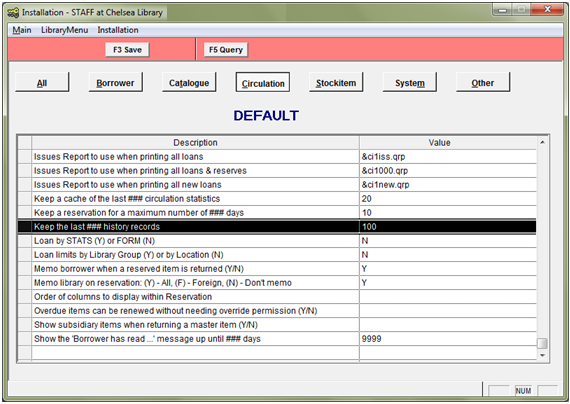
- Click the F3 Save button to save setting changes.
- From the main menu, select Installation > Choose Location, select the appropriate location in the list and click on the OK button.
- Select the Circulation tab – and scroll down to the Keep the last ### history records setting and check the value inserted.
- Either insert a value for this particular location or leave blank to use the Default setting.
- Click the F3 Save button when complete.
- Repeat steps 7 – 10 for all other circulating locations.
- Exit the Amlib client and restart for any changes to take effect.
Borrower settings
This setting controls if a HasRead entry is made in the Borrower History:
1. Launch the Amlib client
2. Go to Main > Borrowers > BorrowerTypes – the Borrower Types screen will display:
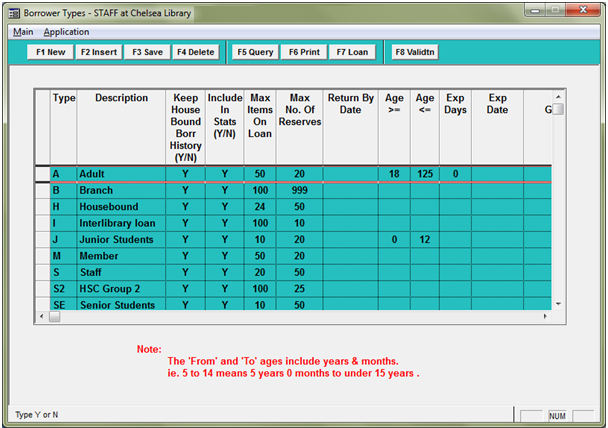
- Ensure the Keep House Bound Borr History (Y/N) is set to Y for all borrower Types.
- Click the F3 Save button to save any changes to the settings.
Create Preliminary Circulation Report
This report will create an ON LOAN entry in the Borrower History: Reports table.
1. Go to Main > Reports > RepCirculation – the Circulation Reports screen will display
2. Click the F1 New button – the Select Report Format screen will display
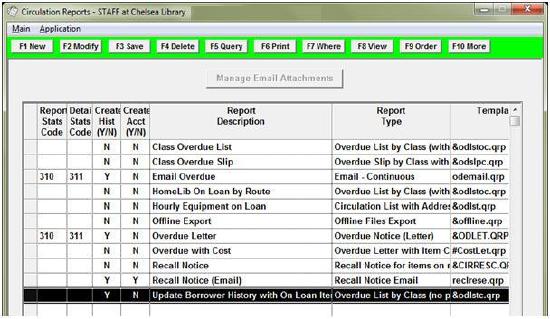
3. Highlight the &ODLSTC.QRP (Overdue List by Class) template
4. Click the OK button
5. Type in a Description – for example: Update Borrower History with On Loan Items
6. Ensure the Create Hist (Y/N) column is set to Y
7. Ensure the Create Acct (Y/N) column is set to N
8. Click the F3 Save button
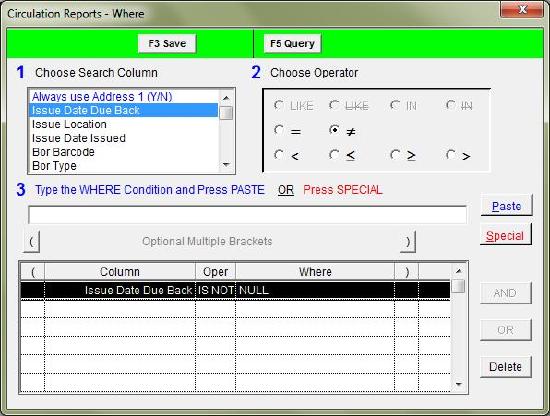
9. Click the F7 Where button – the Circulation Reports – Where screen will display
10. Enter the following Where statement:
a. Issue Date Due Back IS NOT NULL (Use the Paste button to insert the parameter into the list at the bottom of the screen)
b. Click the F3 Save button when complete
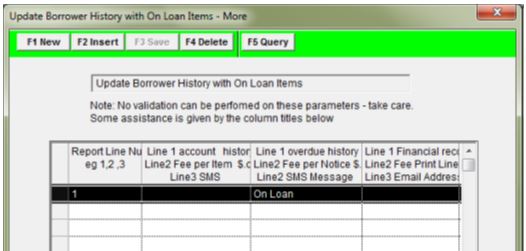
11. Click the F10 More button – the F10 More screen will display
12. Click the F1 New or F2 Insert button
13. Enter the following setting:
a. Report Line Number = 1
b. Line 1 overdue history = On Loan
14. Click the F3 Save button when complete
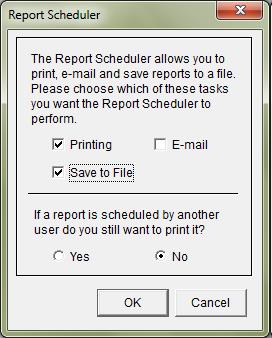
15. Select Application > RepStartSchedule – ensure that Save to File is ticked and click on the OK button
16. Click the F6 Print button – the Print screen will display:

17. Change the To: option to File and click the OK button
18. A Report – Save As dialogue box will open:
a. To save it for a Word document, leave the Save as type: as Rich Text Format (RTF)
b. To be able to open it in Excel, change the Save as type: to Text Document
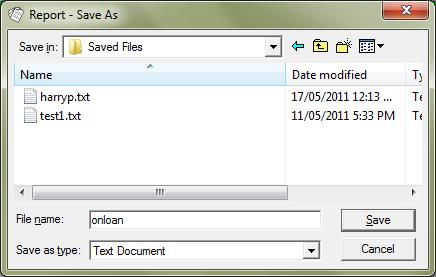
19. Click the Save button – the report will be sent to the Scheduler
20. You can check the progress of your report in Reports > RepPrintProgress
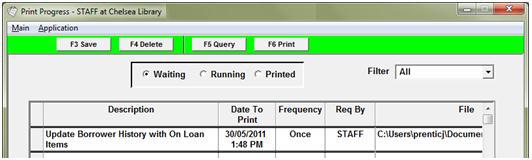
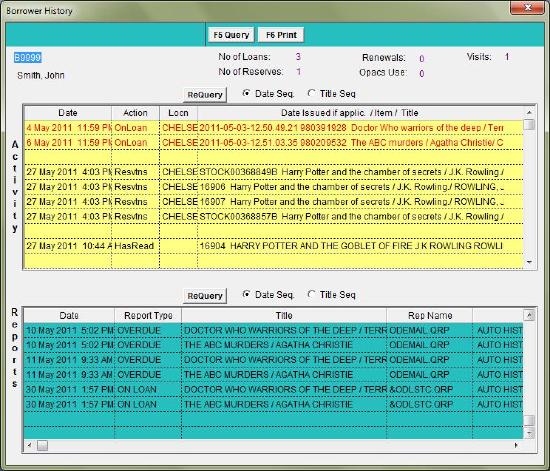
21. An entry for any item on loan will then be placed in the Borrower History: Reports table:
Create Report
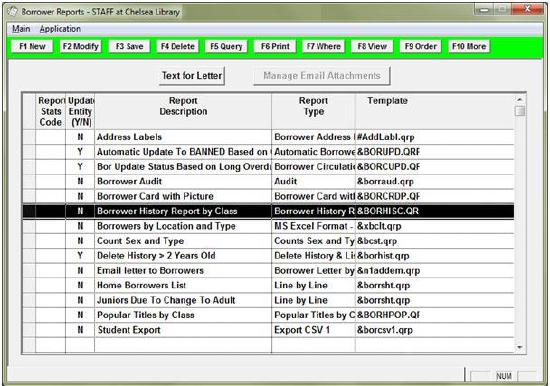
1. Go to Main > Reports > RepBorrower – the Borrower Reports screen will display
2. Click the F1 New button – the Select Report Format screen will display
3. Highlight the Borrower History report template you would like to use – &BORHIST.QRP (Borrower History) or &BORHISC.QRP (Borrower History by Class). You should locate these templates via Template name rather than Description, as these are multi-function templates and sometimes the Description refers to this alternate functionality (for example: Delete History & List)
4. Select the OK button
5. Type in a Description – for example: Borrower History by Class
6. Ensure the Update Entity (Y/N) column is set to N
7. Click the F3 Save button
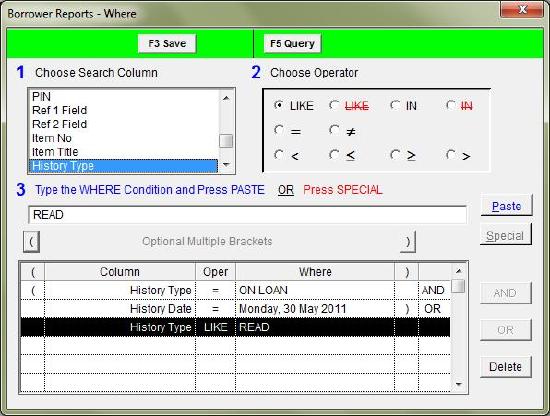
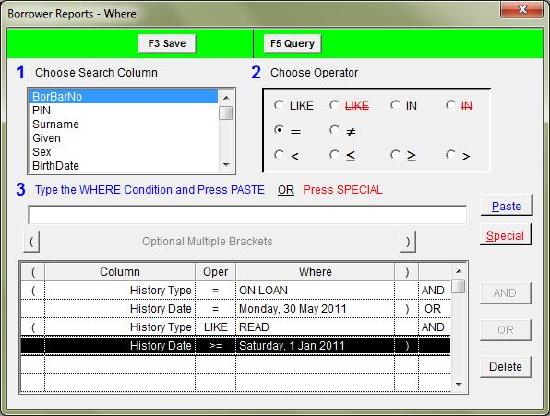
8. Select the F7 Where button – the Borrower Reports – Where screen will display
9. Enter the following Where statement:
a. ( History Type = ON LOAN AND
b. History Date = enter the date the preliminary report was run in DD/MM/YYYY format – for example: 30/05/2011 ) OR
c. History Type LIKE READ
Please Note: These first 2 lines of this statement are enclosed in brackets – the History Date is being checked to prevent other items from other reports being listed. The third line is locating all the HasRead items and is linked to the first 2 lines using an OR operator.
d. You may want to limit the History Date range being checked on the LIKE READ parameter –be sure to enclose the resultant lines in brackets
e. You may want to add other restrictions – for example: BorClass = OR BorGroup = OR BorBarNo = – again be sure to enclose in brackets
f. Click the F3 Save button when complete
OR
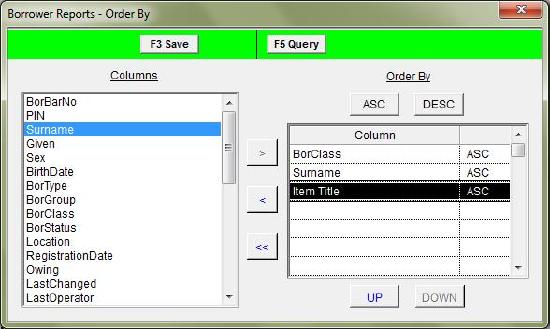
10. Click the F9 Order button – this will bring up the Borrower Reports – Order By screen
g. If you are using the &BORHISC.QRP template, then select BorClass from the Columns list and arrow it across into the Order By list
h. Select and arrow BorBarNo (or BorSurname)
i. Select and arrow Item Title
j. Click the F3 Save button when complete
View Report
1. Highlight the report and click the F8 View button – a prompt will display with the following message: This type of report may use a Saved File
as a Source. Do you want select the file now?
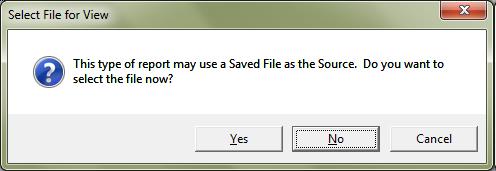
2. If you would like the report to run using the entire database (rather than a Saved List) then click the No button
3. The report will then display:
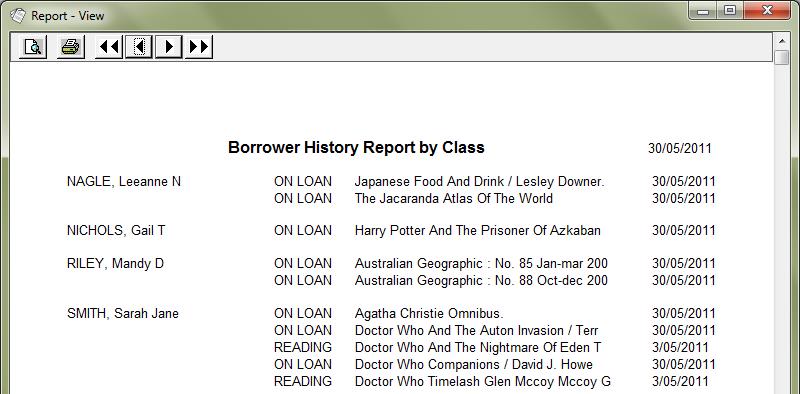
4. Select the print button to print the report