Advanced Lending and Document Delivery
Select whether you are using the Legacy interface or the Modernized interface in Tipasa.
If you have turned on the Advanced Lending feature, the Advanced Lending queues (Verifying, Receiving, Scanning, and Packaging) will also be available from the Document Delivery category. When the Advanced Lending queues are turned on, they appear as minor queues of the In Process queue.
Queues without active requests will not appear in the left navigation and Quick Links.
Move a request into an Advanced Lending queue
Requests will not be moved into the Advanced Lending queues (Verifying, Retrieving, Scanning, and Packaging) until marked by library staff. Requests can be moved into an Advanced Lending queue individually or through batch processing. You have the option to move a request into or out of a queue from any of the queues under the Document Delivery category. You must decide how your library uses the Advanced Lending queues. For an example on how to use the queues, see Advanced Lending workflow.
Move an individual request
You can individually mark requests as New, Verifying, Retrieving, Scanning, or Packaging.
To move a request into an Advanced Lending queue:
- On the left navigation, click Document Delivery.
- Click New or In Process.
- On the New or In Process screen, click the request ID or Title to display the request.
- Process the request as normal.
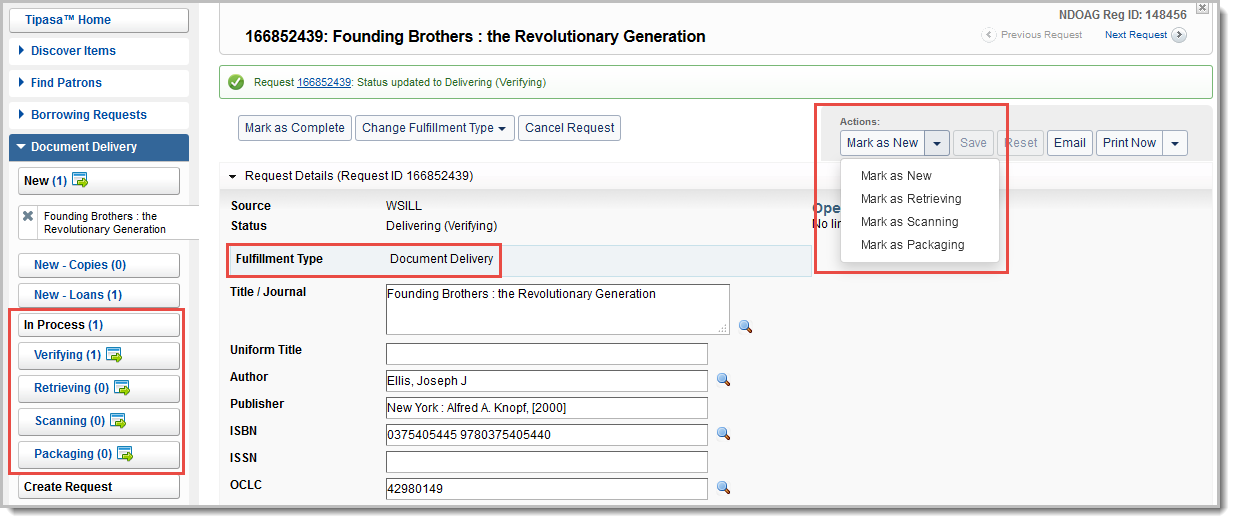
- On the upper right side of the screen, under Actions, click the down arrow to expand the list.
- Select what you want to mark the request as (Verifying, Retrieving, Scanning, or Packaging).
- Optional. If you have already marked a request, you can click Mark as New to move it back to the New queue.
- The request's status is updated based on what you selected and is moved to the respective queue.
Batch processing
You can also use batch processing to mark a request as New, Verifying, Retrieving, Scanning, Packaging, or Complete. You can perform batch processing in any queues that include the batch icon (![]() ) in the left navigation. For more information on batch processing, see Batch processing for borrowers and Batch processing for lenders.
) in the left navigation. For more information on batch processing, see Batch processing for borrowers and Batch processing for lenders.
To use batch processing to move requests into an Advanced Lending queue:
- On the left navigation, click Document Delivery.
- Click New, Verifying, Retrieving, Scanning, Packaging or Complete.
- On Document Delivery queue screen, click New, Verifying, Retrieving, Scanning, Packaging, or Complete.
- A table appears with the batch processing fields.
- In the request ID field, scan or type the request ID, or click the plus sign (
 ) in the table below to add a request.
 - Optional. Click Print Shipping Labels or Print Book Straps to add the selected items to the Print Queue. Please see Printing for Document Delivery requests.
- Based on the batch process you are performing, click New, Verifying, Retrieving, Scanning, Packaging, or Complete Items to apply the status to all of the items you entered in the table.
- The requests' statuses are updated and moved to the respective queue. Complete items are marked as Closed (Supplied).
Turning Advanced Lending off
If you are using Advanced Lending and you decide to turn the feature off, the following will occur:
- Requests formerly in the Verifying, Retrieving, Scanning, and Packaging queues will now appear in the In Process queue
- The status of the requests will keep their respective status. For example, a request in the Verifying queue has the status of Delivery (Verifying). When Advanced Lending is turned off, the status will stay the same until closed.
- The Mark as button will no longer appear in requests.
