Use automation to mail items to library users
Edit Patron Request Workforms to include address and status fields
Ensure workforms used by patrons to request items they may need to have mailed (e.g., book and other) include all address fields. These five values must be included:
- Address 1
- City
- State/Province
- Country (optionally select a default value)
- Postal Code
If address information is included in the patron record, these values will auto-populate when the patron opens a request form.
Note: For automations for mailing to home pased on patron type and status, include the Status field on patron request forms. If the patron record includes ILL Patron Type, the value will auto-populate when the patron opens a request form.
See Patron Request Workforms for more information.
Use Tipasa automation for mailing to home based on patron type status
Use automation to setup mailing items to a home or office address for all patrons of a specific type or status.
Automatically tag requests for mailing to home
Automated Request Manager can automatically tag requests for mailing to home based on the patron’s status. See Automated Request Manager for more information.
- Image
-
- In OCLC Service Configuration, in the WorldShare ILL module, select Automated Request Manager.
- Add a new automation to identify requests that should be mailed to a library user's home.
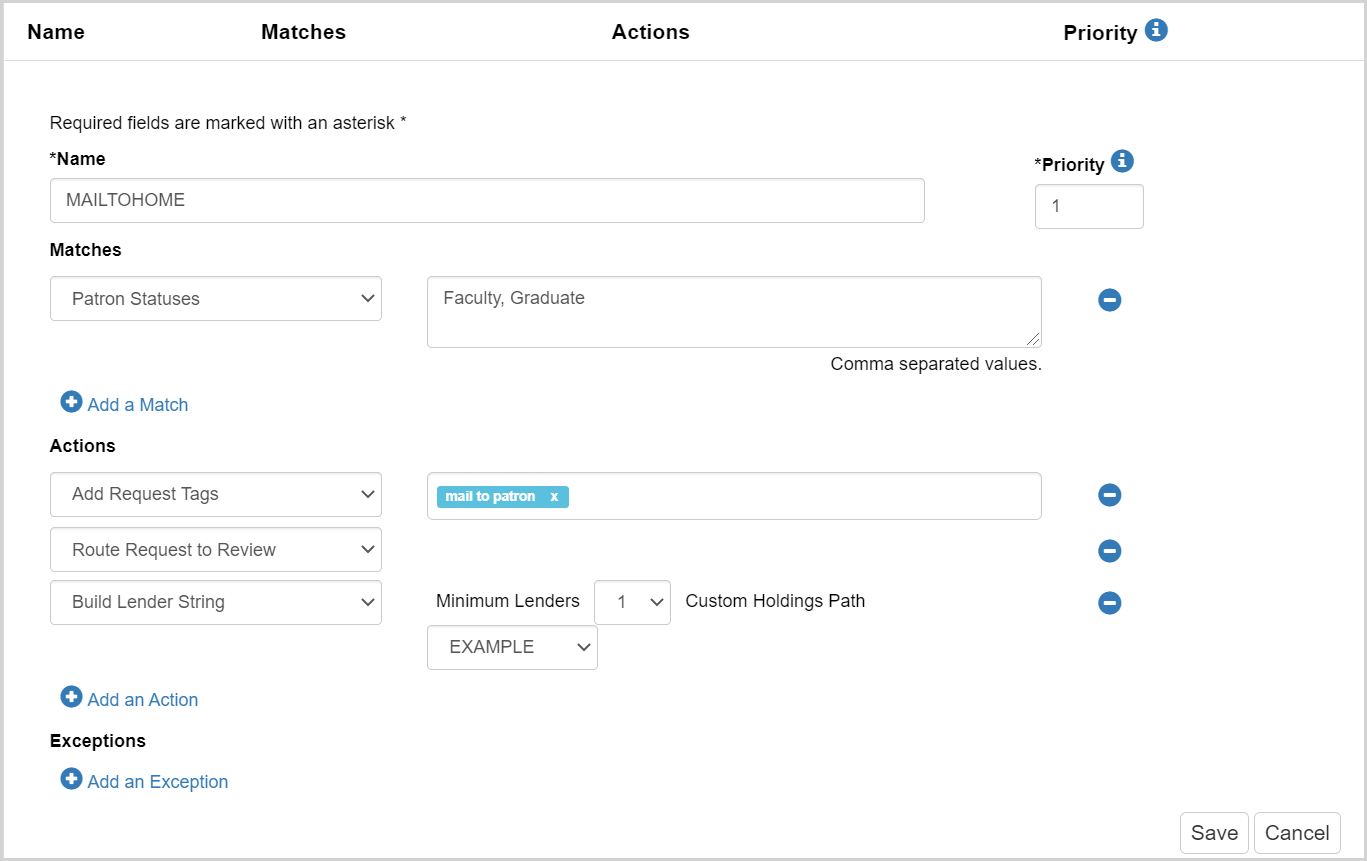
- Name the automation (e.g., MAILTOHOME) and assign it a priority.
- It is recommended that this automation be prioritized so that it comes before any automations that perform more general actions.
- Under Matches, select Patron Statuses and specify the patron types that should automatically receive the mail to home service.
- Under Actions, select Add Request Tag and specify the tag you would like to use (e.g., mail to patron).
- You can either use an existing tag or create a new one for this purpose. If adding a new tag, be sure to tap Enter before moving away from the text box. The tag you select or add should appear in the box with a blue background.
- If you are mailing borrowed items to library users' homes as well as items from your own collection, you can add an action either to Build the Lender String, which will add a lender string from your Custom Holdings Path and put the request in review, or Send Request to Lenders, which will send the request unmediated to lenders in your specified Custom Holdings Path.
- Save the automation.
The automation will appear in your list of automations in Priority order.
Using Tipasa automation for mailing to home “on demand”
Automated Request Manager can automatically tag requests for mailing specific items to a home or office address at the patron’s request. See Automated Request Manager for more information.
Add “Do you want this mailed to your home?”
To allow patrons to specify that they’d like a requested item to be mailed, repurpose the Department field on your Request Forms as a match criterion for automation.

- Change the Field Label for Department to ask Do you want this mailed to your home?
- Optional. Select the Required box.
- Select click to view/edit values.
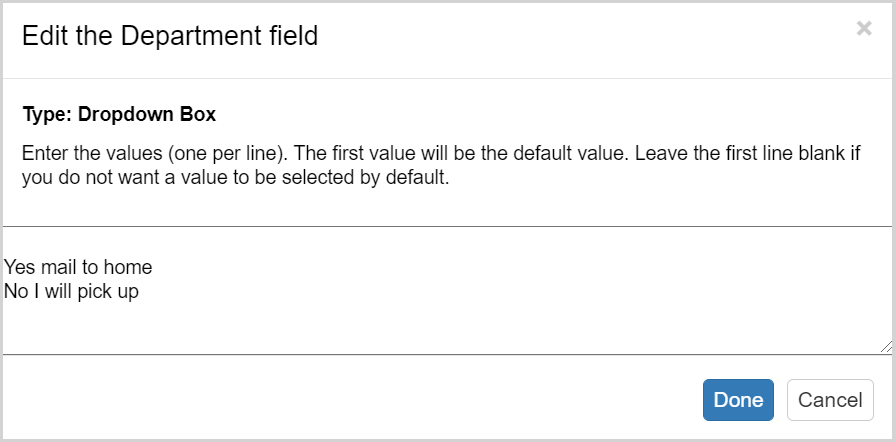
- On the Edit the Department field screen, edit the Dropdown Box values. Leave the top line blank, and then enter Yes mail to home on the first line and No I will pick up on the second line.
- Click Done and save the changes.
Automatically tag requests for mailing to home on demand
Automated Request Manager can automatically tag requests for mailing to home based on the patron’s preference.
- Image
-
- In OCLC Service Configuration, in the WorldShare ILL module, select Automated Request Manager.
- Add a new automation to identify requests that should be mailed to a library user's home.
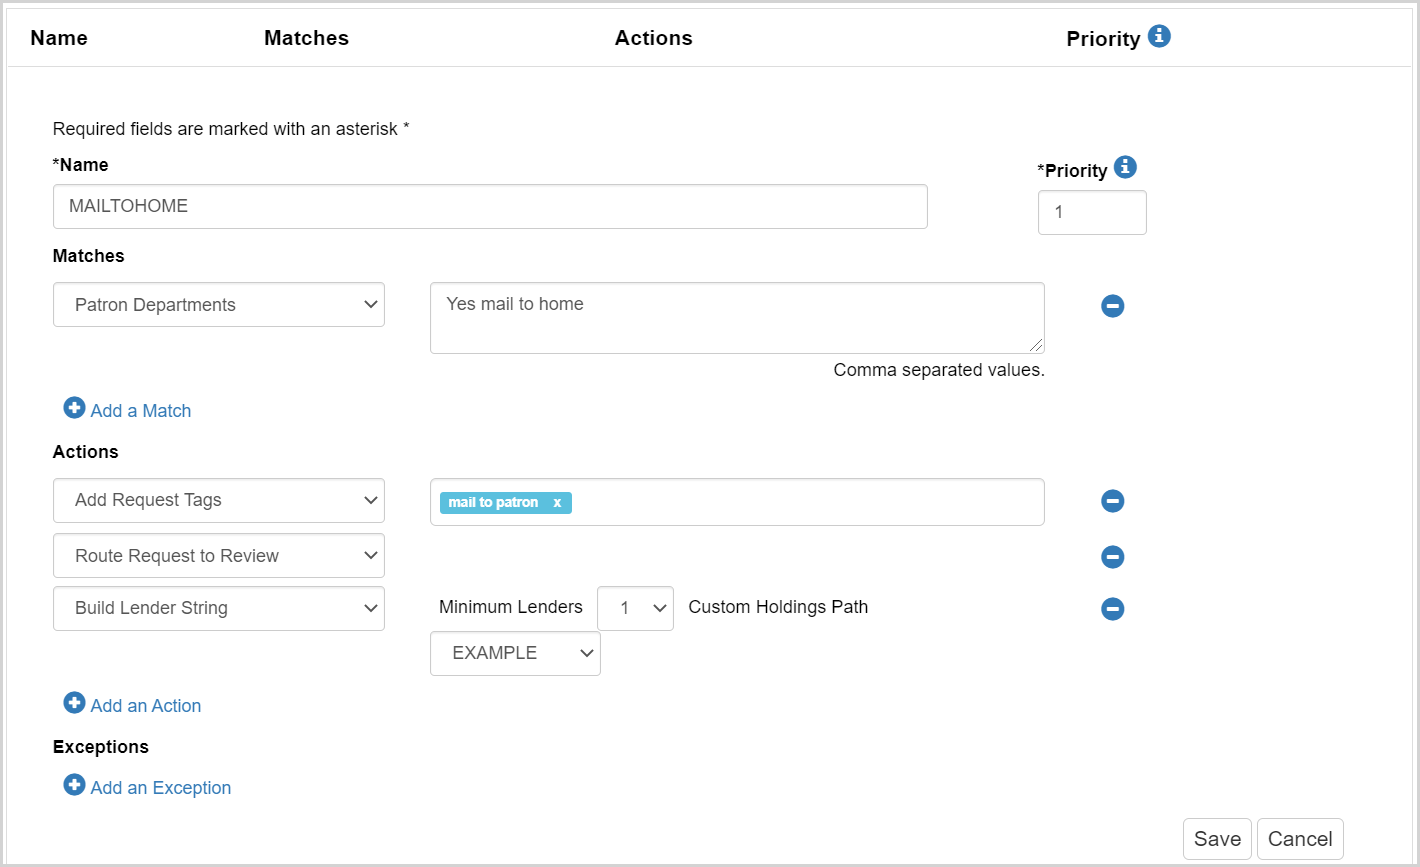
- Name the automation (e.g., MAILTOHOME) and assign it a priority.
- It is recommended that this automation be prioritized so that it comes before any automations that perform more general actions.
- Under Matches, select Patron Department and specify Yes mail to home in the text box. This value needs to be entered exactly as it exists on your Patron Request Workforms.
-
Note: Do not include a comma in your Patron Department value as the free text box matches on comma separated values.
-
- Under Actions, select Add Request Tag and specify the tag you would like to use (e.g., mail to patron).
- You can either use an existing tag or create a new one for this purpose. If adding a new tag, be sure to tap Enter before moving away from the text box. The tag you select or add should appear in the box with a blue background.
- If you are mailing borrowed items to library users' homes as well as items from your own collection, you can add an action either to Build the Lender String, which will add a lender string from your Custom Holdings Path and put the request in review, or Send Request to Lenders, which will send the request unmediated to lenders in your specified Custom Holdings Path.
- Save the automation.
The automation will appear in your list of automations in Priority order.
Mail requests to home
For items in your own collection
Requests with the specified tag for mailing items to users appear in the New for Review queue. Open each request to determine if it is held by your library. If held, a green check mark with Held by my library appears near the top right of the request.
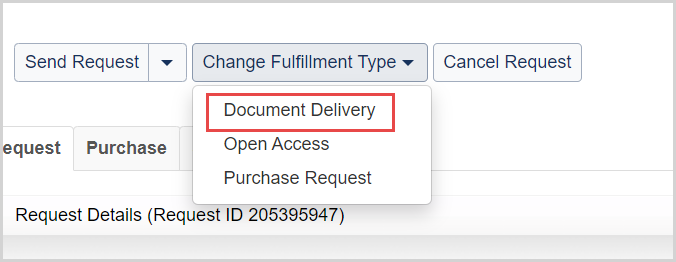
- Manually route the request to Document Delivery by using the Change Fulfillment Type drop-down at the top of the request.
- At the top right of the request, click Print Now. This will print a full request slip with Call Number as well as patron information (name, email, phone, and mailing address) included.
On the printout, the Patron Information section includes the patron’s mailing address. Use this information for shipping the item. You can then either mark the request complete and manage the checkout in your local circulation system only or keep it open in TIpasa until it is returned.
For items borrowed from other libraries
Requests with the specified tag for mailing items to users appear in the In Transit queue. The patron’s full mailing address will be included on the request printout, allowing you to mail the item without looking up the address separately.
Note: If automation is not sending requests directly to lenders, you may wish to specifically send them to lenders with a long loan period. The OCLC Profiled Group LONG includes lenders with loan periods of 12 weeks or longer.
Export a list of requests to print mailing labels
If you prefer to use custom mailing label templates, you can export a list of all requests that should be mailed to home.
- From the Tipasa home page, under Frequently used tags, click the the specified tag for mailing items to users to retrieve active requests with that tag.
- From the results page, use the Export All function to create a .csv file of data about the requests.
- Using mail merge, print custom mailing labels, which include both mailing labels for sending items to your patrons and return labels for patrons to return the item.