Available main client toolbar customizations
Overview
The Connexion client supplies a default main toolbar containing selected toolbar buttons, located at the top of the client window, below the menus. For a list of default buttons and more about using the toolbar, see Toolbars.
Show the main client toolbar on one line or two
- Click the arrow on the main client toolbar. The arrow is located at the right end if the toolbar is horizontal or on the bottom if the toolbar is vertical. The drop-down shows any overflow toolbar buttons and provides a command to toggle between showing the main toolbar on one row or two:
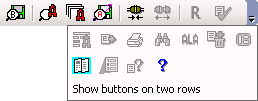
- By default, the main client toolbar displays the toolbar on one row.
- Click Show buttons on two rows to display the toolbar on two rows.
- If you previously selected Show buttons on two rows, click Show buttons on one row to return to the default.
The client remembers your setting each time you re-open the program or upgrade to another version.
Add buttons to the client toolbar
- Navigate to Tools > Toolbar Editor. The Toolbar Editor window opens.
- In the Toolbar Editor window, scroll the Menu Items list. When you find a button you want to add, click and hold it, and then drag and drop it where you want it to appear on the toolbar.
- The button is on the toolbar.
- The image of the button also remains in the Toolbar Editor list, but you cannot add the button to the toolbar again.
- Click Close or press <Enter> to close the Toolbar Editor window.
View a toolbar button name
To see the name of any button on the toolbar, move the cursor over the button until a popup ToolTip opens. The ToolTip shows the corresponding menu and command.
Example:
The ToolTip for  is FileLogon. When you click , the action is the same as clicking Logon on the File menu.
For a complete list of available toolbar buttons for menu commands, see Menus.
Remove buttons from the toolbar
- Navigate to Tools > Toolbar Editor. The Toolbar Editor window opens.
- Click the button you want to remove and hold it, and then drag and drop it into the Toolbar Editor.
- Click Close or press <Enter> to close the Toolbar Editor window.
Change the position of buttons on the toolbar
Press and hold the <Alt> key while you drag and drop a button in the toolbar to a new location.
Reset the toolbar to the default
- Navigate to Tools > Toolbar Editor. The Toolbar Editor window opens.
- Click Reset and then click Yes to confirm. The toolbar returns to the original buttons in the original order.
- Click Close or press <Enter> to close the Toolbar Editor window.
For a list of buttons on the default toolbar, see Toolbars.
Select toolbar button size
- Navigate to Tools > Options > Toolbar to view the Toolbar tab.
- Under Button Size, select a button size.
- Standard (19x17 pixels; example: )
- Large (38x34 pixels; example:
 )
)
- Standard (19x17 pixels; example:
- When finished, perform one of the following actions:
- Click Close or press <Enter> to apply the settings and close the Options window.
- Click Apply to apply the settings without closing the window.
Note: When you change toolbar button size, the new setting does not take effect until you close and reopen the client.
Stored toolbar settings
The client stores any changes you make to the toolbar. Your customized toolbar is retained each time you open or update the program.
Caution: If the default toolbar contains new buttons when you upgrade to a later version, the new default button is not added to your toolbar. You can reset the toolbar to the default (Tools > Toolbar > Reset), or use the toolbar editor to add new buttons.