Autocharge guide
Overview
Overdue charges can be automatically created in Amlib when an item is returned through the Circulation module. Depending on your parameters, the overdue charge is added to the Borrower record as soon as an overdue item is returned. These charges remain on the Borrower record until the charge is paid or it is deleted by a staff member.
An alternate method of creating a charge is to add a cost onto each Borrower record when a report is printed. This is generally created for long overdue items or Claims Returned items that have not been found after 6 months.
Create the report
- Launch the Amlib client
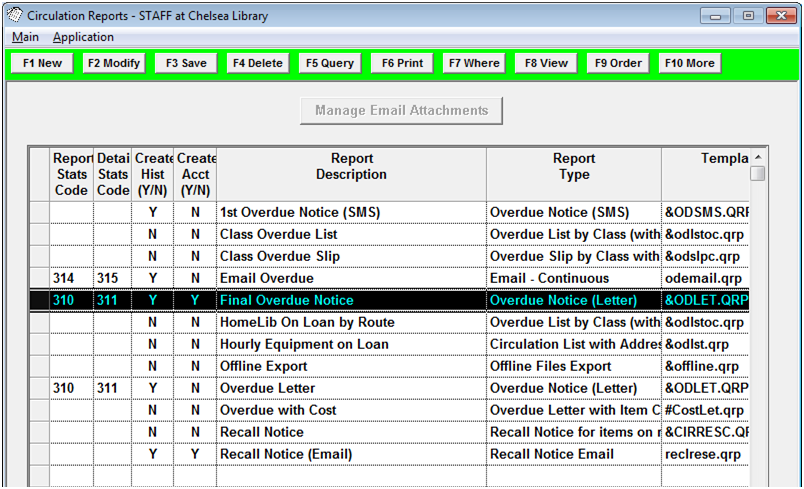
- Go to Main > Reports > RepCirculation. The Circulation Reports window will display.
- Click the F1 New button. The Select Report Format screen will display.
- Highlight an appropriate Report (you may have a standard letter/email template you wish to use, or a modified overdue letter/email template added to the reports module) and click the Select button.
- Enter a Report Description – for example: Final Overdue Account.
- Ensure the Create Hist (Y/N) column = Y (for Yes).
- Ensure the Create Acct (Y/N) column = Y (for Yes).
- Click the F3 Save button to save the Report.
Where statement
- Click the F7 Where button. The Circulation Reports – Where screen will display:
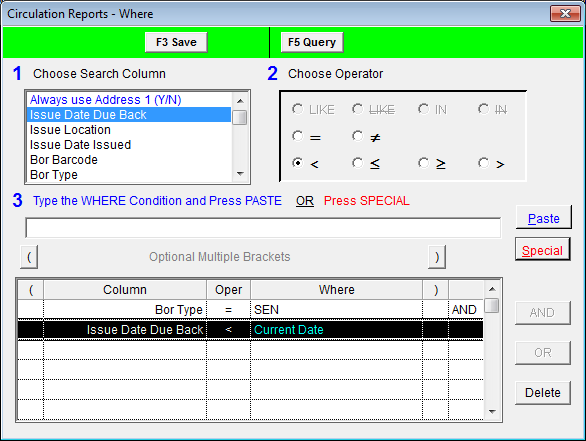
- Enter an appropriate Where statement – for example:
- BorType = SEN (for Seniors)
- Issue Date Due Back < Current Date (select via the Special button)
- Click the F3 Save button when complete.
Order By
- Click the F9 Order button. The Circulation Reports - Order By screen will display:
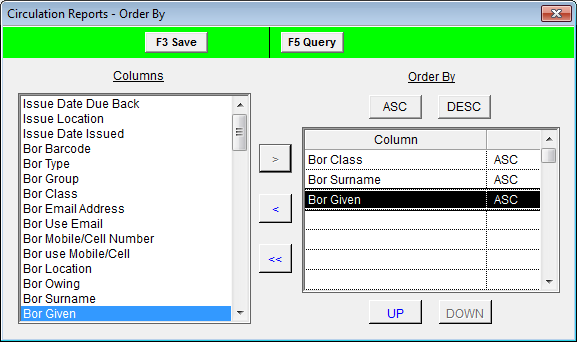
- Set an appropriate order using the arrow keys to move fields from the Columns table in to the Order By table – for example:
- Bor Class
- Bor Surname
- Bor Given
- Click the F3 Save button when complete.
F10 More
| column 1 | column 2 | column 3 | column 4 | column 5 | |
|---|---|---|---|---|---|
| heading | Report Line Number | Line 1 account history NAME | Line 1 overdue history NAME | Line 1 Financial record NAME | Line 1 Fees type name |
| Example | 1 | OVFINACC | OVDFINAL | OVDUEACC | OVDUEFEE |
| comment | Line 1 is used for History and Financial reporting purposes | If left blank, the system will put a Report Type of ACCOUNT in the Borrower History window if Create Hist (Y/N) = Y and Create Acc (Y/N) = Y and the report run via the Scheduler. It is possible to specify your own name – see example (max: 8 chars). Can use to specify 1st, 2nd, etc overdue – for example: OVDUE1,OVDUE2 |
If left blank, the system will put a Report Type of OVERDUE in the Borrower History window if Create Hist (Y/N) = Y and Create Acc (Y/N) = N and the report run via the Scheduler. It is possible to specify your own name – see example (max: 8 chars). Can use to specify 1st, 2nd, etc overdue – for example: OVDUE1,OVDUE2 |
If left blank, the system will put a Financial Type of OVERDUE in the Borrower Financial window indicating the (replacement) Cost for overdue items if Create Acc (Y/N) = Y and the report run via the Scheduler. It is possible to specify your own name – see example (max: 8 chars). Please Note: Customer-defined Financial record NAMES must also be defined in the Circulation Financial Types screen. |
If left blank, the system will put a Financial Type of FEE in the Borrower Financial window for reports that have a FORM_CHARGES field in the report (see example 2) if Create Acc (Y/N) = Y and the report run via the Scheduler. It is possible to specify your own name – see example (max: 8 chars). Please Note: Customer-defined Financial record NAMES must also be defined in the Circulation Financial Types screen. |
| heading | Report Line Number | Line 2 Fee per Item $.c | Line 2 Fee per Notice $.c | Line 2 Fee Print Line | Line 2 not Used |
| Example | 2 | 2.00 | 5.00 | Includes fees of: | <leave blank> |
| comment | Line 2 is used to add Fees to Reports | Enter amount to be charged for each overdue item [Optional] Amount will be added to the FORM_ CHARGES field in the Report |
Enter amount to be charged per notice (in addition to any item fee) [Optional] Amount will be added to the FORM_ CHARGES field in the Report |
Text will be added to the USER_LINE1 field in the Report [Optional] |
- Click the F10 More button. The More screen will display:
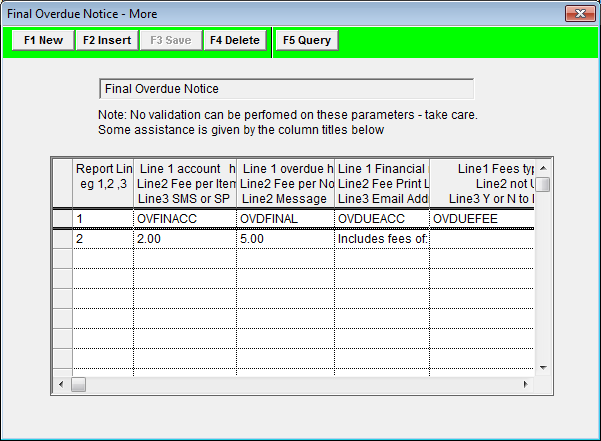
- Click the F1 New or F2 Insert button.
- Enter the following parameters:
- Report Line Number = 1
- Line 1 account History NAME = OVFINACC
- Line 1 overdue History NAME = OVDFINAL
- Line 1 Financial record NAME = OVDUEACC
- Line 1 Fees type name = OVDUEFEE (applicable only if Charges apply –see below)
- Click the F1 New or F2 Insert button.
- Enter the following parameters (example values should be altered according to amount to be charged):
- Report Line Number = 2
- Line 2 Fee per Item = 2.00
- Line 2 Fee per Notice = 5.00
- Line 2 Fee Print Line = Includes fees of:
- Click the F3 Save button when complete.
Add the user-defined financial record and fees type names to the Circulation Transactions Types
Note: Any user-defined names in column 4 and 5 (Line 1 Financial record NAME and Line 1 Fees type name) in the F10 More screen must also be added to the Circulation Transaction Types table.
- Go to Main > Finance > CircFinTypes. Circulation Transaction Types screen will display:
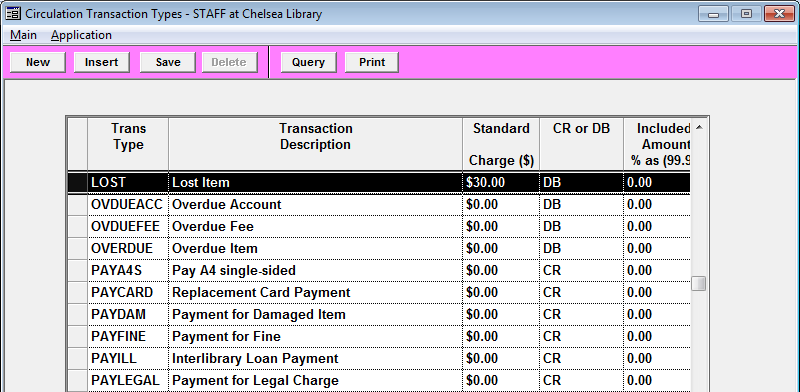
- To add a new Transaction Type:
- Click the New or Insert button.
- Trans Type – Type in the user-defined name – for example: OVDUEACC or OVDUEFEE.
- Transaction Description – for example: Overdue Account or Overdue Fee.
- CR or DB = DB.
- Click the Save button when complete.
Edit the template to include charges
Note: The report template must be altered to include the following fields: FORM_CHARGES and USER_LINE1.
The new &ODFEE.QRP template includes FORM_CHARGES and USER_LINE1.
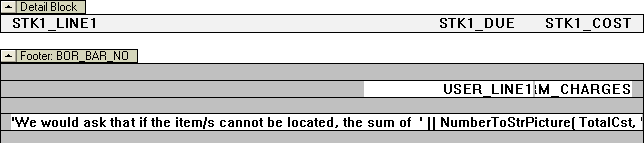
The FORM_CHARGES field can be added to the total charge [Field = FORM_CHARGES] or included as part of a TotalCst. You can also include the field USER_LINE1 which will include the text you entered in the F10 More statement.
View report
When your report is set up with the template, Where statement, and order, you can then preview the report as follows:
- Highlight the report and click the F8 View button.
- The Select File for View pop-up will appear:
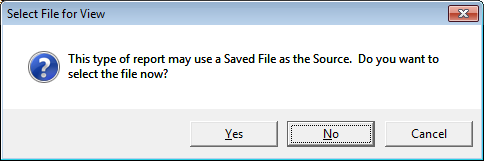
- This type of report may use a Saved File as the Source (rather than the entire database). If you would like this report to use just a Saved File, click the Yes button, otherwise click the No button (generally users select the No button).
- The report will open in the Report – View window.
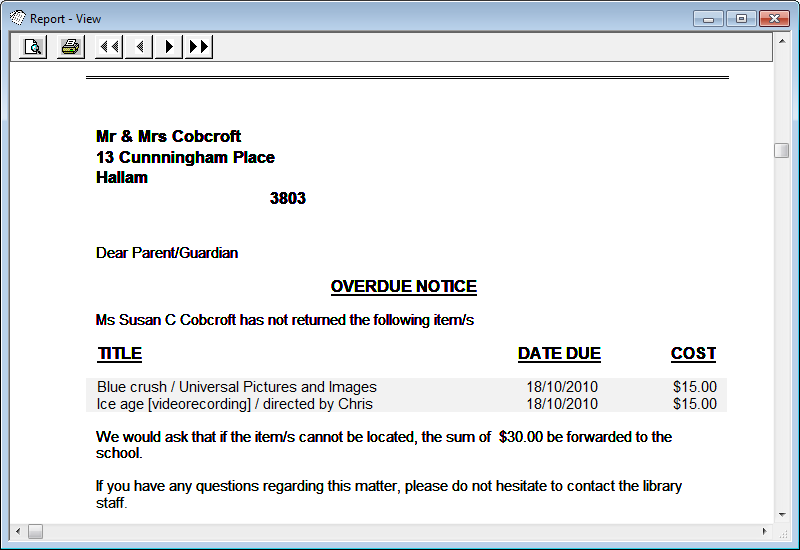
- If you wish to print a hardcopy, click on the print icon.
Print report (via Scheduler)
If you only want to print a report then the quickest method is to use F8 View and print from the Report – View window (see above).
Using the Scheduler (via the F6 Print button) has several benefits over running reports via the F8 View button: It allows you to schedule regularly run reports so that staff do not have to do it manually each time, and it allows for further functions as part of the report such as updating Borrower/Stockitem history, updating the Reservation Status and adding report information to your statistics. Email and SMS reports MUST be run via the Scheduler.
This guide will take you through setting up a report to use RepStartSchedule.
Start the Scheduler
- From the Reports screen, select Application > RepStartSchedule.
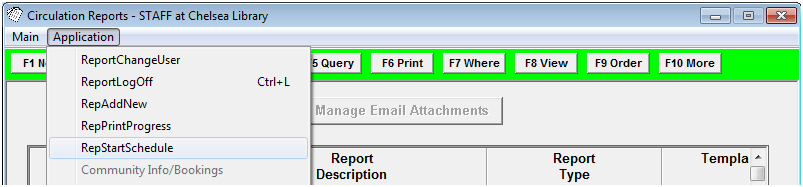
- The Report Scheduler screen will then display.
- Select your printing options: Ensure Printing, E-mail, and/or Save to File are ticked (you can tick all three if you intend on printing up multiple reports using multiple formats during a session).
- Also decide If a report is scheduled by another user do you still want to print it? = Yes/No.
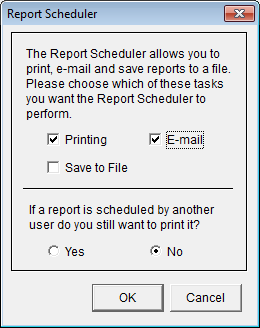
- Click the OK button.
- After clicking OK, if you go back into the Application menu you will see that RepStartSchedule is now greyed out with a tick next to it – this indicates that the Scheduler is now running.

Note: If you need to restart the scheduler at any point, you will need to log out of all Report screens (Ctrl + L) and start at the beginning of these instructions.
Schedule the report
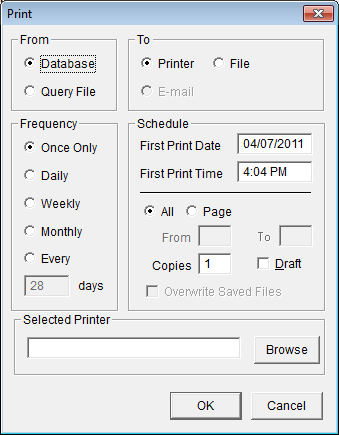
- With your report highlighted, select the F6 Print button. The Print dialogue box will display.
- Select from the following options:
- From:
- Database (to search the entire database)
- To:
- Printer (to generate print reports)
- Frequency:
- Once Only (if this is the only time you're going to print this report)
- Schedule:
- First Print Date (defaults to current date)
- First Print Time (defaults to current time)
- Selected Printer:
- You can specify any active printer on the network to print to – including virtual printer drivers such as a third party software that allows you to print to PDF (For example: CutePDF Writer)
- You can specify any active printer on the network to print to – including virtual printer drivers such as a third party software that allows you to print to PDF (For example: CutePDF Writer)
- From:
- Once you have selected all of your settings, click the OK button.
Check print progress
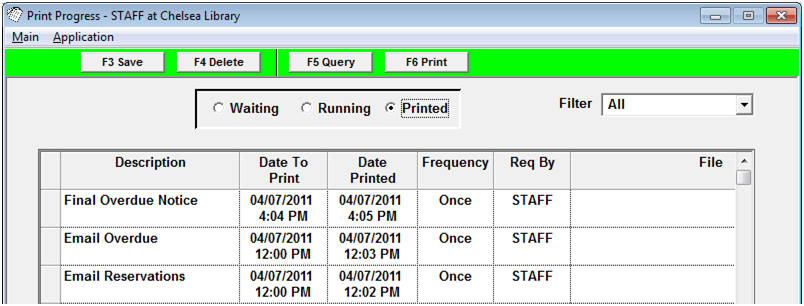
- You can check the progress of your reports at any time by going into Main > Reports > RepPrintProgress.
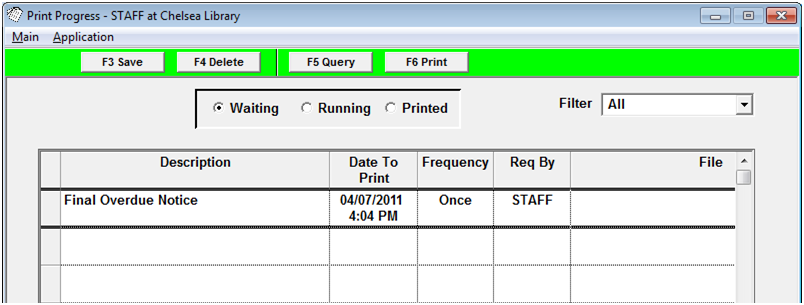
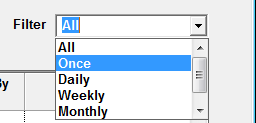
- If your library uses the scheduler for a lot of reports, you can select a frequency type from the Filter drop-down menu at the top.
- Your report will show up in Printed when it is complete.
Borrower
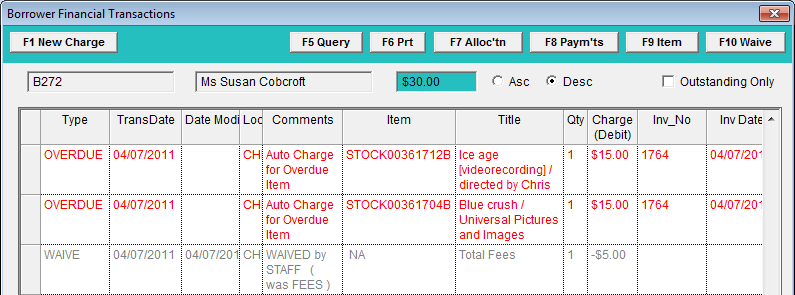
Once the report is printed each Patron will have an entry in the Borrower Financial Transactions window that will show the cost of the item:
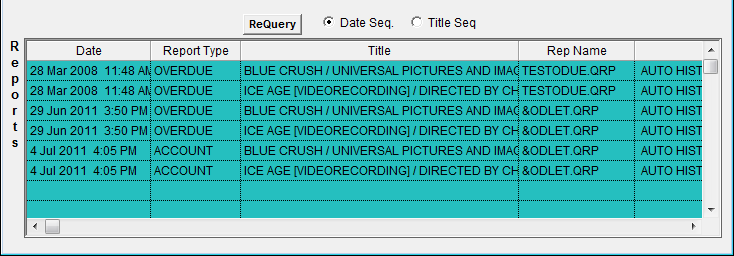
Each Patron will also have an entry listed in the Borrower History window that will show that the report was run off:
- When the item is returned, the following Financial Details prompt will display:
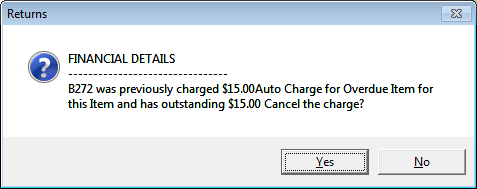
- In order to retain the charge on the Borrowers’ record, click the No button.
Alternate method for defining charges
An alternate method of creating a charge that will remain on the Borrower record is to use CircFinancial to create a charge that will be added to the Borrower record when a specific report is printed (therefore the charge may not necessarily be for an overdue item/s). This charge will not be deleted on the return of the item.
- Launch the Amlib client.
- Go to Main > Finance > CircFinance. The Circulation Transactions screen will display.
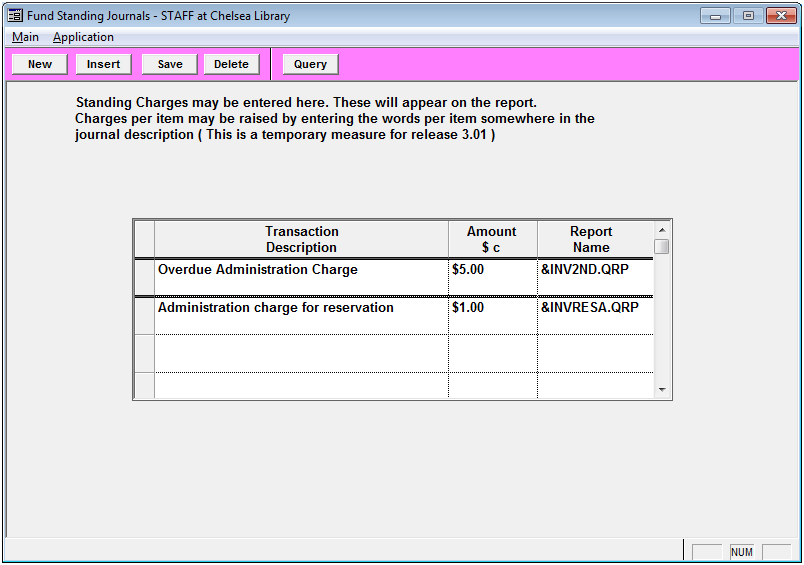
- From the menu, select Circulation > FinStdJnl. The Fund Standing Journals screen will display:
- Click either the New or Insert button.
- Enter the following details:
- Transaction Description – for example: Overdue Administration Charge
- Amount – for example: $5.00
- Report Name – for example: &INV2ND.QRP
- Click the Save button when complete.
Whenever the report is printed (via the Scheduler), the charge will be added to the Borrower Financial record.
In the first example above, any time the report &INV2ND.QRP is printed, a charge of $5.00 is added to the Borrower Financial record of each Borrower for whom a notice is printed.