Purchasing Requests
The Purchase option allows you to track items you may wish to purchase, instead of borrowing via interlibrary loan. This feature allows you to input relevant data about the item you're purchasing, and tracks usage in OCLC Usage Statistics.
Note: Currently, the functionality allows tracking only, but future enhancements are planned.
Add requests to Purchasing Requests:
- Patron initiated requests can appear in the Borrowing Requests > New for Review queue or, if the request matched an automation, the Purchasing Requests > Review for Purchase queue.
- Display requests from the New for Review queue:
-
- On the left navigation, click Borrowing Requests.
- Click New for Review.
- On the New for Review screen, click the request ID or Title to display the request.
- Display requests from Review for Purchase:
-
- On the left navigation, click Purchasing Requests.
- Click Review for Purchase.
- On the Review for Purchase screen, click the request ID or Title to display the request.
- Click New for Review.
- On the New for Review screen, click the request ID or Title to display the request.
- (Optional) Click the Purchase tab to review prices and links to vendor sites such as Get It Now if you subscribe to the service.
- Click the Change Fulfillment Type button at the top of the request and select Purchase Request.
- Complete any desired fields.
Note: Vendor is mandatory.
- Click Save.
- A confirmation message appears and the request appears under Purchasing Requests > On Order.
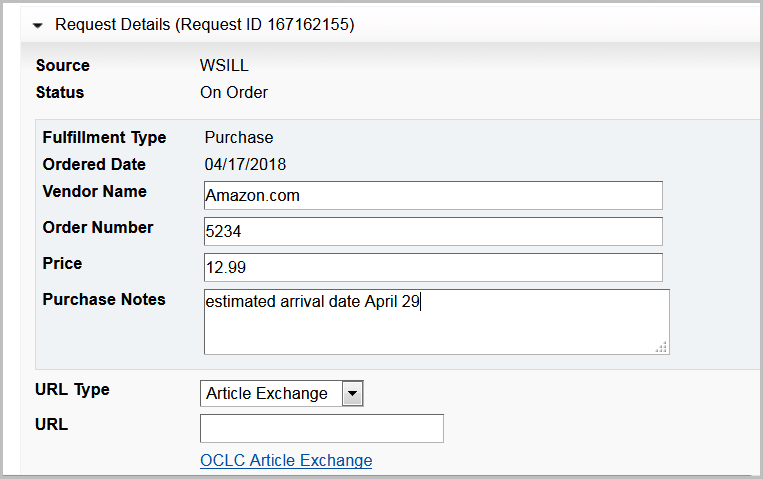
The Purchase Request information displays at the top of the request details.
Complete Purchasing Requests
- When the item is received, manually Mark the request as received in the WorldShare Interlibrary Loan interface.
- If the purchase request is not received:
- The Fulfillment Type of the request can be changed to ILL Request and submitted as a borrowing request.
- Cancel the request as is appropriate.
Note: Requests that are On Order will be aged to Received? status after 21 system days. Please see Request Aging for more information.
Staff Notes
The Staff Notes tab allows you to keep notes that are viewable and searchable only by your library staff. Staff Notes can be added to active and closed requests. The number on the tab indicates how many Staff Notes currently exist for a particular request.
Edit and add Staff Notes
All staff users within an institution can add, edit and delete notes. Any staff member may edit any existing notes. The original author displays in the left column with the most recently-edited-by user name appearing just below the note.
Note: Only staff with the WorldShare ILL Admin role will be able to see the name of the author of the staff notes. Staff with the WorldShare ILL User role will see a date and time stamp for when the note was created/updated along with the name of the library.
The most recently added note will display at the top of the Staff Notes tab. Edited notes display based on the updated date and time.
Add a Staff Note
Note: There can be up to 500 notes per request.
- From the request, select Note from the Actions panel.
- Add the text of your note to the Add Staff Note text box.
- There is a 500 character limit for each note.
- Click Add.
- To remove any text added to the Add Staff Note box, click Cancel.
Edit a Staff Note
- From the request, click on the Staff Notes tab.
- Next to the desired Staff Note, click on the button.
- Select Edit.
- Make the desired edits in the text box.
- Click Update to save your changes.
A message appears confirming the note successfully saved.
Delete a Staff Note
Caution: Deleted notes are not retrievable.
- From the request, click on the Staff Notes tab.
- Next to the desired Staff Note, click on the drop-down.
- Select Delete.
- A message appears asking you to confirm deletion of the Staff Note.
- Click Delete.
A message appears confirming the Staff Note has been deleted.
Usage Reports
The below WorldShare Interlibrary Loan reports include all types of purchase requests:
- Borrower Activity Overview Report
- WorldShare ILL Purchase Request Report
Please see WorldShare Interlibrary Loan reports for more information.