Quick reference: Cataloging in Connexion client
Introduction
The Connexion client is a Windows-based interface to OCLC Connexion® used to access WorldCat for cataloging.
This quick reference provides brief instructions for editing, saving, exporting, and printing labels for bibliographic records; using local files; creating and adding records to WorldCat; replacing WorldCat records; batch processing; and cataloging with non-Latin scripts.
The client supports the following non-Latin scripts: Arabic, Armenian, Bengali, Chinese, Cyrillic, Devanagari, Ethiopic, Greek, Hebrew, Japanese, Korean, Syriac, Tamil, and Thai.
This quick reference does not cover instructions for authorities work or instructions already available in:
- Connexion client basics
- Connexion client setup worksheet
- Quick reference: Searching WorldCat in Connexion client.
Note: Connexion client documentation assumes knowledge of MARC cataloging.
See the client UI Help (Help > Client Help or <F1>) or the online help for complete client documentation.
Open the Connexion client and log on
Open the Search WorldCat client window or browser screen:
- Click Windows Start > Programs > OCLC Connexion or click the client icon (
 ) on the desktop.
 - Click File > Logon, click the Logon button (
 ), or press <Ctrl><F1>.
 - Enter your OCLC authorization and password.
- Click OK or press <Enter>.
Connexion client commands and statuses
Menus/commands
- To use client functions, click a menu name at the top of the client window, and then click a command.
Or
Use equivalent keystroke shortcuts or toolbar buttons (displayed with the command names). - The client installs with pre-set (default) keystrokes and a default set of toolbar buttons on the main client toolbar
Keystroke shortcuts
- Use default keystroke shortcuts or assign your own to activate commands, insert characters, run macros, and insert text strings.
- View key assignments in View > Assigned Keys. To print or copy the list, click Print or Copy to Clipboard.
Note: Before printing, click a column heading to sort the list by data in the column. - Assign your own keystrokes in Tools > Keymaps.
- Print a function key template to put at the top of your keyboard.
Toolbar
- The client installs with three toolbars displayed by default:
- Main client toolbar (with command-equivalent buttons)
- WorldCat quick search tool
- Quick tools for text strings and user tools
- Customize the main client toolbar: In Tools > Toolbar Editor, drag and drop buttons to add or remove, or reset to the default.
- Reposition toolbar buttons in the toolbar: Hold down <Alt> and drag and drop a button to a new position.
- Reposition toolbars: Move a toolbar to the right, left, top, or bottom of the client window by dragging and dropping it by its dotted handle.
- Show or hide toolbars: Click View > Toolbars.
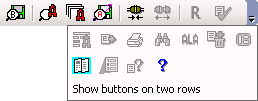
- Show toolbar on one line or two: Click the arrow at the right end of the toolbar, and then click Show buttons on one row (default) or Show buttons on two rows:
Status bar
- Located at the bottom of the client window, the status bar shows, depending on whether a record or a list is displayed:
- For a displayed record: Actions and outcomes; source of record; workflow status; My Status; record number of the total in a list; edit mode; session timing if logged on.
- For a displayed list: Record number of the total in the list for a selected entry.
- Statuses are retained only for online or local save file records.
- To show or hide the status bar, click View > Status Bar.
Selected default function key shortcuts and default toolbar buttons
| Client menu > command | Keystroke | Toolbar button*** |
|---|---|---|
| File > Logon | <Ctrl><F1> | |
| File > Logoff | <Alt><F1> |  |
| File > Print | <Ctrl><P> |  |
| File > Print List | <Shift><F12> | *** |
| File > Print Label(s) | <Shift><F10> | *** |
| File > Exit | <Alt><F4> | *** |
| Cataloging > Search > WorldCat | <F2> |  |
| Cataloging > Search > Online Save File | <Ctrl><F3> |  |
| Cataloging > Search > Local Save File | <F3> |  |
| Cataloging > Browse > WorldCat | <Ctrl><F2> |  |
| Authorities > Search > LC Names and Subjects | <Shift><F2> |  |
| Authorities > Search > Online Save File | <Alt><F3> |  |
| Authorities > Search > Local Save File | <Shift><F3> | *** |
| Authorities > Browse > LC Names and Subjects | <Alt><F2> |  |
| Edit > Validate | <Shift><F5> |  |
| Edit > Control Headings > All | <Shift><F11> | *** |
| Edit > Control Headings > Single | <F11> |  |
| Edit > Control Headings > Uncontrol Single | <Ctrl><F11> | *** |
| Edit > Cut Copy Paste > Cut | <Ctrl><X> |  |
| Edit > Cut Copy Paste > Copy | <Ctrl><C> |  |
| Edit > Cut Copy Paste > Paste | <Ctrl><V> |  |
| Edit > Find/Replace | <Ctrl><F> |  |
| Edit > Enter Diacritics | <Ctrl><E> |  |
| Edit > Reformat | <Ctrl><R> |  |
| Action > Holdings > Update Holdings | <F8> |  |
| Action > Holdings > Produce & Update Holdings | <Shift><F7> |  |
| Action > Holdings > Delete Holdings | <Shift><F8> |  |
| Action > Lock WorldCat Record | <Alt><F8> | *** |
| Action > Release Record Lock | <Alt><F9> | *** |
| Action > Replace Record | <Alt><F10> | *** |
| Action > Replace & Update Holdings | <Alt><F11> | *** |
| Action > Save to Local File | <F4> | *** |
| Action > Delete Record | <Ctrl><Alt><D> |  |
| Action > Export | <F5> |  |
| View > Navigate Records and Lists > Back | <Shift><F9> |  |
| View > Navigate Records and Lists > Forward | <F9> |  |
| View > Label | <F10> |  |
| View > Pinned | <Shift><F4> | *** |
| Tools > Check Spelling | <F7> | *** |
| Help > Client Help | <F1> |  |
| Help > MARC Field Help | <Shift><F1> |  |
Search for WorldCat records
Search WorldCat to find records to use for cataloging.
Use WorldCat search and browse windows
Use the WorldCat search window
- Navigate to Cataloging > Search > WorldCat, click the Search WorldCat button (
 ), or press <F2>.
 - In the Command Line area: Enter a complete keyword, numeric, or derived search or browse (index scan). Use full search syntax (i.e., a single string with index labels, punctuation, search terms, Boolean operators, and qualifiers) in the correct order.
Or
In the Keyword/Numeric area: Enter or select the parts of a keyword, numeric, or derived search using text boxes and lists.
Use the WorldCat browse window
- Navigate to Cataloging > Browse > WorldCat, click the Browse WorldCat button (
 ), or press <Ctrl><F2> to enter a guided browse (index scan) using text fields and lists.
For details on searching and browsing techniques, strategies, syntax, and indexes, see:
Alternative: Use WorldCat quick search shortcut
If you use the command line to search or browse, enter it in the quick search field on the toolbar instead. Click the icon to send the search.

Click the arrow next to the search box to select from 10 previous searches.
Use features of the Search WorldCat window
| Feature | How to use |
|---|---|
| Retain Search | Select the check box to keep the last search term(s). |
| Search for | Enter a search in the text box or click the down arrow to select from up to 10 previous searches. |
 and and  |
Click to toggle between displaying short or full index, language, or material type lists. |
 |
Click to customize the short index or material type list. |
| Apply Language of Cataloging Delimiter | Select the check box and then select a language from the list. Applies to searches in the command line, keyword/numeric boxes, and quick search box. |
| Enter Diacritics | Click to open a window to insert valid diacritics and special characters by selecting an image or a name. |
| Expand/Collapse | Click to collapse the Search window to show only the command line or to return to the full window. |
| Clear Search | Click to clear searches (index selections remain). |
| Settings | Click to open the Search WorldCat Settings window and select options for displaying search results. |
WorldCat search and browse results
Search
The way search results display is based on the number of records retrieved (or you can change how the results display):
| Number of records | Client displays |
|---|---|
| 1 | Full record. |
| 2 to 5 | Brief list: Two-line description of each record. |
| 6 to 100 | Truncated list: One-line description, sorted by data in the index you searched. |
| 101 to 1,500 | Group list: Entries represent groups of records sorted by MARC format and year of publication. |
| Over 1,500 | Error message: Too many records retrieved. Edit or limit search and try again. |
Browse
Browsing results in a list of terms that match or closely match your browse term. The match or closest match is highlighted.
To open a record or another list from a results list, double-click an entry, or highlight an entry and press <Enter>.
Right-click shortcut menu for lists
Right-click in a list. On the popup menu, use the following commands:
| Command | Use to ... |
|---|---|
| Copy | Copy selected entries in the current list. |
| Select All | Select all list entries. |
| List Settings | Open a window to customize the way the list displays:
|
| Reset List Size | Reset column sizes to original (see tip on customizing). |
Tips for customizing a list display
- To resize columns: Click, hold, and drag the vertical corner of a column.
- To re-sort a list by a column: Click the heading of the column. The client re-sorts the list immediately by the data in the column.
Edit records
Note about record limits:
- There are no limits on the number of variable fields or total record length.
- The theoretical limit on the number of characters: Up to 99,999.
View and navigate records
| To do this ... | Use these commands or steps ... |
|---|---|
| Move through three record areas: record information area, fixed field area, and variable field area. | Edit > Next Record Area (or press <F6>). Or Edit > Previous Record Area (or press <Shift><F6>). |
| Show or hide drop-down lists of selectable valid values for fixed field elements. | Drop-down lists of values are available for each element by default. To hide the lists, click Tools > Options > Record Display and click to deselect the Use dropdowns... check box. |
| When you open a record from a list, open the next or previous record without returning to the list. | View > Navigate Records and Lists > Forward (or click the Forward button ( ) or press <F9>). ) or press <F9>).Or View > Navigate Records and Lists > Back (or click the Back button ( ) or press <Shift><F9>). |
| Pin records of the same type to keep them open. Records of different types, such as WorldCat vs. save file records, stay open simultaneously by default. |
View > Pinned (or press <Shift><F4>). Pin a displayed record before opening another record of the same type. |
Open MARC field descriptions
Place the cursor in a variable field or a fixed field element, and click Help > MARC Field Help, click the MARC Field Help button ( ), or press <Ctrl><F1>. The description of the field opens in OCLC Bibliographic Formats and Standards.
Note: This command is also on the right-click menu.
Open RDA Toolkit field descriptions
You must be a subscriber to RDA Toolkit and specify your subscriber logon information in Tools > Options > RDA. See the RDA Toolkit for more information.
Place the cursor in a variable field and click Tools > RDA Toolkit.
Note: This command is also on the right-click menu.
Insert diacritics and special characters
Enter Latin script diacritics and special characters included in a standard set of valid characters adopted by the American Library Association (ALA).
- In a record: Place the cursor where you want to insert and click Edit > Enter Diacritics, click the Enter Diacritics button (), or press <Ctrl><E>.
Or
In a search term or a find or replace term: Click Enter Diacritics in the Search, Browse, or Find/Replace window.
Or
In a label: View a label for the displayed record (View > Label), and click ALA Entry. - In the Enter Diacritics and Special Characters window, select a character from the chart of images or from the list of names.
- Click Insert or Insert and Close.
Note:
- Insert a diacritic after the letter it modifies.
- (Optional) Use default assigned keystrokes to insert characters. Click View > Assigned Keys for a complete list.
Create and use constant data
Create and apply MARC-formatted constant data records to add standard content to bibliographic records without having to re-key.
- Click Cataloging > Create > Constant Data (or press <Ctrl><Shift><N>) and select a MARC format to create a constant data record.
Note: If you set the option to use RDA-based workforms to create bibliographic records (Tools > Options > RDA), the option also applies to creating constant data. AACR2-based workforms are selected by default. - To add or edit data and save the new constant data record:
- Click Action > Save Record to Online File (or press <Ctrl><Alt><V>). You must be logged on to perform this action.
- Click Action > Save Record to Local File (or press <F4>).
- Assign a name to the constant data record.
- (Optional) Select the check box to set the new constant data record as the default, if you use it often.
- (Optional) Add a free-text My Status to help retrieve the record. See Tip: Add My Status to saved records for more information.
- In the Fields to Apply window, click a button to determine which fields in the constant data record to apply.
- Fixed
- Variable
- Both
To apply default constant data:
With an authority record open:
- Click Edit > Constant Data > Online > Apply Default (or press <Ctrl><A>). You must be logged on to perform this action.
Or - Click Edit > Constant Data > Local > Apply Default (or press <Ctrl><Y>).
Create and use text strings
Text strings supplement constant data for entering frequently used, brief data anywhere in a record.
To create a text string:
- Click Tools > Text Strings.
Or
Click the Text Strings quick tool ( ) on the toolbar.
Or
Click the arrow in the Text Strings quick tool and then click Manage. - In the Text Strings window that opens, click Add.
- Enter a unique name in the Description field.
- Enter the text string you want to use in the Text field. Text can be:
- A data cell in a field
- A field (omit spaces between tag, indicators, and field data)
- Multiple fields (enter each field on a separate line)
- Click OK to save the text string.
To insert a text string:
- Place the cursor where you want to insert text.
- Click Tools > Text Strings.
- Select a text string and then click Apply.
Or
- Place the cursor where you want to insert text.
- Click the arrow in the Text Strings quick tool.
- Click a text string name.
Validate records
Automatic validation
Taking a final action on a record interactively or via batch processing automatically validates the record, except, by default, when you export or set holdings on existing records. To change validation for these two actions:
- Click Tools > Options > General.
- Click Validation Level Options.
- Under Bibliographic WorldCat Records:
- Select one of the following for Set Holdings:
- Full (basic validation and verifies relationships among elements)
- Basic (verifies MARC record structure, including elements, length, repeatability, type of data and codes)
- Structure (default) (minimal validation for set holdings actions)
- Select one of the following for Export:
- Full (same as above)
- Basic (same as above)
- None (default) (no validation for export)
- Select one of the following for Set Holdings:
Separate validation
With a WorldCat record or local or online save file record open, or with records selected in a list, while logged on or offline:
- Click Edit > Validate, click the Validate button (), or press <Shift><F5>.
Control headings in bibliographic records
When you control a heading, the system finds a matching authority record and inserts the heading in the bibliographic record as a link. The system automatically maintains future changes to the heading.
- Display a record and click Edit > Control Headings.
- Click to select an action:
- Single (or click the Control Single Heading button () or press <F11) (controls heading of field where cursor is located if exact match is found). This command is also on the right-click menu.
- All (or press <Shift><F11>) (controls all headings if matches are found)
- Uncontrol Single (or press <Ctrl><F11>) (uncontrols heading in field where cursor is located; you must uncontrol a heading to edit the text). This command is also on the right-click menu.
- Uncontrol All (uncontrols all headings)
Controllable fields
- 100, 110, 111, 130
- 600, 610, 611, 630, 650, 651, with second indicator 0
- 655, with second indicator 7 and $2 lcgft
- 700, 710, 711, 730
- 800, 810, 811, 830
Notes on results
| Action | Notes |
|---|---|
| Control Single | If the system does not automatically control a heading, the Control Headings window opens. Use it to select or build and insert a controlled heading manually. The window opens when the system finds:
|
| Control All | If some headings are not controlled, try controlling each singly. |
| Hyperlink | Controlled headings are hyperlinked to the controlling authority record(s). Click a link to open the authority record. |
| Add or Replace record | You must add a new record or replace an existing WorldCat record to retain newly controlled heading(s).
You must have a Full or higher logon authorization to add or replace records. |
|
Note: If the heading changes in the system later, OCLCA is automatically added in field 040 $d. |
|
Insert data from related records
Build a field 760 - 787 or 800, 810, 811, or 830 and automatically insert data from a bibliographically related (cited) record:
- While logged on, add a blank field to a record using Edit > Cut Copy Paste > Insert Blank Field, or position the cursor in the field above and press <Enter>.
- Enter one of the following tags: 760, 762, 765, 767, 770, 772, 773, 774, 775, 776, 777, 780, 785, 786, 787, 800, 810, 811, or 830
- Enter appropriate indicators. Then enter the OCLC number, with or without the pound sign (#), for the related record to cite.
- Click Edit > Insert from Cited Record (or press <Alt><E><I>). This command is also on the right-click menu.
Example
Create a new field and enter tag 780, indicators 0 0, and OCLC number 11553638. The client puts the OCLC number in w and enters the data from record 11553638. The new field looks like this:
780 0 0 Episcopal Church. Diocese of Southern Ohio. $t Journal of the ... annual convention $w (OCoLC)11553638
Right-click shortcut menu for records
Right-click in a record and use any of the following commands on the popup menu. All commands are also on client menus except the one with an asterisk (*) and a note.
| Undo Cut Copy Paste Paste Unformatted Delete Field Copy Field Copy Control Number Control Single Heading Uncontrol Single |
Transliterate > Arabic [or Persian] Right-to-Left Reading Order Insert from Cited Record Edit with Guided Entry Insert Unicode Control Characters* Link Fields Unlink Fields MARC Field Help RDA Toolkit |
| *This command is available only on the right-click menu. Clicking the command opens a list of characters that you can select from. | |
Default keystroke shortcuts for editing and navigating records
Note: * = This command is also on the right-click menu.
| Keyboard shortcut | Corresponding Edit > Cut Copy Paste command | Use to do this ... |
|---|---|---|
| <Alt><E><O> | Copy as Text* | Copy selected content as plain text (ASCII format). |
| <Alt><E><S> | Paste Unformatted* | Paste content from a Web page as a single block. |
| <Ctrl><Z> | Undo* | Undo the last edit. |
| <Ctrl><Shift><Z> | Cancel Changes | Cancel all edits since the last save. |
| <Alt><Delete> | Delete Field* | Delete current field. |
| <Alt><Insert> | Copy Field* | Copy current field. |
| <Alt><Up arrow> And <Alt><Down arrow> |
Move Field > Up [or Down] | Move current field up or down one position. In fixed field with drop-down lists displayed: Display current drop-down list so you can use arrow keys to scroll up or down. |
| <Enter> And <Shift><Enter> |
Insert Blank Field > Above Current Field [or Below Current Field] | Insert blank field above or below current field. |
| <Ctrl><T> | Copy Control Number* | Copy OCLC number. |
| <Up arrow> And <Down arrow> |
None | Move cursor to same position in line above or line below. In fixed field with drop-down lists displayed: Move cursor up or down in list of values for current element. |
| <Shift><Up arrow> And <Shift><Down arrow> |
None | In fixed field: Move cursor up or down to the fixed field element immediately above or below. |
| <Alt><Up arrow> And <Alt><Down arrow> |
None | Move the current field up or down one position. In fixed field with drop-down lists displayed: Display the current drop-down list so that you can use arrow keys to scroll. |
| <Ctrl><Up arrow> And <Ctrl><Down arrow> |
None | Move scroll bar up or down one line. |
| <Right arrow> And <Left arrow> |
None | Move cursor to right or left one character. |
| <Ctrl><Right arrow> And <Ctrl><Left arrow> |
None | Move cursor to first character of next word or to first character of previous word. In fixed field: Move cursor to the right or left one cell. |
| <Shift><Arrows> | None | In variable fields: Select characters (right/left arrows) or lines (up/down arrows), one at a time. |
| <Tab> | None | Move cursor to next field. In fixed field with drop-down lists displayed: Move cursor forward (to the right) from element name to cell, etc. |
| <Shift><Tab> | None | Move cursor to previous field. In fixed field with drop-down lists displayed: Move cursor backward (to the left) through cells. |
| <Page up> And <Page down> |
None | Scroll window up or down one page (screen) to display content immediately above or below current display. |
| <Delete> | None | Delete highlighted text, or if no text is highlighted, deletes one character to the right of the cursor. |
| <Alt><Delete> | None | Delete current variable field. |
| <Backspace> | None | Delete highlighted text, or if no text is highlighted, delete one character to the left of the cursor. |
| <Home> | None | Move cursor to beginning of cell. |
| <Ctrl><Home> | None | Move cursor to beginning of record. |
| <End> | None | Move cursor to end of cell. |
| <Ctrl><End> | None | Move cursor to end of record. |
| <Ctrl><F7> | None | Delete text from cursor to end of cell. |
| <Alt><F7> | None | Delete current word. |
| <Ctrl><S> | None | Move cursor to next subfield or to beginning of next field. |
| <Shift><Ctrl><S> | None | Move cursor to previous subfield or to end of previous field. |
Save records
Save bibliographic records
- Online save file: A single OCLC online file shared by staff at your library who log on using the same OCLC symbol.
- Local save file: One or more files on your workstation or shared drive.
- Display a record or select records in a list.
- Click Action > Save Record to Online File (or press <Ctrl><Alt><V>). You must be logged on to perform this action.
Or
Click Action > Save Record to Local File (or press <F4>).
Note:
- Records saved to the online file no longer expire.
- Locked WorldCat records are unlocked after 14 days.
- The client automatically saves local save file records after actions.
- The maximum number of records for both local and online files is 9,999.
Tip: Add My Status to saved records
Assign a free-text My Status to help retrieve a related group of records from the online or local save file or from constant data files.
- Display a record or select records in a list.
- Click Action > Set Status (or press <Alt><Shift><S>).
Or
Set a default My Status in Tools > Options > My Status to add the My Status automatically whenever you save a record. - Enter My Status using up to 40 characters of free text (e.g., enter your name, a date, a project name, or a combination of these).
- Click OK or press <Enter>.
Delete records from the save file
Display a save file record or select records in a list, and click Action > Delete Record, click the Delete Record button (), or press <Ctrl><Alt><D>.
Search for specific save file records
- Click Cataloging > Search > Online Save File, or click the Search Online Save File button (), or press <Ctrl><F3>. You must be logged on to perform this action.
Or
Click Cataloging > Search > Local Save File, or click the Search Local Save File button (), or press <F3>. - Enter one or more search terms in Search for field(s), select an index for each, and, if multiple terms, select a Boolean operator to combine.
- Limit the search by statuses or other criteria.
- Click OK or press <Enter>.
Find save file records by statuses or by limits only
- Click Cataloging > Show > By Online Save File Status or press <Ctrl><O>. You must be logged on to perform this action.
Or
Click Cataloging > Show > By Local Save File Status or press <Alt><C><H><L>. - Select status(es) or limit(s).
- Click Show Records or press <Enter>.
Tip: Quick way to retrieve save file records
Retrieve all records in the save file and then sort by data in columns.
- Click Cataloging > Search > Online Save File.
Or
Click Cataloging > Search > Local Save File. - Do not enter any terms or criteria in the Search window. Click OK.
- Sort the list by clicking a column heading to group the records you need together (e.g., sort by My Status or by action status).
- Click OK or press <Enter>.
Save file indexes
Online file indexes
| Online file index | Definition/Search format |
|---|---|
| Save File Number | Enter number (1 to 9,999). |
| OCLC Control Number | Indexes 001 (fixed field) and 019. Enter complete number. |
| Title | Indexes 245 a b f g k n p. Enter one or more words from title, separated by spaces. |
| URL | Enter complete URL for Web resource. Omit separator characters (. and /). Include or omit http://. |
| Used Date (date of last modification or re-save) |
Enter all 8 digits of date, in format yyyymmdd. Omit hyphens or other separators. |
| My Status | Enter My Status identifier you assigned. |
Local file indexes
| Local file index | Definition/Search format |
|---|---|
| Save File Number | Enter number (1 to 9,999). |
| OCLC Control Number | Indexes 001 a and 019 a. Enter complete number. |
| Title | Indexes 245 a b f g k n p and 246 a b f g n p. Enter one or more words from title, separated by spaces. Alternative: Combine words with Boolean or or not. |
| Name | Indexes 100, 110, 111, 130, 700, 710, 711, and 730 (all subfields). Enter one or more parts of name, separated by spaces. Alternative: Combine names with Boolean or or not. |
| Standard number | Indexes 010 a b z; 020 a z; 022 a y z; and 028 a. Enter all digits of the number. |
| Holding Library Code | Indexes 049 a. Enter a holding library code. |
| My Status | Enter the My Status identifier you assigned. |
Use local files
When you install the Connexion client, you also install default (empty) local files on your workstation for bibliographic records and constant data.
- DefaultBib.bib.db
- DefaultBibCD.bibcd.db
- Default file location: X:\Documents and Settings\[user name]\ Application Data\OCLC\Connex\Db (X = letter of your hard drive)
- Limitation for each local file: 9,999 records
Use the local file manager to work with local files.
- Click File > Local File Manager or press <Alt><F><L><F>.
- Click a button next to the type of local file you want to work with. A check mark designates the default file.
- Click one of the following buttons, depending on what you want to do:
- Configure Paths to create or delete a local file path name.
- Auto Back Up to clear or select automatic back up and a location.
- Create to create a new file (type the file name only; the client supplies the correct file extension).
- Delete to delete the selected file (you cannot delete the default file).
- Set as Default to set the selected file as the default.
- Authorization to assign a logon authorization and password to use for logon whenever the selected file is open.
- Statistics to show the number of records in the file by specific record statuses.
- Compact/Repair to remove empty space remaining when records are deleted from the selected file or to repair the selected file when you receive erroneous messages that records are in use by another.
Take final actions on records
- Taking actions interactively. The following sections cover taking a specific action on records interactively (i.e., immediately, while logged on).
- Taking actions via batch processing. For instructions on batch processing record actions in the client, see Batch-process WorldCat searches and record actions below.
- Authorization. The final actions you can take on records depend on the cataloging level associated with your logon authorization. See OCLC cataloging authorization levels for record actions and upgrades for more information.
Export records
- Exporting records requires no minimum authorization level.
- Before you export the first time, you must create an export destination. See Export bibliographic records or Setup worksheet for OCLC Connexion client.
- You can export both existing WorldCat records (records that have OCLC numbers) and workforms (new records not yet added).
To export records:
- Display a record or select records in a list.
- Click Action > Export, click the Export button (), or press <F5>.
Caution: If exporting to an existing file, the first time you export, the client may prompt you to choose to overwrite or append data already in the file or to cancel and use another file. Your choice persists each time you export in the same logon session until you close and re-open the client.
Records export immediately, whether you are logged on or offline, unless you set an option to export in batch in Tools > Options > Batch.
Check the Export status in the status bar of a record or in the Export column of a list. If it is R (Ready), your option is set for batch export.
Report errors in records
Reporting errors requires a minimum authorization of Limited.
- Log on. With a record displayed, click Action > Report Error.
- Complete the required fields.
- OCLC symbol
- User name
- (Optional) Select a check box to receive a copy of your report.
- Describe the error in the large text box.
- Click Report Error. The client automatically attaches a copy of the displayed record and sends the report to OCLC quality control staff.
Print labels
Edit and print labels for one record
- Printing labels requires no minimum authorization level.
- Records must have a call number in order to print labels.
By default, labels print immediately whether you are logged on or offline. Check the Label status in the status bar of a record or in the Label column of a list. If it is R (Ready), your option in Tools > Options > Batch is set to batch print labels.
- Logged on or offline, display a record and click View > Label, press the View Label button (), or press <F10>. The client extracts the following information from the record and inserts it in the displayed label:
- Author from main entry fields 1xx
- Title from 245 $a
- Call number based on logon authorization
- Input stamp based on 049 $a
- Edit the label, if needed, and set parameters for print constants, number of copies, and more.
- Click Print or press <Enter>.
Print labels for multiple records without editing
- Logged on or offline, display a record or select records in list, and click File > Print Label(s) or press <Shift><F10>.
- (Optional) Print more than one copy or specify print constants for multiple copies or parts.
- Click OK or press <Enter>.
Save labels
Print labels to a file or edit records with label data and then save them:
- Click Tools > Options > Printing.
- Click Label Options.
- Select the Output to Text File check box.
- Print the labels.
Or
- Edit records with content required to produce the labels you want.
- Save the records to print labels later.
Take update or produce and update actions
- Produce and update actions require a minimum authorization level of Full.
- Add holdings. Update holdings to add your OCLC institution symbol to a WorldCat record to indicate that your library holds the item.
- Add new records. Produce and update actions on workforms also add records you create to WorldCat (the system assigns an OCLC number). See Create records and add to WorldCat and Set actions on records for batch processing.
Update or delete holdings
To update holdings for a record:
- While logged on, display an existing record.
- Click Action > Holdings > Update Holdings, click the Update Holdings button (), or press <F8>.
To delete holdings from a record:
- While logged on, display an existing record.
- Click Action > Holdings > Delete Holdings, click the Delete Holdings button (), or press <Shift><F8>.
Produce and update holdings
- While logged on, perform one of the following actions:
- Display an existing record.
- Select records in a list.
- Click Action > Holdings > Produce and Update Holdings, click the Update Holdings button (), or press <Shift><F7>.
These commands trigger other OCLC services to produce accession lists depending on specifications in your OCLC cataloging profile.
Produce and Update Holdings can be used to:
- Add the record to OCLC MARC Record Subscription file or tape.
- Generate an item on the list from OCLC Accessions List service.
Display holdings for a record
- Display a record and click View > Holdings.
- Select one of the following:
- Default
- All
- Regional
- State
- (Optional)
- To display the institution name for a symbol, move the mouse pointer over the symbol in the holdings list.
- To print the displayed list of holdings, click Print.
Launch local holdings maintenance in the Connexion browser
- Creating and maintaining local holdings records (LHRs) requires a minimum authorization of Full.
- To check whether a bibliographic record has LHRs attached, see the holdings statement at the top of the record.
- Example: Held by OCL/Local OCL holdings - 12 other holdings
- You can open local holdings maintenance, which is in the Connexion browser interface, from within the Connexion client.
To open a Connexion browser session for maintaining LHRs:
- Display a WorldCat record or a record from the online or local save file.
- Logged on or offline, click Tools > Launch Local Holdings Maintenance or press <Alt><T><L>. The client opens Connexion in the browser interface, and automatically logs you on. After logon, the LHR or list of LHRs displays in the browser screen.
- Modify the LHR(s).
- When finished, close the browser window to log off automatically.
Create records and add them to WorldCat
Note about record limits:
- There are no limits on the number of variable fields or total record length.
- The theoretical limit on the number of characters is: Up to 99,999.
Overview
- No minimum authorization is required to create records.
- Adding new records requires a minimum authorization level of Full.
- Always search WorldCat for your item and search again before adding your record to WorldCat to prevent duplicate records.
- Define a classification scheme, holding library code, and institution symbol in Tools > Options > General, Offline Cataloging Options.
You can create a record from an existing record or from a workform, or you can import records from your local system.
Derive a new record from an existing record
Retrieve a WorldCat record that closely matches, or is related to, the item you are cataloging. Use it to derive a workform for a new record:
- Display a record.
- Click Edit > Derive > New Record or press <Ctrl><Alt><C>.
- Select fields to transfer in Tools > Options > Derive Record.
- Change the MARC format using the fixed field drop-down list.
- Click Yes to transfer or No to suppress transferring fixed field values.
- Add data and edit the record as needed to complete the record, and then save it or add it to WorldCat:
- Click Action > Holdings.
- Select one of the following:
- Update Holdings
- Produce and Update Holdings
- Alternate Produce and Update Holdings
See Produce and update holdings for details.
If you are not authorized to add records to WorldCat, you can save, print, or export the new record.
Create a record from a workform (AACR2- or RDA-based template)
Open a workform in a MARC format you select:
- Click Cataloging > Create > Single Record.
- Click one of the following MARC formats:
- Books
- Computer Files
- Continuing Resources
- Maps
- Mixed Materials
- Scores
- Sound Recordings
- Visual Materials
- Add data and edit as needed to complete the record.
- Save the record or add it to WorldCat (see Derive a new record from an existing record, step 3, for details).
Note: By default, the workform that opens is based on AACR2. To use RDA-based workforms, set an option in Tools > Options > RDA.
Import records
Create records in your local system and import them into Connexion as workforms.
- Click File > Import Records or press <Alt><F><I>.
- Enter the full path and file name of your import file, or click Browse to navigate to the file. Files must be MARC-compatible (e.g., files with the extension *.dat).
- Select Import to Online Save File (must log on) or Import to Local File (logon not required, but requires cataloging settings in Tools > Options > General / Offline Cataloging Options).
- (Optional)
- Click Options to apply default constant data or assign a My Status.
- Click Record Characteristics to select a record format (default: MARC 21) and a character set (default: MARC-8) for imported records.
- Click OK or press <Enter>.
- Click Yes to delete your original file or No to keep it. A temporary Import Report displays. Print or copy if needed.
Replace WorldCat records
Replacing WorldCat bibliographic records in WorldCat requires a minimum authorization level of Full.
- Log on and retrieve the WorldCat record you want to modify.
- (Optional) Click Action > Lock WorldCat Record or press <Alt><F8>.
- Add or edit data in the record.
- Click one of the following:
- Action > Replace Record or press <Alt><F10>
- Action > Replace and Update Holdings or press <Alt><F11>
Note:
- The system locks the record automatically before replacing, if not already locked, and then unlocks it when the action is completed.
- If the record replaced is in the online save file, the system automatically deletes it unless you re-save before you close it.
Batch-process searches and record actions
Enter WorldCat searches and/or mark records for actions in one or more local files to process all at once in a batch.
Enter WorldCat searches for batch processing
- Click Batch > Enter Bibliographic Search Keys or press <Alt><B><B>.
- In the Query field, enter a full syntax search as you would in the Command Line of the interactive Search WorldCat window.
- Click Add or press <Enter>. The search is added to the list.
- Repeat steps 2 and 3 to enter more searches.
- (Optional) Import searches from a text file (*.txt). To prepare the text file, use a text editor such as Notepad. Enter each search in full syntax on a separate line.
In the Enter Bibliographic Search Keys window: Click Import and enter the path and file name. - When finished, click Save.
- When ready, run batch processing.
Set actions on records for batch processing
- Save records you want to batch-process in a local save file. Log off if you are online.
- Display a record or select records in the local file list, and then click one of the following actions on the Action menu:
- Delete Holdings
- Produce
- Replace
- Submit for Review
- Update Holdings
- Export*
Click File > Print Label(s)* to batch print labels.
*Required For batch Export and Print Label(s), you must set options in Tools > Options > Batch to prevent immediate export or print. - When ready, run batch processing.
Remove actions from records marked for batch
Remove the Ready Status from records to remove them from batch processing:
- Display a marked record or select marked records in a local save file list.
- Click Action > Set Status or press <Alt><Shift><S>.
- Under Remove ready status for batch, select one or more check boxes for action(s) you want to remove.
- Click OK or press <Enter>.
Run batch processing
The Connexion client automatically logs on to run batch processing.
Required: You must set a general default logon authorization in Tools > Options > Authorizations or a file-specific authorization in File > Local File Manager (click Authorization) for automatic batch logon.
To run batch processing:
- Click Batch > Process Batch or press <Alt><B><P>.
- Select the local file(s) containing searches and actions you want to process. You can select an unlimited number of both bibliographic and authority files to run at the same time.
- Under Process, select a check box to select searches, record actions, export, and/or label print for processing.
- Select a processing order in the Bibliographic [and or Authorities] Processing Order list. By default, files are processed by Date/Time added [to the save file].
- (Optional) Click Search Options to assign a My Status or apply default local constant data to records downloaded from searches.
- When ready, click OK or press <Enter>. Batch processing runs immediately.
Quick batch: Set or delete holdings by entering OCLC numbers
Batch-process Update Holdings, Produce and Update Holdings, or Delete Holdings by entering only the OCLC numbers of records. You do not have to retrieve the records first before taking these actions.
- Click Batch > Holdings by OCLC Number or press <Alt><B><H>.
- Enter OCLC record numbers in the large text box, one number per line.
Or
Click Import and enter the path and file name of a text file of OCLC numbers (each on a separate line) or navigate to the file.
Recommended limit: No more than 2,500 OCLC numbers per batch. - Select a button next to the holdings action you want to process.
- When ready, click OK or press <Enter> to batch-process immediately.
Use non-Latin scripts for cataloging
Overview
The client supports the following non-Latin scripts: Arabic, Armenian, Bengali, Chinese, Cyrillic, Devanagari, Ethiopic, Greek, Hebrew, Japanese, Korean, Syriac, Tamil, and Thai.
Input methods
If you use non-Latin scripts and English is the default language on your workstation, you may need to install other languages and input keyboards or Input Method Editors (IMEs) in Windows. Access to languages and input keyboards may differ according to your version of Windows. See Windows Help (Start > Help and Support) for information and instructions.
Alternative: RLIN21 keyboards
See Install RLIN21 Arabic, Cyrillic, Hebrew, or Latin keyboards for instructions for installing RLIN21 keyboards for Arabic, Cyrillic, and Hebrew scripts.
Valid characters
Character sets in MARC 21 Specifications for Record Structure, Character Sets, and Exchange Media Code Tables define the scope of valid characters for Arabic, Chinese, Cyrillic, Greek, Hebrew, Japanese, and Korean.
For Bengali, Devanagari, Tamil, and Thai, the client supports Unicode 4.0 characters in these ranges: U+0980 to U+09FF (Bengali), U+0900 to U+097F (Devanagari), U+0B80 to U+0BFF (Tamil), and U+0E01 to U+0E5B (Thai).
Guidelines
- Records with non-Latin script data must meet MARC standards.
- Use non-Latin script data only, or romanized (Latin-script equivalent) data only, or both in records.
- Follow guidelines in ALA - LC Romanization Tables for romanized data.
- Use multiple supported non-Latin scripts anywhere in a record, including within a single field.
Client tools for non-Latin scripts in records
Use the following commands as tools to help manage multiscript data:
| Command | Description |
|---|---|
| Edit > Linking Fields > Link or Unlink | Links or unlinks non-Latin script fields with Latin script fields.
Note: This command is also on the right-click menu in records. |
| Edit > MARC-8 Characters > Convert to MARC-8 CJK | Converts non-MARC-8 CJK characters to equivalent MARC-8. |
| Edit > MARC-8 Characters > Verify or Clear | Verifies characters separately from record validation or clears highlights from invalid characters. Unavailable for Bengali, Devanagari, Tamil, and Thai. These scripts are verified when you validate records. |
| Edit > Transliterate > Arabic or Persian | Transliterates romanized data in records into Arabic script data.
Note: These commands are also on the right-click menu. |
| File > Import Records; click Record Characteristics | Select a record standard (default: MARC 21) and character set (default: MARC-8) for imported records. |
| Tools > CJK E-Dictionary | Helps select characters for Chinese, Japanese, and Korean script data. |
| Tools > Options > Export; click Record Characteristics | Select a record standard (default: MARC 21) and character set (default: MARC-8) for imported records. |
| Tools > Options > International | Select or clear options for:
|
| View > Align Right | Align Arabic or Hebrew script data for record display and print.
Note: This command is also on the right-click menu. |
| On right-click menu only—Insert Unicode Control Characters | Insert control characters to correctly display left-to-right multiple-digit numbers and punctuation in Arabic, Persian, and Hebrew records. |