Configure COUNTER 5 vendors for reporting
Search for the vendor to configure
If a vendor already exists in the License Manager system, search for and configure the vendor to begin harvesting usage data. If a vendor does not yet exist in the system, refer to Request a Vendor to request a new vendor.
Request a vendor
Request the addition of COUNTER SUSHI Vendor to License Manager.
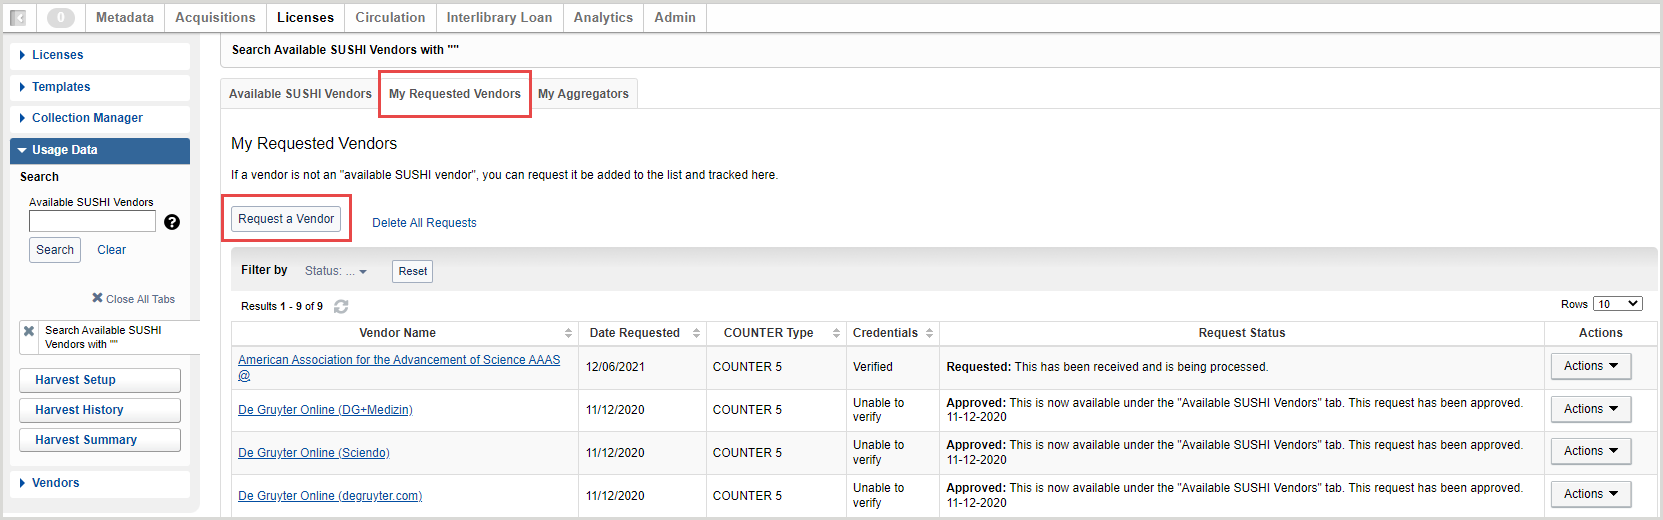
- On the left side of the screen, expand Usage Data.
- Search for a specific vendor in the Available SUSHI Vendors box or leave the box blank and click Search.
- From the search results screen, select the My Requested Vendors tab.
- Click the Request a Vendor button.
- Enter the required information on the Request a Vendor screen. Refer to the COUNTER Registry for recommended values and requirements for the fields below.
- Vendor Name: Use the search box to enter the vendor you wish to add. If you cannot find the vendor you wish to add, create a new vendor using the Vendors section on the left-hand navigation. See Create a vendor for more information.
- Knowledge Base Provider: Use the search box to enter the Knowledge Base Provider name and select from a drop-down list. Selecting a Knowledge Base Provider will autofill the Provider ID field.
- Provider ID: A unique identifier for the vendor. To retrieve the Provider ID, find the collection on a new or existing license. The Provider ID is included in the Provider column in the Collections tab of a license.
- If the desired vendor does not appear in the Knowledge Base Provider drop-down and you do not know the Provider ID, enter a Provider ID of “unknown” when you submit the vendor request.
- Sushi Server URL: Enter the URL of the COUNTER SUSHI API for the requested vendor. This URL is different than the URL of the vendor's main webpage.
- Example URL: https://sushi5.scholarlyiq.com/counter/r5/reports
- For the URL to function in License Manager, it must end in "/reports" even if the vendor does not publish the URL in this style.
- Special Considerations: Optional. Select if your vendor requires IP ranges when enabling SUSHI harvesting from OCLC. OCLC's IP addresses will appear so you can share them with the vendor.
- Version: Select the COUNTER type to setup for the vendor.
- Report Type: Select at least one report type to enable for the vendor.
- Credentials: Enter your library's SUSHI credentials to enable testing of the vendor connection. Fields vary by vendor.
- COUNTER 5: Enter at least one of the Platform, API Key, Requestor ID or Customer ID.
- Click Test & Save.
Once you have requested a vendor, License Manager will test the connection based on the supplied credentials. Requested vendors will appear with a Request Status on the My Requested Vendors tab. Statuses include:
- Approved: The vendor's credentials have been verified and the vendor is approved. The vendor is available under the Available SUSHI Vendors tab.
- Requested: If License Manager is unable to verify the vendor with the credentials provided, the vendor will be reviewed by the License Manager team.
- Declined: The vendor is not approved for SUSHI harvesting. A reason the vendor has been declined will be provided. Use the Actions drop-down to edit and resubmit the request.
You can configure an Alert to notify you when a vendor has been approved or declined. Refer to Configure Alerts for more information.
About License Manager and harvesting COUNTER usage reports via SUSHI
WorldShare License Manager currently supports the COUNTER 5 reports listed below.
- COUNTER 5: PR, PR_P1, IR_M1, IR Master, IR_A1, TR, TR_J1, TR_J2, TR_J3, TR_J4, TR_B1, TR_B2, TR_B3, DR, DR_D1, DR_D2
To find more information about COUNTER reports in relation to WorldShare Reports, see WorldShare Reports and Report Designer, E-Resources reports.
Watch a video
SUSHI reports
Vendors and vendor-specific requirements for harvesting COUNTER 5 reports via SUSHI
Refer to the registry of COUNTER-compliant vendors for the configuration details needed to harvest usage data for your vendor. All vendors require credentials or identifiers and some vendors require other unique steps. See the registry for the most up-to-date details.
The required fields needed to successfully configure SUSHI vendors are also listed on each vendor's configuration screen within License Manager.