OCLC Support

Receipts

Find information about the available Circulation receipts and learn how to edit a circulation receipt and customize receipt labels.

To access this screen, sign in Service Configuration, open the WMS Circulation left navigation, select Notifications and Receipts, and then select the Receipts link.

Use the Circulation receipts screen to customize receipts. Receipts can be printed or emailed to the patron.

  • Status: Indicates whether the receipt has been edited.
  • Last Modified: Date and time the receipt was last edited.

When a receipt is printed or manually emailed from WorldShare Circulation, the system uses the language and locale that matches your institution's WorldCat Registry's Currency and Locale settings to provide consistent content in all printed receipts. Receipt language will always match your institution's configured locale even if your browser and/or WorldShare session prefers a different language.

  • Language and locale settings impact a receipt's default field labels, material format values, and the formatting of dates, times, and monetary amounts. Customized receipt labels appear as entered in the OCLC Service Configuration. See Customize Receipt Labels.
  • Supported languages include:
    • English (Australia, Canada, Netherlands, US, and UK)
    • French (Canada and France)
    • Dutch
    • German
    • Spanish
    • Italian
    • Japanese
    • Korean
    • Chinese

View circulation receipts

Use the Circulation Receipts screen to view all the receipts available for editing. The following describes the fields on the Circulation Receipts screen:

Receipt name Description
BILL
CANCEL
  • From the Bills tab of a patron record:
    • When canceling a bill, choose whether to print or email a receipt.
    • For information on canceling a bill, see Cancel a bill.
CHECK_IN
  • From the Check In screen:
    • Select the checked in items, choose a Receipt Option, and click Receipt.
    • The Email option will only display if all items selected are for a single patron.
    • Includes the External Request ID:
      • Request ID from WorldShare ILL or Tipasa
      • PFL or AFL number assigned to a ZFL-Server request
      • Order Item Number or Reference ID from WorldShare Acquisitions
    • For information on checking in items, see Check in items.
  • For information on automatically sending an email notification of a check-in, see Additional Patron Notifications
DUE_DATE
  • From the Checkout tab of a patron record:
    • Select items from the check out and click Receipt.
    • Items become automatically selected when they are checked out to a patron.
    • Includes the External Request ID:
      • Request ID from WorldShare ILL or Tipasa
      • PFL or AFL number assigned to a ZFL-Server request
      • Order Item Number or Reference ID from WorldShare Acquisition
    • For information on checking out an item, see Check out items.
    • For information on automatically sending an email notification of a change in due date, see Additional Patron Notifications
HOLD
  • From the Check In screen:
    • When an item is checked in and it fulfills an open hold request.
    • You must select a Receipt Option in order for the receipt to print or be emailed.
    • Includes the External Request ID:
      • Request ID from WorldShare ILL or Tipasa
      • PFL or AFL number assigned to a ZFL-Server request
      • Order Item Number or Reference ID from WorldShare Acquisition
    • For information on checking in items, see Check in items.
ILL_SHIP
  • From the Check In or Checkout screen:
    • If using ZFL-Server integration.
    • When a borrowed ILL item is checked in and ready to be returned.
    • When an ILL item is checked out to lend to a borrowing library.
PULL_LIST_ENTRY
  • From the Pull List:
    • Select items from the pull list (the Select for Print / Forwarding column must be visible) and click Receipt.
    • This is not the same as printing the entire pull list.
    • Includes the External Request ID:
      • Request ID from WorldShare ILL or Tipasa
      • PFL or AFL number assigned to a ZFL-Server request
      • Order Item Number or Reference ID from WorldShare Acquisition
    • For information on the pull list and configuring its columns, see Pull list and Clear hold shelf.
REFUND
  • From the Bills tab of a patron record:
    • When refunding a bill.
    • For information on refunding a bill, see Refund a bill.
ROUTING
  • From the Check In screen:
    • When an item is checked in and needs to be routed to a different branch.
    • You must select a Receipt Option in order for the receipt to print or be emailed.
    • For information on checking in items, see Check in items.
SCHEDULE
  • From the Check In screen:
    • When an item is checked in and it fulfills an open schedule request.
    • You must select a Receipt Option in order for the receipt to print or be emailed.
    • For information on checking in items, see Check in items.

Edit a circulation receipt

  1. Click the Receipt Name you want to edit.
  2. (Optional). Enter a header.
    • The text you enter will appear at the top of the receipt.
    • Do not enter more than 200 characters.
  3. Select the check boxes to indicate the information you want to include on the receipt.
    • If you want this information to also be included on the header of the receipt, click Show in receipt title.
  4. (Optional). Enter a footer.
    • The text you enter will appear at the bottom of the receipt.
    • Do not enter more than 200 characters.
  5. Click Save.

Customize Receipt Labels

Receipt label fields, which appear below the receipt header, are customizable. To customize your receipt labels, from the Circulation Receipts screen:

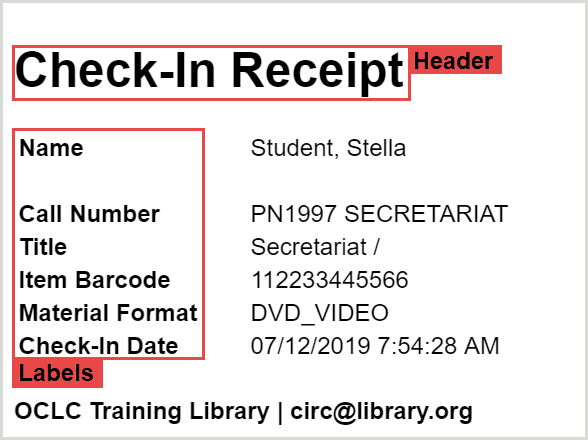
Receipt labels and header - Image
Circulation receipts - header and labels
  1. Select the Custom Receipt Labels link.
  2. Review the default label text and enter customized text, if desired. Labels are grouped into three categories: Item, Patron, and Other.
  3. Click Save.

The customized label text appears on printed receipts.  When reviewing receipt templates, the customized label text will display with the default text in parentheses. 

To revert a customized label back to the default text, clear the Custom Label field and Save.