Set / reset with temporary password
The Reset Password facility enables you to allow your users to set and reset their own passwords, so that library staff do not need to set the users’ passwords initially, and so that your users don’t have to divulge their password to library staff in order to log into Folio and use the end user services such as reservations and renewals.
The Reset Password facility can be configured in one of two ways:
- to send an email containing a temporary password to the user, which the user then uses to log into Folio and set or reset his/her password on the Account Details screen
- to prompt the user to set or reset his/her password directly
The first option is a much more secure option and is described here. Alternatively see set or reset password directly
Workflow in Folio
On entering the barcode, Folio then asks for their email address and other security question(s) you may have configured. On submitting the correct information, Folio responds:
Folio has sent you a temporary password that will expire in [24] hours
- depending on configuration settings
The end user would receive an email or SMS such as:
Your Folio temporary password is:
TEWT7KRQ2Z
This password is usable for the next 24 hours, until 22-Jan-2018 14:41.
The end user then logs in to Folio using their library barcode and the temporary password. They should access their Account details in Folio and double-click the Password field. Folio prompts them to enter a New Password and to Confirm Password.
Enable login option on the Folio menu
To make the Login option display at the top of the Folio screen, you need to check this setting is enabled, or enable it
- Go to OPAC> Configuration Settings.
- Use the search Configuration Settings by Setting to find allow_login.
- If the setting does not exist, click New Record to create it.
- Edit the following fields to include these values:
| field | Value |
|---|---|
| Ini File / Config Block | g_menu |
| Value | "Y" (encase in double quotes) |
| Include | Yes |
To specify the name of the Login option
- Go to OPAC> Configuration Settings.
- Use the search Configuration Settings by Setting to find page_title_login.
-
If the setting does not exist, click New Record to create it.
- Edit the following fields to include these values:
| field | value |
|---|---|
| Ini File / Config Block | login |
| Setting | page_title_login |
| Value | "Login" (encase in double quotes) |
| Include | Yes |
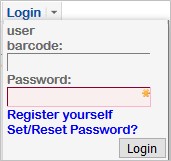
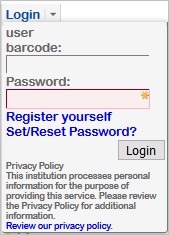
Password configuration on the login form
The following settings are required to configure the login form correctly, for example:
- Go to OPAC> Configuration Settings.
- Use the search Configuration Settings by Setting to find the following settings.
- If the setting does not exist, click New Record to create it.
- Edit the following settings to include these values:
| Setting | Purpose | Fields | Values |
|---|---|---|---|
| password_required |
Make the Password field mandatory on the Login form and set the text to display if someone is logging in without entering a password. Note: Users without passwords in their User record will then no longer be able to log in. The Login form will show a mandatory password field (*) as soon as the user clicks the Login option. |
Ini File / Config Block | login |
| Setting | password_required | ||
| Value | "You must enter a password to log in. If you have not yet set your password, ask a member of library staff for the temporary password, then click the Set/Modify Password link to set your own password" | ||
| Include? | Yes | ||
| password_reset_link | Define the text of the Set/Modify Password link | Ini File / Config Block | login |
| Setting | password_reset_link | ||
| Value | "Set/Reset Password?" (encase in double quotes) | ||
| Include? | Yes | ||
| password_reset_allowed | Configure the login form to display the Set/Modify Password link | Ini File / Config Block | login |
| Setting | password_reset_allowed | ||
| Value | true | ||
| Include? | Yes |
Configure a password reset email notice or SMS
A default example notice is provided.
- Go to Alerting> Notices.
- Search %password to retrieve either
Example Password Reset Email Notice
Example Password Reset SMS Notice
- Create a copy of the example and edit the Notice Text and Subject line of your copy as required.
Do NOT set Enabled=Yes in this notice. OLIB will still send it to the user when he/she clicks the Reset Password option in Folio. (If you set Enabled =Yes, the message will be sent to the user every time the library edits their user record).
Configure password reset validation details in OPAC Defaults
In Folio, these prompt the user for some information to validate themselves when they click Set/Reset Password.
- To configure these go to either:
- System Administration> OPAC Defaults (system-wide)
- OPAC> Password Reset Options (at Location level)
| Field name | Description |
|---|---|
| Min. Validity (mins) | Minimum time allowed between password resets |
| Max Validity (hours) | Temporary password validity (before it gets ignored) |
| Temporary password complexity | Letters only, numbers only, both, anything printable |
| Length | Temporary password length |
| Potential validation fields |
List of user fields to validate the password reset request. One or more from the following ending in semi-colon postcode (for any address) - borrowers.note1-10 (labelled as security questions on account details) - last 4 digits of phone number (home, office or mobile) - barcode of an item currently on loan - outstanding balance - borrowers.identification - an old password (by extending the User Update Audit Trail to record encrypted versions of old passwords: thus this is “from here on ...” and cannot be used for passwords the user had prior to OLIB9 SP6) E.g: postcode;phone;note1; You can also include any column name from the BORROWERS table by adding “_” (underscore) to the column name. For example fname_ for the user’s forename. In addition, a more user-friendly label is preferably created for this in g_forgotten_password (fname_label setting) such as “Forename”. A system secret string (see below) can be entered instead of or as well as other validation fields. To use this, enter the text secret; ...followed by semi colon. |
| No. Fields to request | Enter the number of user fields to request that should be validated (‘x’) |
| No. Fields to validate | Enter the number of user fields to require correct validation (at least 1) |
| Password Reminder Field | Optional configuration of a field (e.g. one of the note fields) for the user to store a password reminder comment. If this field is populated, display it as a hint for the password field on the login form. Do not allow the password reminder and the password to have the same value. |
| Preferred Notice, Alternative Notice To User | Select a preferred alert notice to use and an alternative (if the user does not have suitable contact information for the preferred notice) |
| Notice to Library | Select the notice that will be used if the user does not have suitable contact information for either notice. |
- Next, go to OPAC> Configuration Settings.
- Select the search Folio Configuration Settings by Setting.
- Search usdetails (user details array).
- Open the "mailid" option (Value MAILID EM EMail address) and set Include=Y.
Review "forgotten_password" settings
These can be found in g_forgotten_password and can be edited as required. These set the text of the headings for the various pop up boxes presented to the user when they click Set/Reset password.
Note, if a setting does not exist in g_forgotten_password you can create it in OPAC> Configuration Settings.
Go to OPAC> Ini Files / GCBs and search for g_forgotten_password:
| Setting | Value |
|---|---|
| email_label | "Enter your student email address" |
| first_password | "ask user" Set Include=No |
| passreset_page1_heading | (setting ID 605882) e.g. “Please enter your user number and click ‘Continue’ to proceed” |
| passreset_page2_heading | (setting ID 605881) e.g. “Please provide the requested information to confirm your identity, and click ‘Continue’ to receive a temporary password” |
| password_reset_advice |
(setting ID 605850) e.g. “You have been sent a temporary password that will expire in 24 hours” Change this to correspond to the time you specified in OPAC Defaults. |
| password_unrecognised_barcode | If the user enters an unrecognised barcode when prompted, Folio displays the message "The user ID that you entered is not recognised. You must contact the library for them to assign you a valid user ID". If you want to change the message, create this setting in OLIB, with your preferred text contained in the Value field in double quotes. (Sequence 1=1, Sequence 2=0). |
| secret_label | "Enter the temporary password you have been given by the library staff" |
| temp_password | "ask user" Set Include=No |
Note: where the above settings are requesting that the end user enters some private data, you can obscure this data while the user is entering it. Open the relevant setting and set Value 2 = "hidden".
Enable the option to allow users to set their password for the first time (g_forgotten_password)
Use the settings:
first_password set Include=No
temp_password set Include=No
Enable the prompt for email (g_forgotten_password)
You will probably need to create the setting email_label. This is the Email field presented to the user during reset.
Enter a random high number, e.g. 5298, in Sequence 1, and 0 in Sequence 2.
For temporary passwords (g_forgotten_password)
Optionally, create the setting secret_label, with Include = Y and with Value 2 = "hidden" (obscuring the text when the end user is entering the temporary password).
Configure Folio Account Details screen
The password entry and confirmation fields on the Folio Account Details screen will be required. This will allow users to change their password in Account Details after they log in to Folio.
- Go to OPAC> Configuration Settings.
- Select the search Folio Configuration Settings by Setting.
- Search for usdetails to display the options in the hitlist.
- Modify the one that relates to the password field (with “password" at the beginning of the Value field).
- Set Value to
"password E <view>Password</view><edit>New password:<br/>Confirm password:</edit>".
- Ensure that Include? = Yes, and save your changes.
Note: the above example includes the HTML line break tag (<br/>) immediately preceding the Confirm password string. Do not remove it.
(The text between the <view>…</view> tag is displayed when the Password field is displayed in read-only mode. The text between the <edit>…</edit> tag is displayed when the Password field is displayed in modify mode, i.e. after the user has double-clicked Password).
This completes the basic configuration for Set/Reset Password.