Create an Excel file of barcodes
Learn how to create a list of barcodes in Amlib to be used for the Overdrive Card manager and other e-book platforms.
This report is used to create a list of barcodes to be used for the Overdrive Card manager and other e-book platforms that require a barcode list of the borrowers.
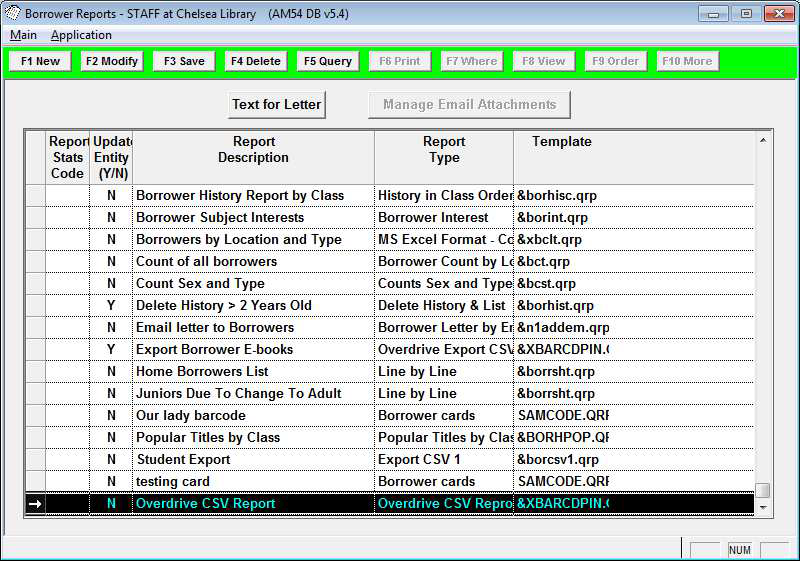
Add New Report to Amlib Reports
- Save the file &XBARCDPIN.qrp to your Amlib Reports folder, or your documents folder if being done on a single PC.
- Go to Main > Reports > RepBorrower.
- Click on Application > RepAddNew.
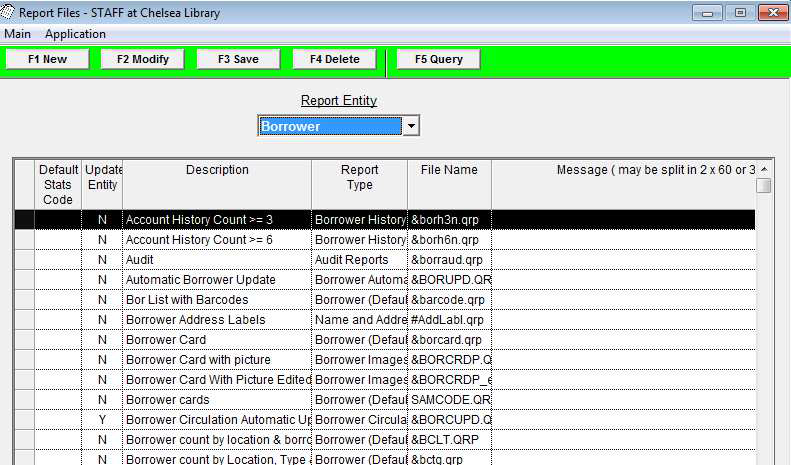
- Click on F1 New.
- Type in a Description – for example: Overdrive CSV Export
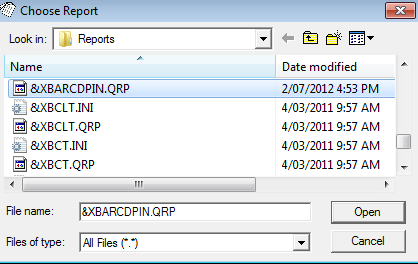
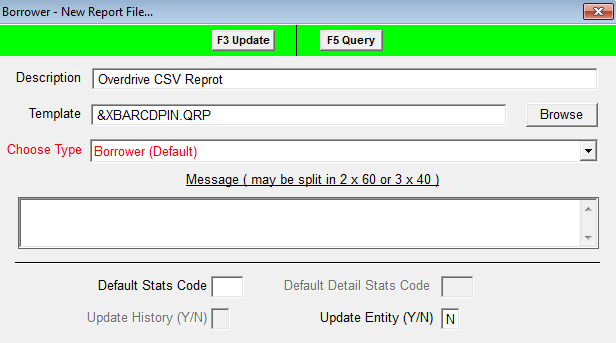
- Browse to the Amlib/Reports folder on your Amlib and locate the template (&XBARCDPIN.QRP) to be loaded (if the template has been loaded onto your PC –then navigate to the local folder). Select File Of type ‘All files’.
- Click the Open button.
- Select the appropriate Choose Type – Borrower (Default).
- You can leave Default Stats Code blank.
- Update Entity (Y/N) = N
- Click the F3 Update button.
- Close out of the Report Files window.
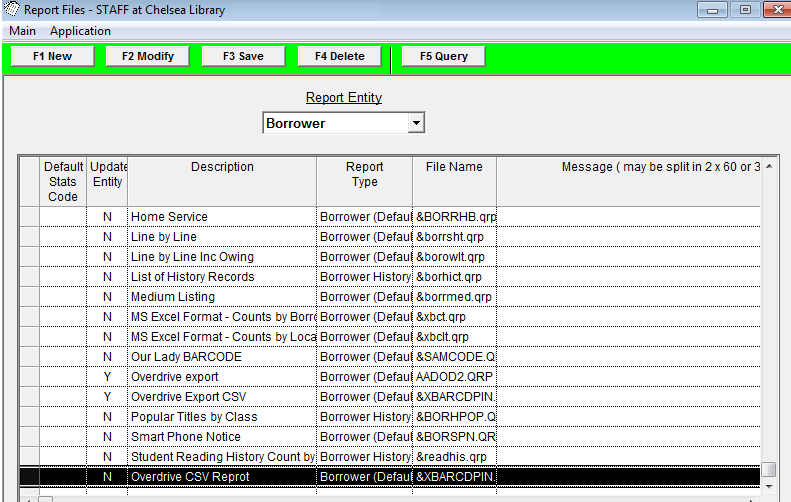
- The template is now loaded and available for use in a Report.
Preparing New Report for Use
- Go to Application > RepBorrower.
- Click on F1 New.

- Find the report you just created, highlight it and click on Select.
- Type in a description then click on F3 Save.
Create your Barcode file
- Select the report you created (eg. Overdrive CSV Export)
- Click on F7 Where.
- Parameters should be something like:
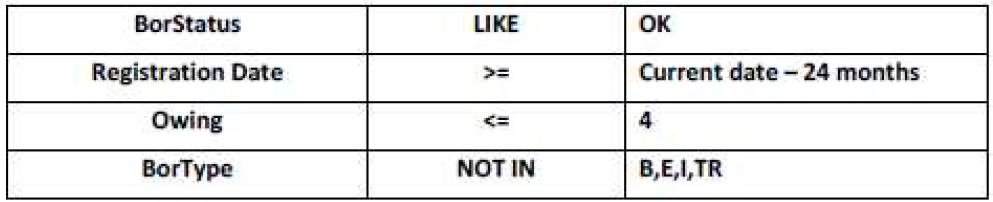
These parameters will find all borrowers who have registered in the last 2 years, with no outstanding accounts, owing less than $4.00 but does not include Borrowers of the type Bulk loan, External Agency, ILL or Traveller. Choose parameters that fit you r library but they must include the BorStatus and Registration date.
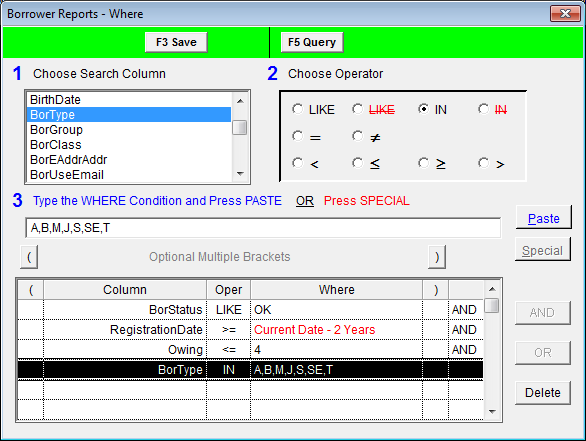
- Select F3 Save.
- Click on F6 Print and select print to File then OK.
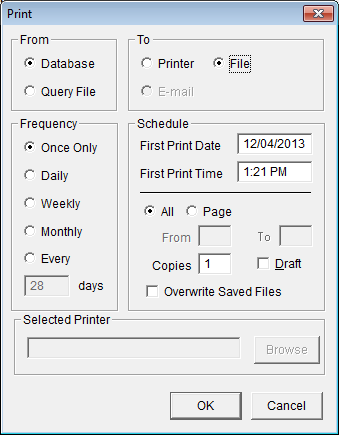
- When the save box opens
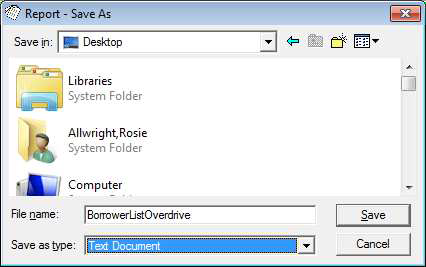
Name the file (eg. Borrower list overdrive) and save as a text document (.txt) or it will not open properly in Excel. Don’t save as Rich text. - Click on Application > RepStartSchedule.
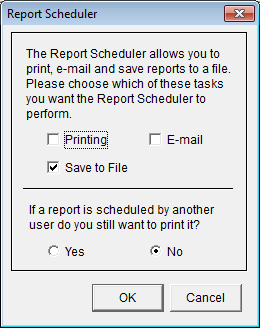
- Make sure that Save to File is selected and click on OK
To Open an Excel File of Barcodes
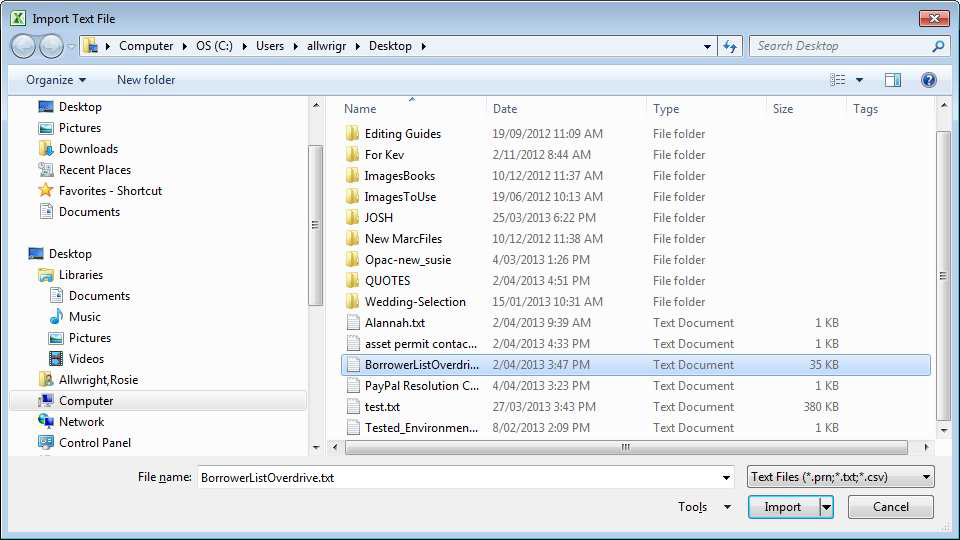
- Open Microsoft Excel.
- Select Data > From Text select your file you saved (eg. Borrower list overdrive.txt).
- Select Import.
- The text import wizard will open.
- Click on Delimited then click on Next.
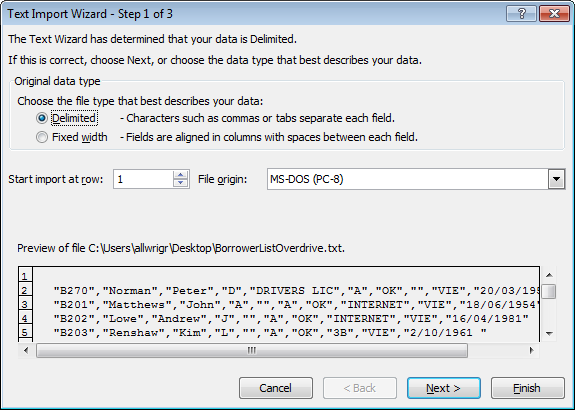
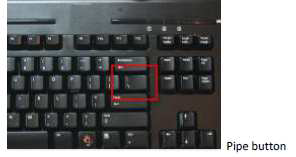
- Select tab and other and type a Pipe | in the box (to make a pipe select the shift key and the backslash \ key that is normally above the Enter key on your keyboard)
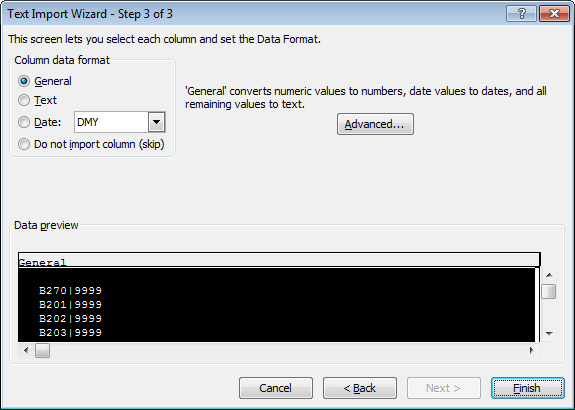
- Click on Next and then Finish.
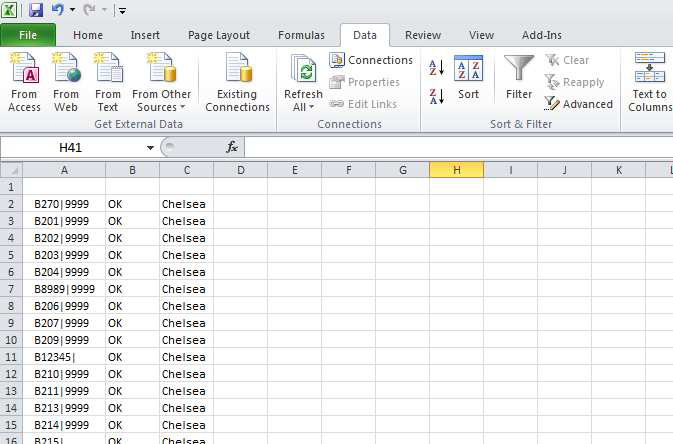
- The excel worksheet will have 2 columns: column A is the barcode, column B is the PIN.
You may need to extend the width of Column A to read the file properly; it doesn’t matter to Library Card Manager. If you don’t use a PIN in Amlib you can create one here, just edit the file. - You may need to have 4 columns. Column A is for the Barcode, Column B is the PIN number, column C is for Status (only those libraries using Status otherwise leave it blank), Column D is the library.
- If you need to add a PIN number you can use a generic one eg. Postcode - Type the PIN into cell B1, copy and then paste into the others in column B. The same techniques can be used for the library name in column D.
- When the file is edited and complete it needs to be saved in .csv format to allow it to be uploaded using Library Card Manager
- Select Save As.
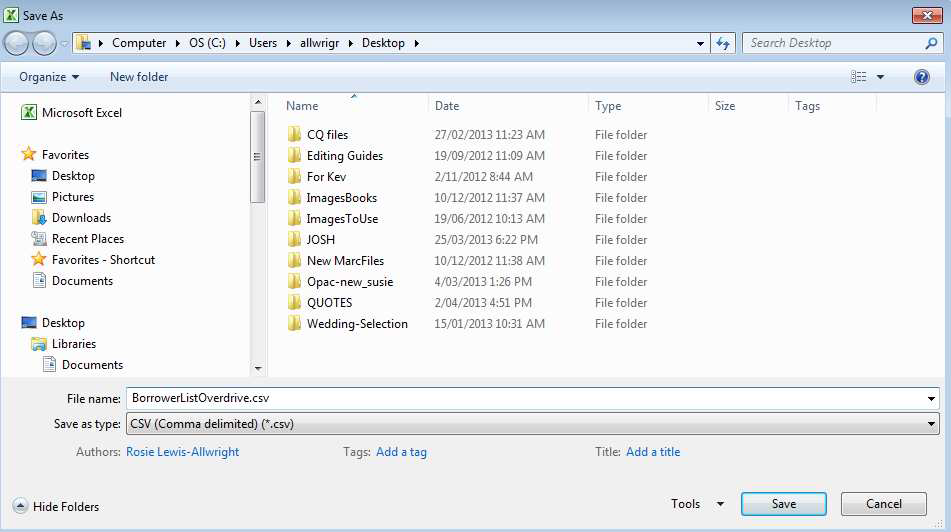
- In Save as Type select CSV (Comma delimited) and then Save.
- The .csv file can now be loaded to Library Card Manager. If there are any errors in the file the Library Card Manager will tell you.