Export bibliographic data to Excel
Save BIBCSV.QRP template into the Amlib/Reports folder of your Amlib PC/server.
Load the template
- Launch the Amlib client.
- Go to Main > Reports > RepAddNew – the Reports Files screen will display.
- From the Report Entity drop-down, select choose Bibliographic.
- Click the F1 New button – the Bibliographic – New Report File screen will display:
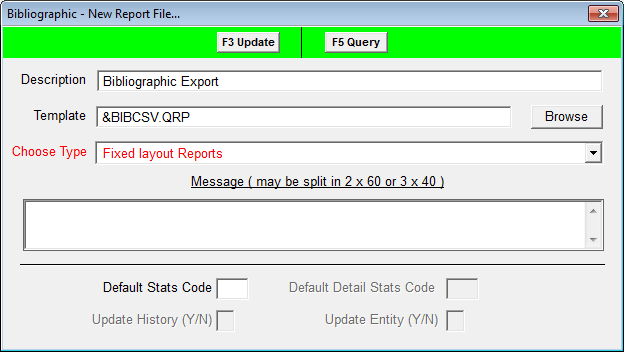
- Enter the following details:
- Description: Bibliographic Export
- Template: click on the Browse button, change the Files of Type drop-down to System Report Templates (*.qrp), select the &BIBCSV.QRP template and click the Open button
- Choose Type = Fixed layout reports
- Click the F3 Update button when complete.
Create the report
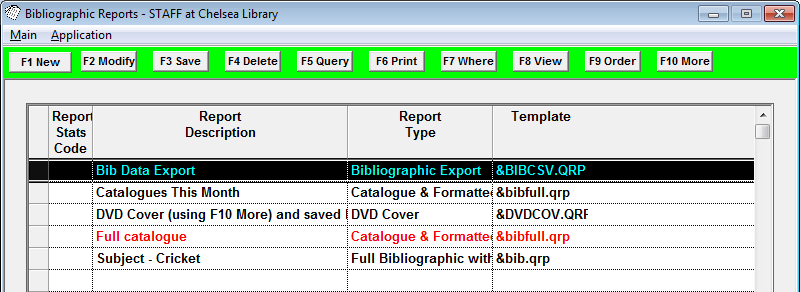
- From the Report Files screen choose Main > Reports > RepBibliographic – the Bibliographic Reports screen will display.
- Click the F1 New button – the Select Report Format screen will display.
- Highlight the &BIBCSV.QRP (Bibliographic Export) template and click the Select button.
- Type in a Description – for example: Bib Data Export.
- Click the F3 Save button.
Where statement
- Highlight the new Report and click the F7 Where button – the Bibliographic Reports – Where screen will display.
- There are three unique parameters:
- Auth Tag: Search for a particular MARC tag
- Auth Key: Check for particular data contained in the MARC tag
- Tags to Display: MARC tags to display in report
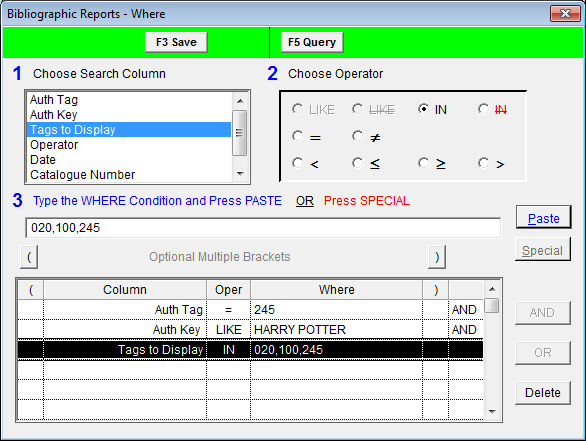
- The statement can include the following settings:
- Auth Tag – for example: Auth Tag = 245 (Title)
- Auth Key – for example: Auth Key LIKE Harry Potter (looks for all matching items where the Title BEGINS with Harry Potter)
Note: If you want to export ALL holdings: Auth Key IS NOT NULL (paste without a value in 3)
- Tags to Display – for example: Tags to Display IN 020,100,245 (will display ISBN, author and Title in report)
- (optional) Enter a start date: Date >= enter a date in DD/MM/YYYY format – for example: 01/01/2010
- (optional) Enter a finish date: Date <= enter a date in DD/MM/YYYY format – for example: 10/10/2010 (a finish date is optional – if not inserted, the report will go up to the current date).
- You may also want to limit by Catalogue Number(s).
- Click the F3 Save button when complete.
Map the output
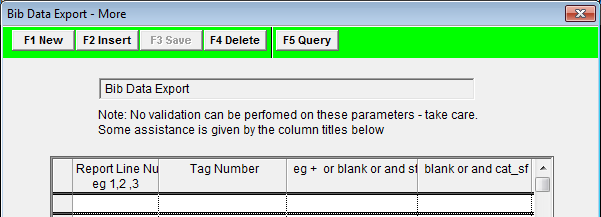
It is possible to export up to 20 fields or subfields (Fields 1-20). Go to Main > Authorities > MarcTags to see a complete list of Tag Nos). This F10 More screen allows you to determine the order in which the fields will be output and the format.
- Highlight the report and click the F10 More button – the More screen will display:
| Column 1 | Column 2 | Column 3 | Column 4 | Column 5 | |
|---|---|---|---|---|---|
| Heading | Report Line Number | Tag Number | eg + or blank or and sf in ('a', 'b') | blank or and cat_sf in ('a', 'b') | Not used |
| Example | 1 | 100 | |||
| 2 | 245 | ||||
| 3 | 082 | ||||
| 4 | 650 | ||||
| Comment | Can be any number between 1 and 20 |
MARC Tag field number - for example: 245 (Title) Any Tag can be matched to any Line Number |
Specify which part of the MARC tag to send - see table below for more details | Specify which part of the MARC tag to send - see table below for more details |
The table below explains how the user can specify which parts of the MARC tag to send:
| Operator | Description | Explanation |
|---|---|---|
| blank (Default) | The entire MARC tag is printed | If the column is left blank, then the entire MARC tag is printed |
| + | All data in the specified tag is printed no matter how many tags are included in the record | All Subject listings are printed, where there is only one or several hundreds! |
| and sf in ('p', 'n') | Only the subfields to be printed within this Authority Tag | If 440 (Series) tag, only the Series name and number printed |
| and cat_sf in ('c') | Only the subfields specified to be printed within this Non-Authority Tag | If 260 (Publisher) tag, only the 'c' (Date) subfield printed (and not Place or Publisher) |
- Use the F1 New button to insert export lines.

- Click the F3 Save button when complete.
Order the report
- Highlight the report and click the F9 Order – the Order By screen will display:
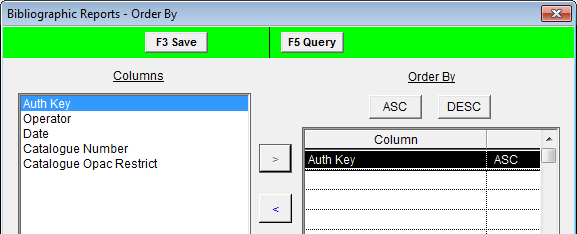
- Select Auth Key and use the arrow to move it to the right column.
- Click the F3 Save button when complete.
Run the report
Start the scheduler
- From the Reports screen, select Application > RepStartSchedule.
- The Report Scheduler screen will then display.
- Select your printing options: Ensure Save to File is ticked.
- Also decide If a report is scheduled by another user do you still want to print it? = Yes/No
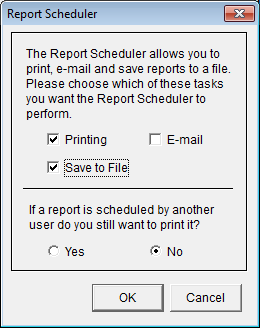
- Then click the OK button.
- After clicking OK, if you go back into the Application menu you will see that RepStartSchedule is now greyed out with a tick next to it – this indicates that the Scheduler is now running.

Note: If you need to restart the scheduler at any point, you will need to log out of all Report screens (Ctrl + L) and start at the beginning of these instructions.
Schedule the report
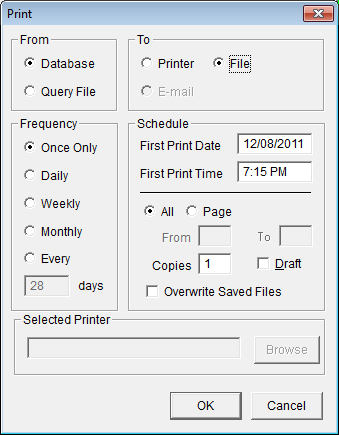
- With your report highlighted, select the F6 Print button - the Print dialogue box will display.
- Select from the following options:
- From:
- Database (to search the entire database)
- To:
- File (to save the report as a file)
- Frequency:
- Once Only (if this is the only time you're going to print this report)
- Schedule:
- First Print Date (defaults to current date)
- First Print Time (defaults to current time)
- Selected Printer:
- You can specify any active printer on the network to print to - including virtual printers such as a third party software that allows you to print to PDF (For example: CutePDF Writer)
- You can specify any active printer on the network to print to - including virtual printers such as a third party software that allows you to print to PDF (For example: CutePDF Writer)
- From:
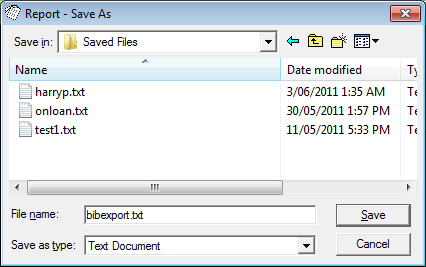
- Once you have selected all of your settings, click the OK button – the Report – Save As… screen will display – navigate to the location where you want to save the file, enter a File name (for example: bibexport.txt), change the Save as type to Text Document and click the Save button.
The report will then be sent for processing.
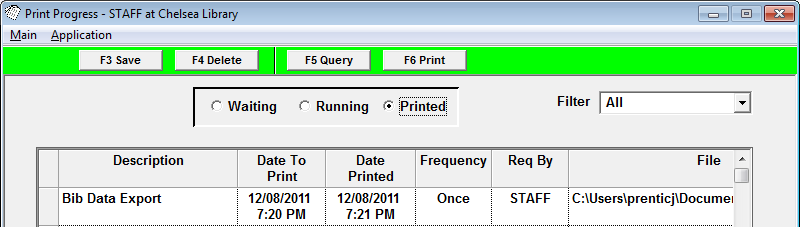
Check print progress
- You can check the progress of your reports at any time by going into Main > Reports > RepPrintProgress.

- If your library uses the scheduler for a lot of reports, you can select a frequency type from the Filter drop-down menu at the top.

- Your report will show up in Printed when it is complete.
Open in Excel
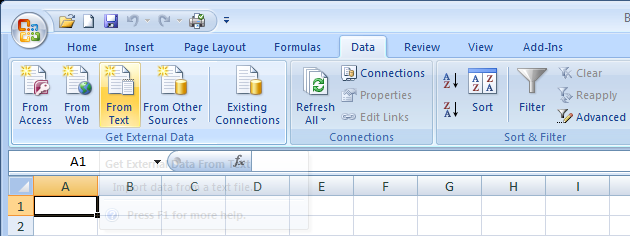
- Launch Microsoft Excel
- Select the Data tab and then the From Text button:
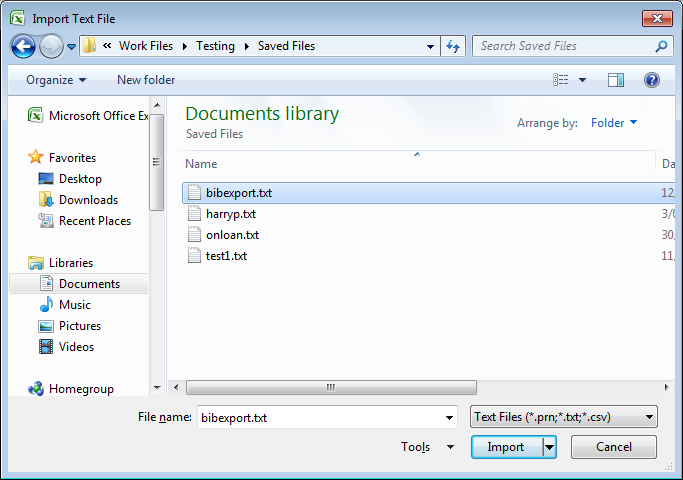
- Navigate to the text file you've saved - ensure that the Text Files = (*prn;*.txt,*.csv) highlight it, and click on the Import button.
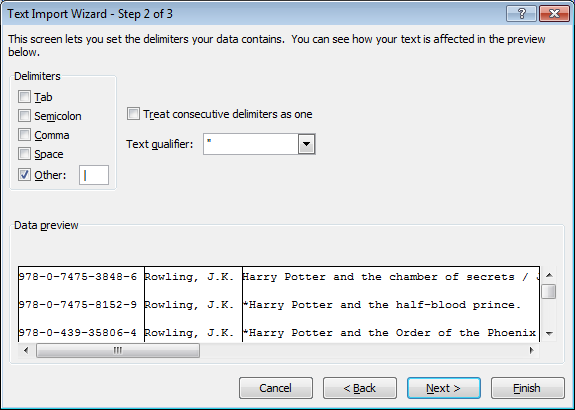
- The Text Import Wizard will open:
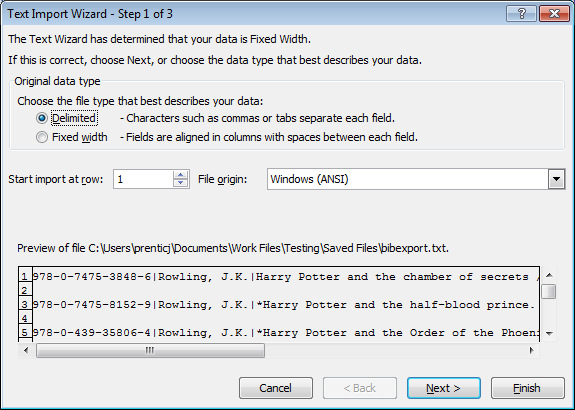
- Ensure that Original data type = Delimited, and then click the Next button.
- Delimiters: deselect Tab and add a pipe | in the Other box (it is possible to use both if you don’t know which one the report is using but this may cause cell contents to be misaligned – so check carefully!).
- Click the Next button and then the Finish button.
- Your data will be transferred into the Excel sheet and you can now use the formatting tools to customise it:
