Bibliographic Report from a Catalogue saved file
Learn how to create and print the Bibliographic Report from a catalogue saved file in Amlib.
Create a saved file
The following report requires a saved catalogue file. This file can be created in various ways – for example: a list of catalogue entries has been created via the Cat keyword search in the Catalogue module and saved.
Or this list could be from a Kinetica or SCIS download of new items.
Alternatively it is possible to search in Stockitem, find items and XReference to Catalogues for the items found in the Query – for example: All Videos or all books by a certain author. This is the method shown below.
- Launch the Amlib client.
- Go to Main > StockItems > Stockitems – the Stockitem screen will display.
- Perform an F5 Query search – the results will display in a Stockitem List:
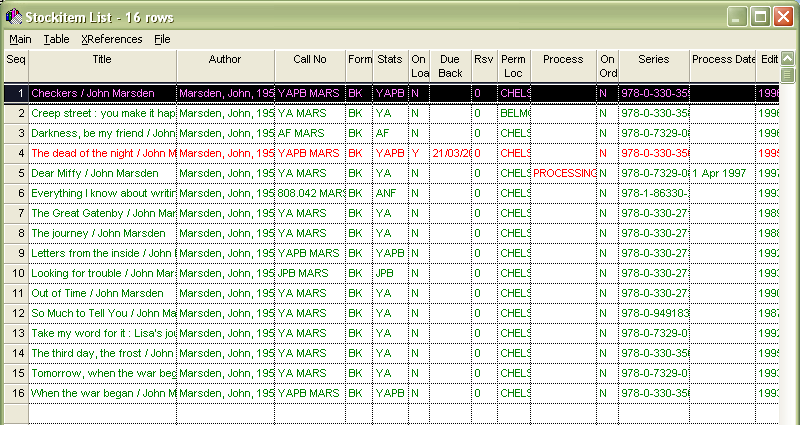
- Highlight the items.
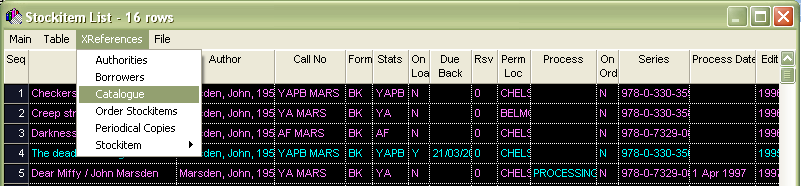
- From the menu, select XReferences > Catalogue – the Catalogue records for the selected items will then display in a Catalogue List:
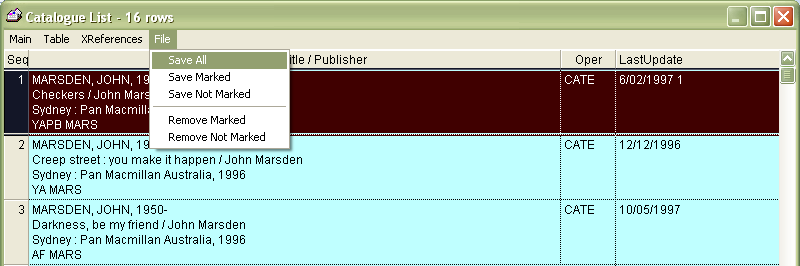
- From the menu, select File > Save All – the Catalogue Saved Query Results screen will display.
- If a file does not exist that you may wish to add these records to click the F1 New button and create a new file, enter in the Details of the file, and click F3 Save button.
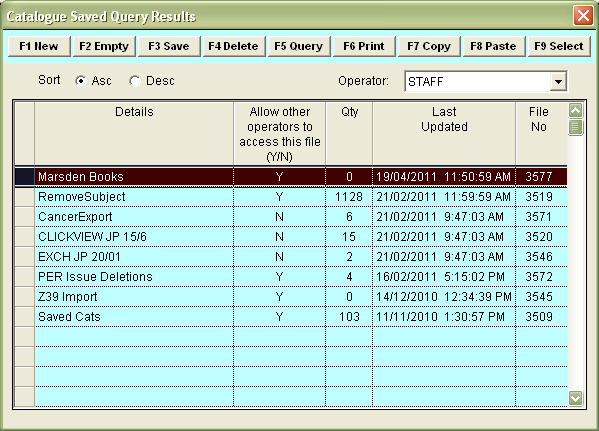
- Highlight the file and click the F9 Select button –a prompt with the following message will display: The ‘XXX’ file contains XX catalogues.
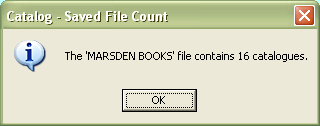
- Click the OK button and close out of the Catalogue module.
Create the report
Now it is necessary to set up the report in the RepBibliographic screen.
- Go to Main > Reports > RepBibliographic – the Bibliographic Reports screen will display.
- Click the F1 New button – the Select Reports Format screen will display.
- Highlight the Full Bibliographic without tag # (&BIB.QRP) template and click the Select button.
- Type in a Report Description – for example: Accession List.
- Click the F3 Save button.
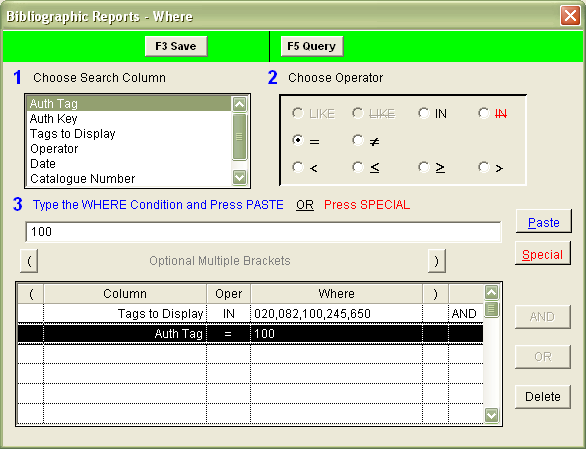
- Click the F7 Where button – the Bibliographic Reports – Where screen will display:
- Enter in the following Where statement:
- Tags to Display – for example: TAGS to Display IN 020,082,100,245,650
(Only the tags listed will display. If you wish all tags to show you would not list specific tags) - Auth Tag – for example: Auth Tag = 100
(In this context the Auth Tag is used to control the sort order of the items set in F9 Order – for example: 100 will list items by the Author, 245 will list the items by title and 082 will list items by Call Number).
- Tags to Display – for example: TAGS to Display IN 020,082,100,245,650
- Click the F3 Save button when complete.
- Click the F9 Order button – the Bibliographic – Order By screen will display.
- Use the arrow keys, to move Auth Key from the Columns box to the Order By box.
- Use the arrow keys to highlight and move Auth Key from the Columns box to the Order By box (the Auth Key using the Auth Tag set up at 7b).

- Click the F3 Save button when complete.
- Click the F8 View button – a prompt with the following message will display: This type of report may use a Saved File as the Source. Do you want to select the file now?
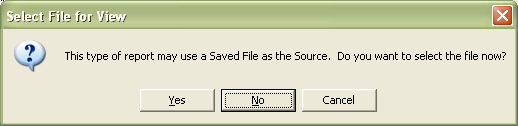
- Click the Yes button – the Select Saved File list will display:
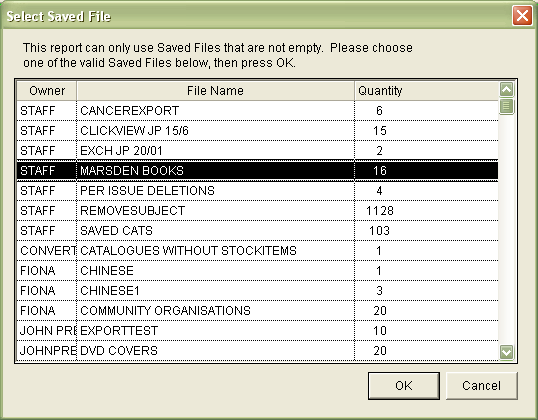
- Highlight the Saved File (in this example: Marsden Books) and click the OK button.
- The list will display in Report - View:
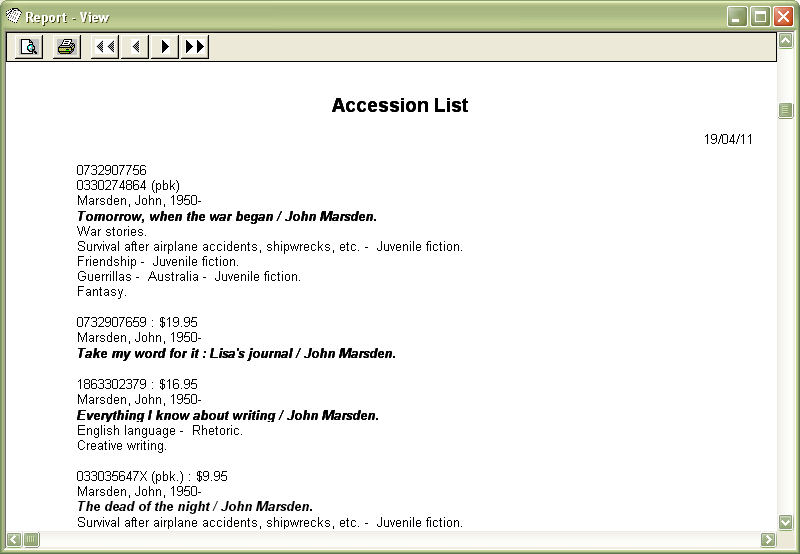
Fig 1: Auth Tag = 100 (sorts by Author)
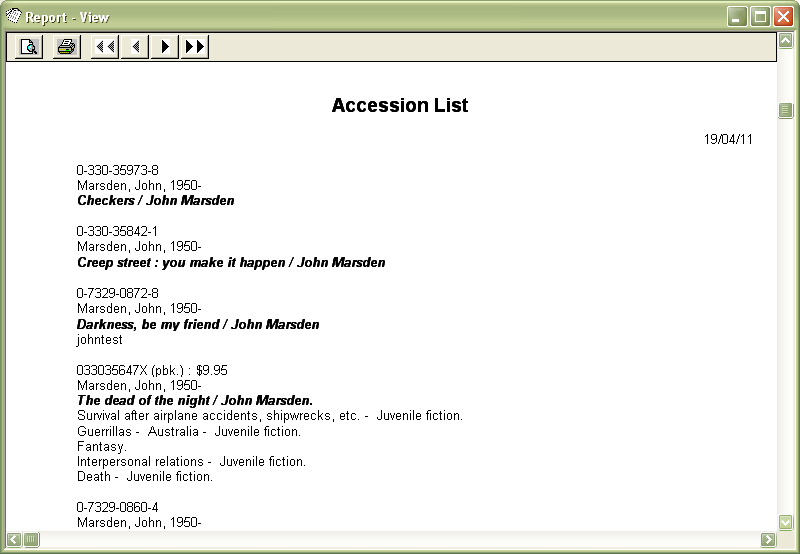
Fig 2: Auth Tag = 245 (sorts by Title) - Use the print button to print off the report.